DIY: Tapestry Turned Pillow

A few lovely readers asked after the big pillow on my Charlottesville bed (as seen in my posts on the tiny shelf makeover and the postcard wall).

Screen Shot 2015-08-15 at 6.26.32 PM

Isn’t it great?! In high school I picked up this old tapestry from a local flea market, then tucked it away in the depths of a closet where I found it a few years into college. I thought about putting it up on a wall, but what I really needed was a big pillow. Some inspiration...

I pinned this forever ago from Domino magazine:

Screen Shot 2015-08-23 at 3.26.41 PM

Great teal bedspread from a post on House of Turquoise:

Screen Shot 2015-08-23 at 3.27.29 PM

Love this as a cover for a sofa, too (via the blog Honey & Fitz):

Screen Shot 2015-08-23 at 3.28.21 PM

This headboard is from the bedroom of Grace Bonney (of the great blog Design*Sponge):

Screen Shot 2015-08-23 at 3.29.14 PM

After a bit of research, I learned that this type of textile is made by the Otomi people in the Mexican state of Hidalgo. There are so many options other than simply textiles: dresses, purses, you name it. And purchasing from certain sources also benefits the tribe--doing good deeds while beautifying a room!

Because I had a pretty neutral background (white bedspread and sheets, wood furniture, white walls), I thought this color-charged tapestry would give me just the right happy feel that I wanted in my room. I enlisted my dear mother to turn the tapestry into a pillow by sewing on a big piece of red duck cloth that we had on hand as the back and stuffing it with cotton.

Screen Shot 2015-08-23 at 3.25.10 PM
Screen Shot 2015-08-23 at 3.24.38 PM

I love projects like this that make such a big difference but are so simple to do—especially when we’re talking throw pillows! This can easily be replicated for small or big pillows, too.

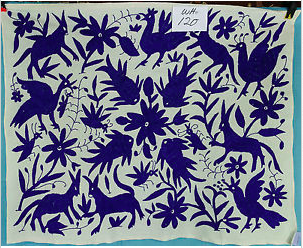
A friend of mine was thinking of doing something similar in her new apartment, so I did a quick eBay search for Otomi tapestries where I found some great options, like this wall hanging:

Screen Shot 2015-08-24 at 1.44.13 PM

Another wall hanging, very much like mine:

Screen Shot 2015-08-24 at 1.45.10 PM

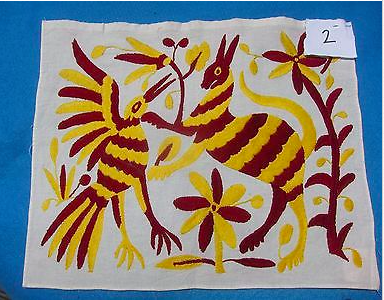
Placemat--could be made into a small pillow:

Screen Shot 2015-08-24 at 1.46.15 PM
Screen Shot 2015-08-24 at 1.53.01 PM

Of course, having a sewing machine is largely helpful for this project. Sewing by hand, using small stitches, would also work—just want to make sure that the stitches are set in from the edge of the fabric by about 1" so that the stuffing can’t peek through. (Do I sound like Martha Stewart?? YIKES) In retrospect, I would make an envelope pillow (great instructions from Jenny at Little Green Notebook here) and use a standard pillow insert instead of stuffing.

Or, of course, there are options to buy for yourself, like these from the same eBay search:

Screen Shot 2015-08-24 at 1.54.05 PM
Screen Shot 2015-08-24 at 1.55.18 PM

From the etsy shop mentioned above:

Screen Shot 2015-08-24 at 1.56.32 PM
Screen Shot 2015-08-24 at 1.58.28 PM

Just used this gorgeous pillow from Roberta Roller Rabbit in a project and LOVE the yellow tassels:

Screen Shot 2015-08-24 at 1.59.27 PM

Do you have any pillow DIYs you’d like to see featured on The Spoonful?? Contact me here or post in the comments below!
DIY: Postcard Wall

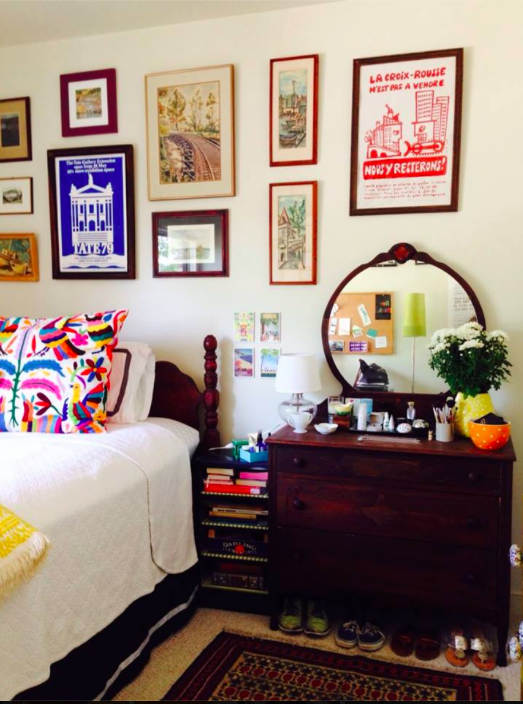
I have a habit of picking up postcards and other papers, especially while traveling. While studying abroad in Lyon, I amassed quite a pile of wonderful postcards which I loved too much to send away or keep hidden in a stack of papers. I also had, on impulse, bought a box of postcards based off of the wonderful Paris vs. New York book (and blog, here). With all of those postcards crying out to be used, I thought I would make a small-scale art installation in my college room (also shown here with the tiny shelf makeover), and the vast wall by my bed seemed to be asking for something wonderful to fill its emptiness. I could have just taped them up to the wall (like I did in my NYC entryway), but I wanted them to have more substance—I think my NYC entryway works because it feels like a massive bulletin board, but this space in my Charlottesville room by my bed wasn’t going to have the same feel.

Screen Shot 2015-08-23 at 12.18.39 AM

I love the look of a bunch of similar frames (who doesn't?!). Here's an image from the wonderful Nick Olsen in last month's Architectural Digest:

Screen Shot 2015-08-22 at 11.47.58 PM

All red frames from Elle Decor:

Screen Shot 2015-08-22 at 11.52.32 PM

Bigger scale here from Elle Decor:

Screen Shot 2015-08-22 at 11.58.44 PM

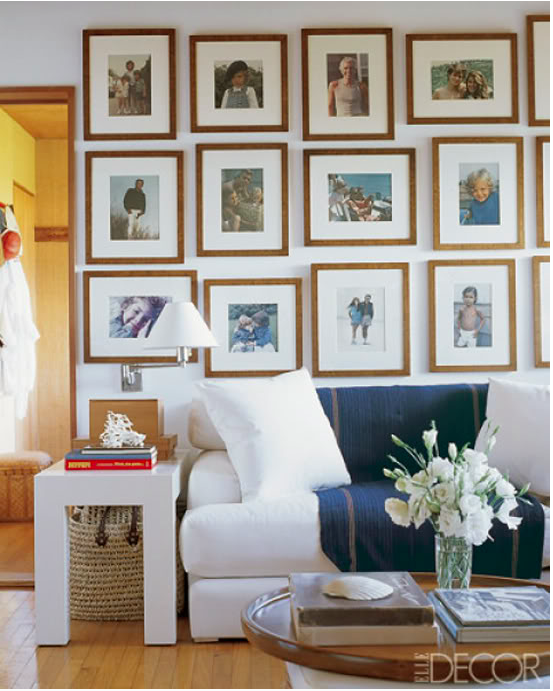
One of my all time favorite rooms by Tom Scheerer. Love the wood frames!

Screen Shot 2015-08-23 at 12.00.13 AM

Yes. (Elle Decor again)

Screen Shot 2015-08-23 at 12.01.45 AM

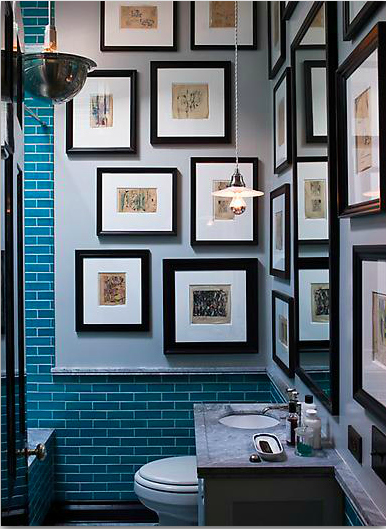
This collection of black frames by Steven Gambrel (a fellow UVA alum! Wahoowa) makes my mouth water:

Screen Shot 2015-08-23 at 12.04.13 AM

And how great is this grouping by the revered Ralph Lauren? (Seen on Little Green Notebook)

Screen Shot 2015-08-23 at 12.08.36 AM

But, alas, all of those frames would’ve been pricier than I was looking for in this project. What I really wanted out of the “installation” was a 3-dimensional quality with the postcards popping off the wall.

Screen Shot 2015-08-23 at 12.18.52 AM

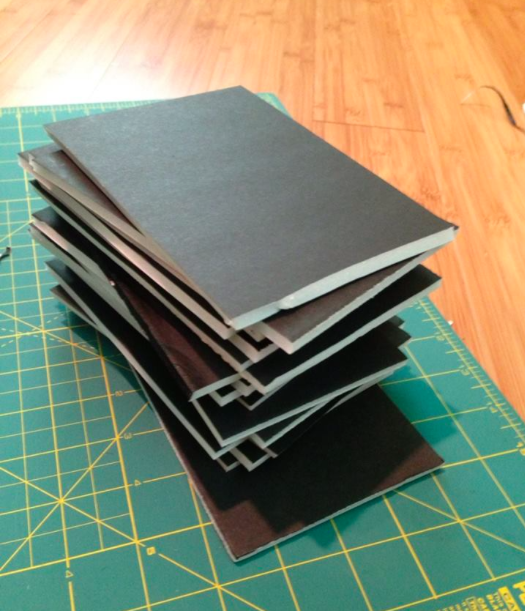
To achieve this 3-D look, I glued foam core to the back of the postcards and then hung them on the wall. Foam core board is super cheap—I got several boards from the dollar store and cut them down to be about ¼” smaller on all sides of the postcard. I recommend using an x-acto knife and straight edge when working with foam core; it's so much faster than scissors, which don't give a clean edge anyway.

Screen Shot 2015-08-23 at 12.17.06 AM

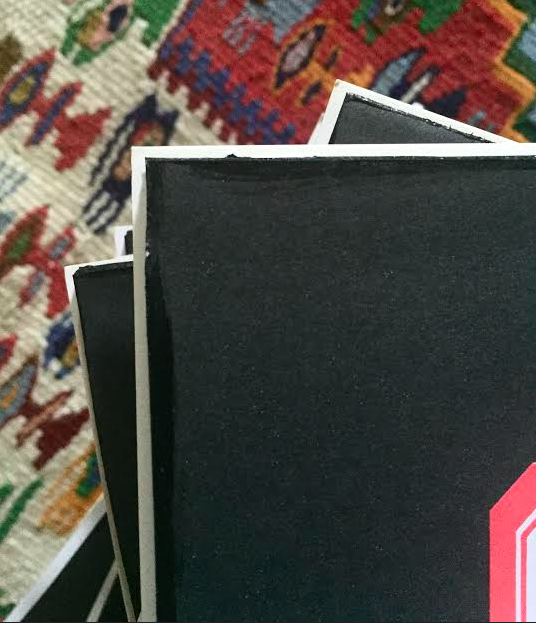
I realized when I cut down the foam core that the white foam showed on the sides of the cards and was rather unsightly, so I grabbed some black craft paint and quickly covered up the white foam with black paint.

Screen Shot 2015-08-23 at 12.16.49 AM
Screen Shot 2015-08-23 at 12.17.16 AM

After the paint dried, I used rubber cement (which I prefer to Elmer's glue when working with paper because it doesn't wrinkle) to attach postcard to foam core board.

Screen Shot 2015-09-04 at 9.20.26 AM
Screen Shot 2015-09-04 at 9.20.14 AM

Because the foam core backing covers up the writing on the back of the postcard, I wanted to make a note to remind myself later where the cards had come from. I had some labels lying around, so I recorded the necessary details on the backs that way:

Screen Shot 2015-09-04 at 9.20.00 AM

Then I hung them all up... ta-da!

Screen Shot 2015-08-23 at 12.18.39 AM

Do you have any great DIY ideas to share? Contact me here or in the comments below... I'd love to share them on The Spoonful! And happy Labor Day!

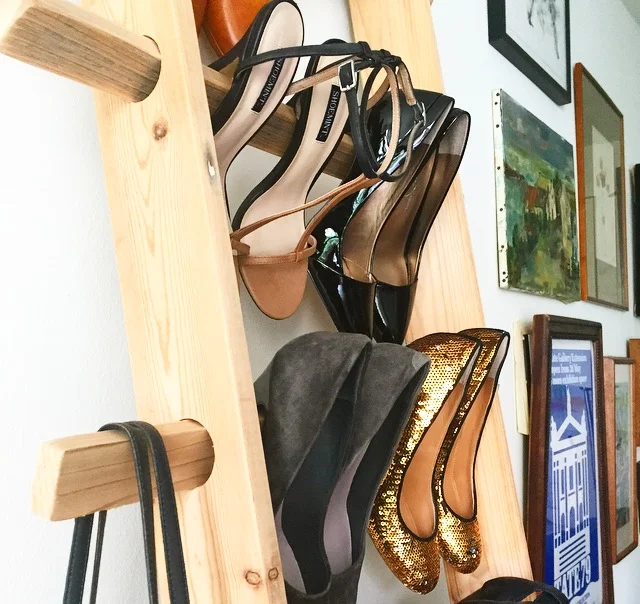
Shoes and Ladders

I have an infatuation with heels (and it's justified: I'm 5'2"!). Though we live in the same city, I do not have Carrie Bradshaw's closet space for them (my apartment = Carrie's closet size... sniff, sniff).

Carrie Bradshaw closet

... if only.

Welp, on to Plan B. This image has been in the back of my mind for years (literally... I think I pinned it right out of high school):

shoes ladder orig pin

... and I had seen other ways that ladders were used for storage:

ladder inspo 2
ladder inspo 2
ladder inspo 1
ladder inspo 1

It's obviously not a novel idea... just last week I was in this fabulous shop in Brooklyn Heights, Collyer's Mansion, and snapped this picture:

ladder inspo 3
ladder inspo 3

I had looked all around for a vintage wood ladder, but they were pricier than I expected/wanted to spend, so I enlisted my long-suffering father for the task. Poor guy is doomed to be my workhorse forever.

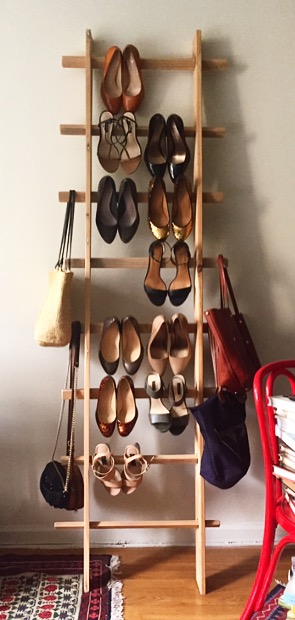
I showed him the inspiration image of the ladder with shoes, drew a diagram of what I imagined in a ladder of my own, and the next thing I knew, he whipped this out.

ladder 1
ladder 1

Pretty amazing, right? And so much more special than anything I could've bought.

ladder6
ladder6

We had all the wood in the garage, most of it making up the shipping crates from our return from Saudi Arabia 17 years ago... it pays to be a pack rat! Details like that turn pieces in a room into stories.

ladder2
ladder2

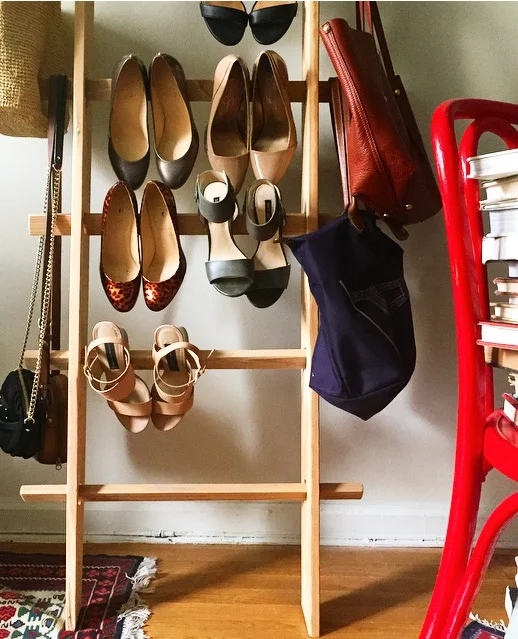
And it doubles as a hanger for satchels and totes!

ladder4
ladder4

Even if the heels are gathering dust (city life and high heels don't mix), I love the vertical aspect of the ladder leaning against the wall. And maybe having them visible will be a reminder to stop buying them... flats are the way to go in this walking city! 

DIY: Atlas Desk

The desk in my studio is one of my favorite DIYs that I've done. I needed something to fill in the vacant space opposite the sofa, and I always find that a surface upon which to stack assorted piles is supremely helpful and necessary.

desk1-1
desk1-1

My parents' storage room is chock-full of all kinds of furniture--lucky for me and not so lucky for dear old Dad who bears the brunt of reorganizing it! I dug around and resurfaced with a 20 year old Ikea-type white and sturdy table on rollers: a blank canvas. Perfect.

I remembered this great image I had seen on my very favorite blog, Little Green Notebook, a few years ago.

deskinspo
deskinspo

Check out that little Parsons side table covered in maps! It's from a room designed by Nick Olsen, who is just fantastic.  He was nice enough to talk to me about the design field when I was in the midst of job hunting and soul searching and gave really helpful insight and tips about getting a foot in the door of the design industry (Thanks Nick!!).

Maps have always been my thing, and I liked the way Nick's side table drew attention and interest without being over the top. Another hunt through storage led to an old atlas book from the 80s, which I commenced cutting up into big, mostly uniform sizes for decoupaging onto the desk. (Smaller pieces would've worked too, but I was a bit pressed for time.) I picked maps from the atlas where I had travelled or lived, or maps that I found to be exceptionally pretty, like the ocean maps that I put on the ends of the table.

diydesk1
diydesk1

Decoupage is terribly simple and there are loads of how-to pages with a quick Google search--or just use the directions on the tub of Mod Podge (I prefer the glossy finish). After making sure the desk was completely clean, I took the atlas pages I had neatly cut and laid out where I wanted them to be placed so that all of the white of the desk was covered, trimming them to fit if necessary. I also kept in mind color themes while doing this: I tried to keep edges all white maps, ends all ocean maps, etc. This made the maps seem a little less haphazard to me. Then, one by one, I brushed on a thorough--but not over-the-top--layer of Mod Podge with a foam brush (I like using these cheap foam brushes when I want to avoid brush strokes), and I coated the surface of the desk on which I planned on applying the page with a layer, too. I think it's helpful to let the Mod Podge dry for a few seconds to get a little tacky, and then I started in the middle of the top (although I probably should've started on the back... less pressure in case I messed up!) and worked out from there, smoothing the pages as I went. I find that less is more when it comes to Mod Podge... otherwise it wrinkles the pages. After each page had been placed, I covered it again with another layer of Mod Podge to seal it and keep any edges from peeling up.

diydesk2
diydesk2

The edges were a bit tricky, but I folded pages to fit around the turns of the piece, making sure I really creased the folds. This needed more Mod Podge to hold, and I found that making the piece a bit bigger made it stay because it had more surface area to hold on to.

diydesk3
diydesk3

I followed the drying instructions on the Mod Podge container and then took the desk outside to spray on a layer of polyurethane... I prefer glossy here, too. (This is optional, but I chose to do it because I knew it would be in a high-traffic spot.) This--horror of horrors!--made everything wrinkle dreadfully! So I covered the piece with a towel and stacked heavy books high to force the wrinkles out, with success. Crisis averted.

diydesk5
diydesk5

That's it! I had a piece of glass cut for the top and have been messing around with the containers, etc ever since. I'd like a proper desk lamp and definitely need to hide those cords. And need a filing cabinet! The list gets longer! To be continued... :)

desk1-4
desk1-4
desk1-3
desk1-3
desk1-5
desk1-5

Painted Bookshelves

There are few things I love more than a great set of bookshelves... unless the interior of said bookshelves has been painted in some gorgeous color. Here's what I mean: 

I love how the blue of these shelves' interior (via domino, pinned here) is a few shades darker than the wall color (also seriously loving that hide rug). 

This red! I like how the rest of the room is pretty low key so the red insides can really make a statement (via Architectural Digest by Steven Volpe, pinned here), but other red accents throughout the room (pillows, dress in photograph) tie it all together. 

Here's a simple favorite (by Steven Gambrel and pinned here from this blog). Such a beautiful shade of blue for the shelves' backs, and the leather chest is a beautiful complement. And those antique horses! Amazing.

This post from Crane Concept (pinned here) walks through how to DIY these built-ins. The black paint here makes the shelves look like they go on to infinity (and beyond)--a great optical illusion. (The rug is killer, too... see this post for where to find an affordable option for yourself!)

This idea is also really effective and gorgeous in stand-alone shelves. Antony Todd, a wonderful space on 11th and University, has these amazing shelves that I drool over every time: 

This beautiful display cabinet was for sale on Viyet-- it has since sold, sadly, but inspirational all the same! DIY, anyone??

And then, of course, there's the wallpaper-backed route. I'm particularly obsessed with the island vibe in this image (via PS I Made This with a video outlining the process here):

This wallpaper is always a favorite, especially when it's tucked in somewhere unexpectedly, like here (via Apartment Therapy and pinned here):

Here's that tropical vibe again... loving it (via Cup of Jo and pinned here):

This can be a great DIY, too! In high school, my dear mother and I actually "wallpapered" the back of my built-in bookshelves with wrapping paper... but that's another story for another day :)

Have you ever  painted the backs of your shelves? Have you seen any especially beautiful examples of someone who has? Let me know in the comments below!

A Red Bed

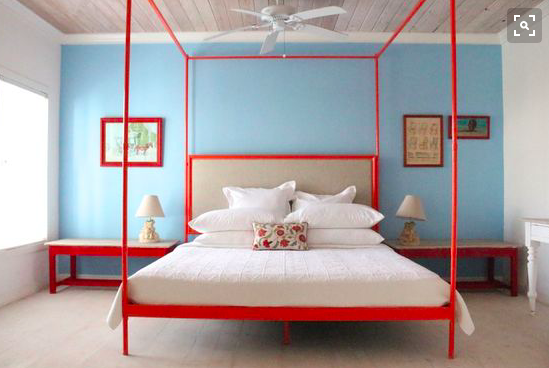
This photo is from a little spot in the Bahamas called Ocean View Club (on my travel list!). How heavenly is this bedroom??

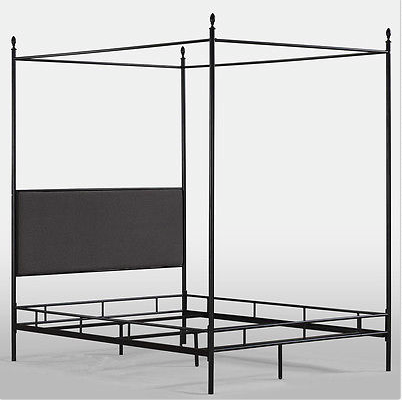
I'm loving the pale blue/tomato red color combination. To recreate, I'd take a four poster bed like this one...

... and paint it in a terrific red:

Other accents should be the same red, like the bedsides and a frame or two on the wall. I love how the wall is filled up with the two benches on either side of the bed. I would recreate that look by painting a couple of benches (like this one from World Market) the same red as the bed frame and painting the top of the bench white (as shown in the inspiration image):

Of course, that could also be done with smaller nightstands (and if the red is too much, leave them natural wood!).

The pale blue accent wall is lovely and looks to be similar to this shade:

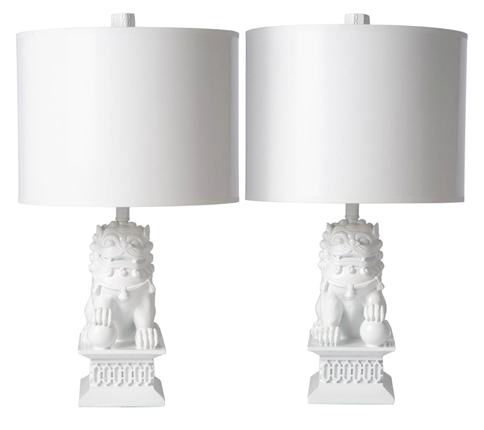
Add little foo dog bedside lamps (less pricey alternative here):

And an ethnic throw pillow on a crisp white bedspread:

Island decor, delivered!

Do you have a room you'd like to see recreated on The Spoonful? Let me know in the comments below!

Going Dutch

If there were ever a "summer door," I think it's the Dutch door (as shown in a previous post here). These doors can open as a regular door does, or just the top half can swing open to let in fresh air and sunshine, keeping animals out and children in. I was daydreaming about this marvelous idea and came across this how-to from HGTV for making one of your own!

I don't have a suitable door in my little apartment to turn into a Dutch door... maybe one day, but until then I have plenty of time to find beautiful inspiration!

Jenny Komenda at Little Green Notebook first introduced me to Dutch doors with this post when she was living in Brussels. So dreamy!

How beautiful is this pair of double Dutch glossy blacks? (via the great Thomas O'Brien)

This sunshine yellow just screams happiness (via Brittany Ambridge): 

This white option proves simplicity never goes out of style (and neither does that hat stand!): 

On the opposite side of the spectrum, we have this terrific high gloss, multi-color number from Miles Redd (via AD):

I think this shot is just lovely:

And I will leave you with this. Mooooooo

Happy Friday!

Black and White Stripes

I must begin by saying that The Spoonful turned ONE over the weekend! Can you believe it?! Thank you, thank you, thank you to all of you who have read this page, given suggestions, shared posts on social media, and mentioned it in person--I'm so grateful and looking forward to many more years. Without further ado..

How wonderful is this photo (pinned here) of Audrey (my idol) on the most gorgeous settee?

Black and white stripes are the epitome of classic and I adore them. Here's a round up of some favorite moments where they particularly shone:

Liza Laserow via 1st Dibs (and pinned here):

August Black's big cushions are terrific (pinned here):

How about this pair of striped sofas (pinned here), face to face, from French blogger Flodeau?

Nick Olsen painted these stripes on roller shades in his NYC apartment (pinned here). Obviously I'm obsessed. (Also obsessed with the stacked books as bedsides and with the entire apartment in general.)

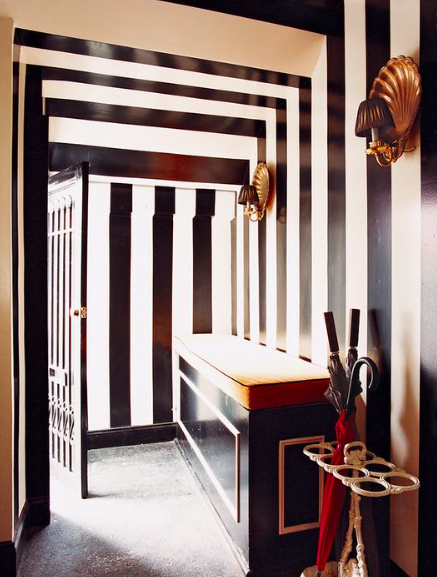
And for the win... these painted walls (pinned here) via Domino. So. Good.

Is there a topic you'd like covered on The Spoonful? Share it in the comments below!

Inspiration: Fresh White

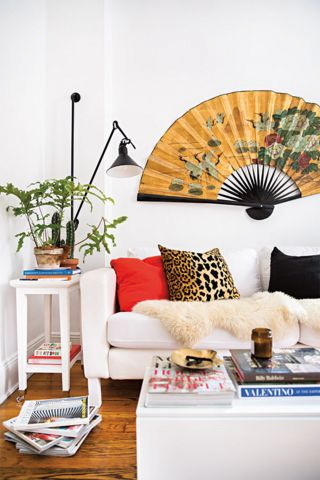
I'm loving this fresh snapshot from Domino (where else):

Because the furniture is all pure white and the color comes from accessories, it's easy to create what looks to be a whole new space by just swapping out the books and pillows. 

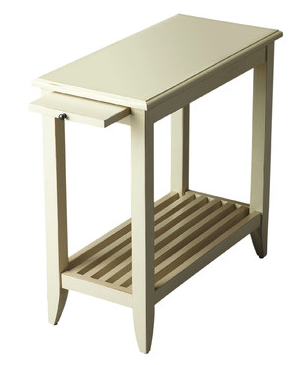
To recreate the look, start with the white furniture. I like how slender the side table is above; here's a similar one from Wayfair (I would also spray paint--glossy pure white--a table if I found a good style in the wrong color!):

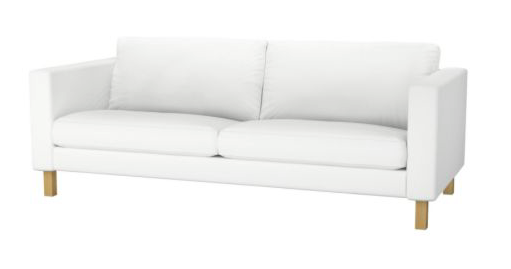
The sofa's straight lines keep the crazy pillows from getting too... crazy. Here's a goodie from abc home :

And here's a budget-friendly version from Ikea (with slipcover). A little white paint on those legs is all you need--or check out PrettyPegs for alternative furniture legs made for Ikea goods (why didn't I think of that??).

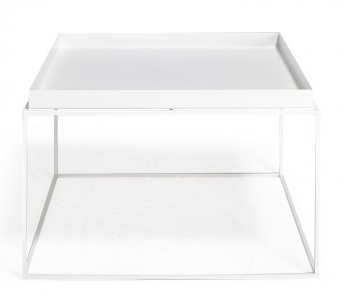
I've always loved this white coffee table from Hay (sold by abc home):

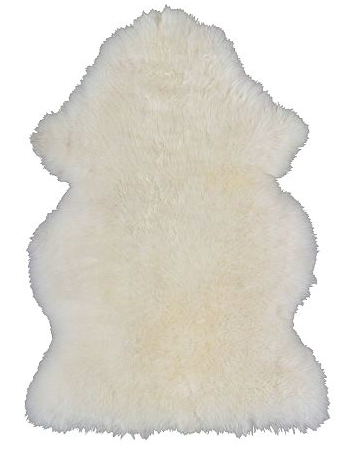
And the obligatory sheepskin OF COURSE:

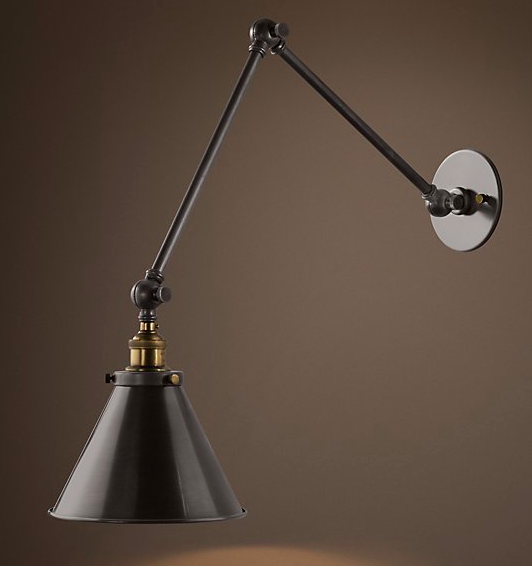
A mounted wall light for reading (this one is from Restoration Hardware):

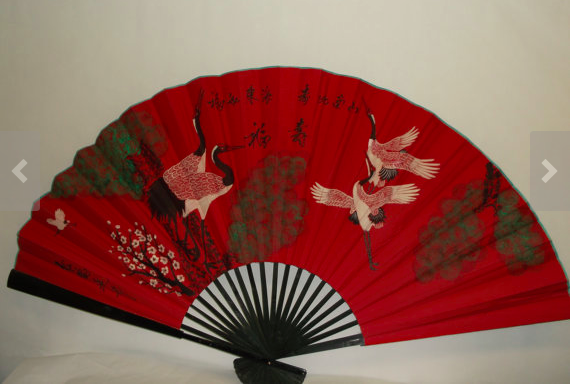
And now for the color! I think that huge Asian fan is a wonderful thing--and I think the black aspects of it (in the original photo above) really work to pull together the many black accents in the pillows, light, even from the books. Here's a vintage one I found on etsy:

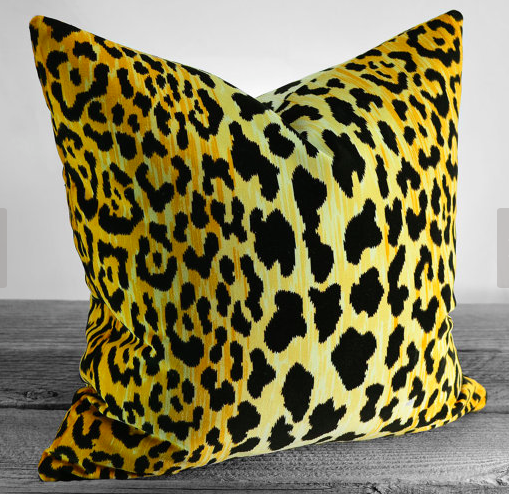
The leopard pillow looks to be a classic Brunschwig et Fils pattern (here), but here's a less pricey option:

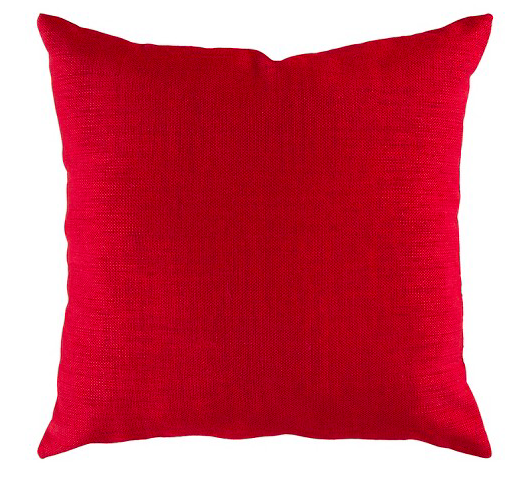
... cherry red pillow from Target:

... and a black throw pillow from Overstock:

... add one of these catch-alls from Michele Varian:

... grab a few succulents from Homecoming (the coolest coffee shop/florist in Brooklyn) or at the local hardware store:

... and, finally, load on the coffee table books. Need help deciding? MyDomaine, One Kings Lane, and Remodelista are here for you :)

Voila!

Do you have a room you'd like to see broken down on The Spoonful? Let me know in the comments below!

Tub Trays

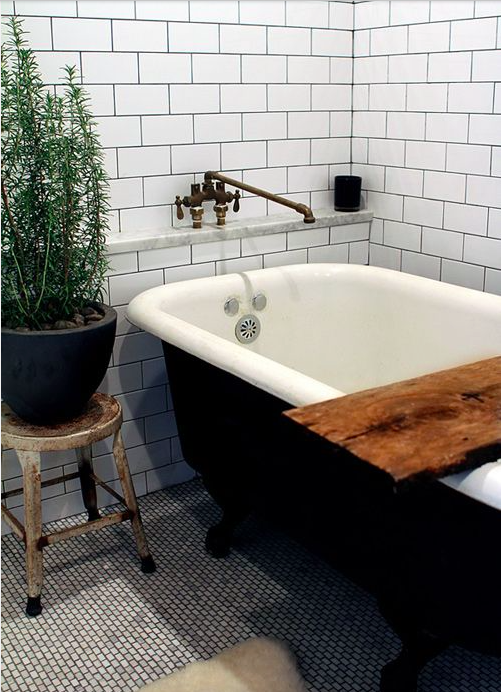
How great is this bathtub setup (via Remodelista and pinned here)?!

That wood plank across the tub makes me so very happy. Here's another one (via Hearth; I blogged about this bathroom here!): 

These curved edges on this tray (via La Maison Douce) are especially beautiful (and perhaps more forgiving if bumped into!):

I was just in one of my favorite spots in Brooklyn Heights, Collyer's Mansion, and saw this great tub bar. I love its simplicity: 

Of course, I also think this would be a terrific DIY opportunity. My girl Martha writes about it here

Not too tough, right? And so totally chic. Now I just need a claw foot tub!

Have you tried this DIY? Do you have a DIY you'd like to see featured on The Spoonful? Let me know in the comments below!

Artist Spotlight: Gregg Emery

Welcome to another Artist Spotlight! This spotlight is extra special because the artist has a show opening NEXT THURSDAY at the Agora Gallery in Chelsea. Here is the press release and here is the Facebook invite--spread the word! (And if you're part of the Virginia Club of New York, we're having a tour Saturday, March 12 from 4-5pm with Gregg himself. Mark your calendars!) Gregg Emery--teacher, artist, and generally amazing person--and I met because our easels were side by side at an open house at the National Academy on the upper east side (they have open houses throughout the year--if you're in the city, check it out!).

Gregg in front of a display of his drawings

We've kept in touch and now he's on my blog: reason #476 why I love NYC. Gregg makes these fantastic abstracts that are terrific in photos but even more terrific in person (like at his show at Agora, ahem ;) ). Without further ado, I'll let him tell his own story...

Gregg Emery was born in Bombay, NY, a rural community outside Montreal filled with dairy farms and bordering the Akwesasne Mohawk Reservation. In a town with few creative stimuli and even fewer traffic lights, Emery sketched at the earliest age wherever and whenever possible; his grandest dream was making it to New York City. An even farther thought was having numerous exhibitions of his work, with collectors from across the globe.

Gregg Emery received his Bachelor of Arts with departmental distinction from Hartwick College and a Masters in Fine Art from the Maryland Institute, College of Art, where he studied under Babe Shapiro, Power Boothe, Hermine Ford and Sal Scarpitta. He is currently the Chair of the Visual Arts and Art History department at the Trinity School in Manhattan, a private, coeducational K-12 school. Emery enjoys teaching art & art history, sharing his knowledge and experience with a younger generation. His artwork is included in numerous private and public collections including the permanent collection of the Baltimore Museum of Art. Gregg Emery is represented by the Agora Gallery in New York City.

Screen Shot 2015-10-03 at 4.02.26 PM

The Spoonful: Describe your style in 5 words:

Gregg: dramatic, beautiful, athletic, powerful, meditative

Convergence
Convergence

The Spoonful: Art background?

Gregg: BA In Studio Art from Hartwick College, MFA from Maryland Institute, College of Art, Apprentice at the Fabric Workshop in Philadelphia, PA

Screen Shot 2016-03-03 at 8.36.37 AM

The Spoonful: Whose work do you most admire?

Gregg: Tough question, I love so many artists for so many reasons… I think my family first and foremost, I have so many members of my family who are artists but claim they are not. My great-grandfather who carved amazing wood sculptures and wonderfully detailed drawings... my father, housebuilder turned math/ computer teacher, car mechanic and now keeps bees and repairs/ rebuilds antique clocks. My mother who plays organ/ piano and is a poet with her weekly local newspaper column. The hardwork coupled with humility is what I hope to take away or hope it is in my genes.

More traditional type artists? Hmmm, Caravaggio, huge fan… also RembrandtRothko (his meditative paintings blow mine away)… contemporary I do enjoy Andy Goldsworthy (artwork also found here) & Yayoi KusamaTakashi Murakami and others. I also have drawn inspiration from many street artists… C215BanksyOs Gemeos just to name a few.

Red calm
Red calm

The Spoonful: Where do you find your inspiration?

Gregg: Inspiration for me comes from many places… The colors I choose actually come from things I see around me. Recent ones are from movies... from James Bond, Twilight, and even a recent set of pieces inspired by colors in the classic scene in Raiders of the Lost Ark when Indy reaches for the golden idol. The gold, Indy's brown jacket, and this shimmering blue light all make it into the painting. Color is so powerful, triggering memory, hunger, depression, exhilaration and everything in between… Movies are modern mythology, religion or meditation… to me, movie makers are the gods, the creators of worlds, akin to the masters of the Renaissance. I also take color inspiration from travels including a series based on a trip last year to Morocco, markets in Taiwan, even shells from Fire Island or a dessert from a fellow artist, pastry chef & muse. Although these colors may come from specific places, people or moments, I encourage them to trigger your own train of thoughts, and I do hope you enjoy these worlds I created as much as I did making them.

Screen Shot 2016-03-03 at 8.36.07 AM

The Spoonful: Ideal workspace consists of...?

Gregg: Lots of space, lots of light, a projection screen (I like to have a movie playing (without sound) while I work), no interruptions. Mostly I work at night and I love when no one is around.

Screen-Shot-2015-10-03-at-4.03.56-PM.png

The Spoonful: Greatest piece of advice on being an artist (creating, surviving, anything) that you've received? That you can give?

Gregg: Best piece of advice? I've received much advice over the years. One from my parents, you can learn something from everyone so listen carefully and don’t judge a book by its cover, age, gender or anything else that might stand in the way of authentic communication. Draw everyday, drawing is key, it is the way we think, see the world and make sense of things. Learn from art history, dig deeply into the past to learn your place in the world and find your way into the future. From a student, never become a parody of yourself.

Piao Liang
Piao Liang

The Spoonful: Five things you can't live without?

Gregg: (hmmm OK Cupid?) alright, 1. Sketchbook 2. Passion 3. Water 4. Breath 5. Silence

Screen-Shot-2015-10-03-at-4.03.09-PM.png

The Spoonful: Where can we find your work?

Gregg: I am currently represented by the Agora Gallery, NYC in Chelsea. I have also shown with the Vogelsang Gallery of Belgium. You can find me on ArtSlant and collaborating with great people like the Shadow People Project and the NY Poetry Society. I also have a piece in the permanent collection of the Baltimore Museum of Art.

Screen Shot 2016-03-03 at 8.35.21 AM

The Spoonful: Anything else we should know??

Gregg: You should really probably know at least one of the names of the members of the Ramones if you’re going to wear their T-shirt (that was the first live concert I heard.) Also you should know that my college roommate for 3 years was Lizardman, the guy tattooed from head to toe and I also find him incredibly inspiring as an artist. Sincere, intelligent, and who can challenge his commitment? Well, if you did he could eat you so I wouldn’t try it.

Screen Shot 2016-03-03 at 8.34.49 AM

Gregg's show at the Agora will run until March 29. Go check it out--and let him know you heard about the show on The Spoonful!

Gregg is also working on a couple of new collaborations including one with a group of professional dancers, the Sydney Schiff Dance Project, whose costumes he painted--they'll be at his opening night, Thursday, March 10, wearing the costumes! He can also often be found at the Poetry Brothel, drawing the poets and those listening to them! Also check out his drawings and other sketchbook work on tumblr, instagram (@aplsd21), and twitter.

Thanks so much Gregg!!

If you know of an artist who'd like to be featured on The Spoonful's Artist Spotlight, let me know here!

Office Space Inspo

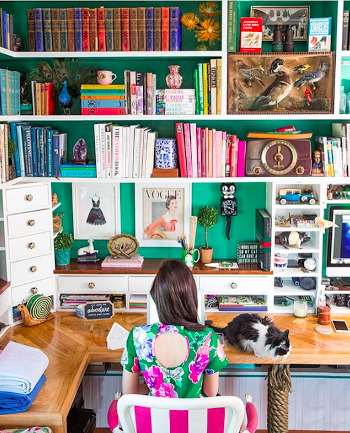
Hello! Thanks for the lovely feedback on my bathroom inspiration post (here). Here's another space that I came across and just loved (and currently still love): Screen Shot 2016-02-10 at 10.58.09 PM

It's the office space at ManRepeller, who is hilarious and amazing and I highly recommend following her immediately if you don't already. (AND fun fact: I saw her on the street once and told her that I thought she was amazing and she said the same back to me although she had no proof of such.)

Those great copper chairs are by BluDot, here, and the table is also by BluDot, here. But if you're looking for a more wallet-friendly option, read on...

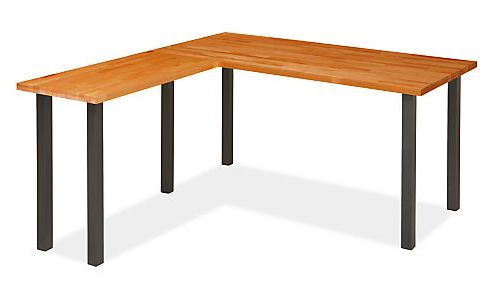
I love how the desk in ManRepeller is just a big, long table. This one from CB2 is similar to the BluDot one in the inspiration picture and less than half the price:

Screen Shot 2016-02-10 at 11.18.34 PM

Or, better yet, this table + top from Ikea for $75 combined:

Screen Shot 2016-02-10 at 11.23.57 PM

Screen Shot 2016-02-10 at 11.25.09 PM

The copper chairs are a bit trickier to find cheaply, so here's what I would do:

Screen Shot 2016-02-10 at 11.36.39 PM

/chair/primer/spray paint/

Ikea furniture is notoriously hard to spray paint, but my fave blogger Jenny Komenda at Little Green Notebook writes here about how she had great luck with this particular primer (note that she specifies shellac-based because of Ikea's finish). That said, you could really choose any chair that you'd like to change up and spray it! I recommend Rustoleum, but you may want to try a few brands and test out their particular shades of copper to find which one best suits you :)

Add a few sheepskins to cozy up the "metal":

Screen Shot 2016-02-10 at 11.43.21 PM

And some light bookshelves (I have this one in my apartment and LOVE it):

Screen Shot 2016-02-10 at 11.45.34 PM

Accessories are a must on the shelves. I love digging around in thrift stores and flea markets (or my parents' attic...) for one-of-a-kind, inexpensive finds. I like how the shelves at ManRepeller aren't overly crowded, but have sweet, thoughtful trinkets and books. Here are a few ideas:

Screen Shot 2016-02-11 at 12.10.31 AM

/1/2/3/4/5/6/

Voila!

Have you seen a lovely space that you'd like deconstructed on The Spoonful? Let me know here or in the comments below! xo

Bathroom Inspo

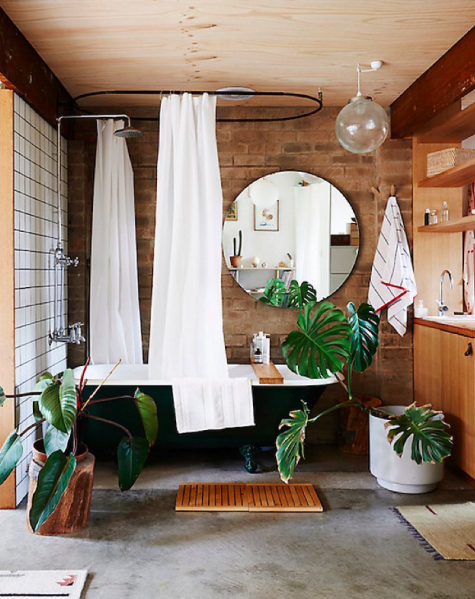
I came across this heavenly bathroom on One Kings Lane's instagram and just about died: Screen Shot 2016-01-25 at 11.31.17 PM

I love every bit of it, from the concrete floors to the leather pulls on the cabinet to the live greens to the wood slab across the tub. And the bath mat! Obsessed.

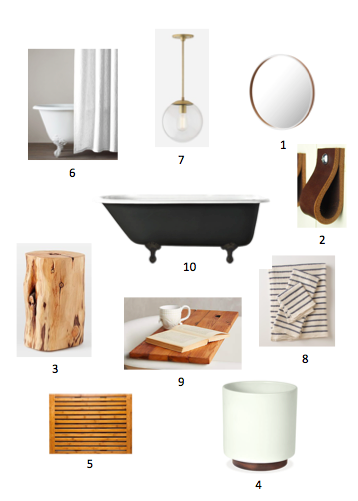
I thought I'd have a little fun and put the space together on here...

Screen Shot 2016-01-27 at 8.39.29 PM

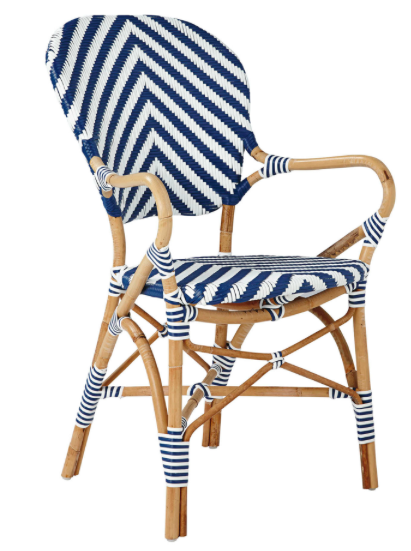
/1/2/3/4/5/6/7/8/9/10/

Add a few big-leafed plants and it's a beaut!

Do you have a room you'd like broken down and sourced on The Spoonful? Let me know here or in the comments below!

Throwback DIY: Albert Hadley Walls

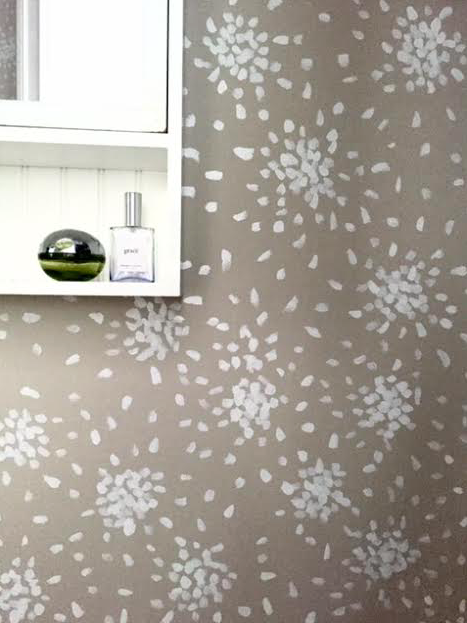
Many, many years ago, before I even knew the name Albert Hadley, I pinned this image of a bathroom wallpapered in a print ("Fireworks") by the design great: Screen Shot 2015-10-25 at 3.39.02 PM

A quick design history lesson... Albert Hadley was one half of the design company Parish-Hadley--"the erudite yang to Sister Parish's freewheeling yin," as Architectural Digest describes him here--who brought about wonderful things in the world of interior design. His clients included the Rockefellers, the Astors, and the Kennedys, to name a few, and his signature lay in creating a comfortable room with some punchy kick to keep things interesting. Though Mr. Hadley passed away a few years ago, his legacy lives on in many ways--including this wallpaper!
One college summer, I decided my lime green bathroom needed a facelift (really wish I had a "before" photo!), and, remembering that great image, I decided to do a little Hadley-inspired DIY.

Screen Shot 2016-01-18 at 10.48.41 PM

First things first: paint the walls. I picked a sandy off-white neutral; this bathroom gets very little sunlight so I made sure to choose a light color, without feeling too sterile.

For the "fireworks," I picked a high-gloss white, the whitest white; the glossiness helps the white stand out against the sandy background color. Once the wall color was good and dry, I mapped out my pattern lightly with a pencil, taking care to space the fireworks correctly. This is one of those steps that takes a long time but makes such a difference and actually saves time--and headaches--in the end!
Then I got to work! I found it important to have enough paint on the brush each time so that the fireworks didn't look too painterly (a look I often love but not here).

Screen Shot 2016-01-18 at 10.48.27 PM

Screen Shot 2016-01-18 at 10.48.33 PM

I'm still so pleased with the result, even several years after completing the paint job. And it was absolutely more budget-friendly than installing genuine Albert Hadley wallpaper! Maybe one day...


The Sophisticated Pom-pom

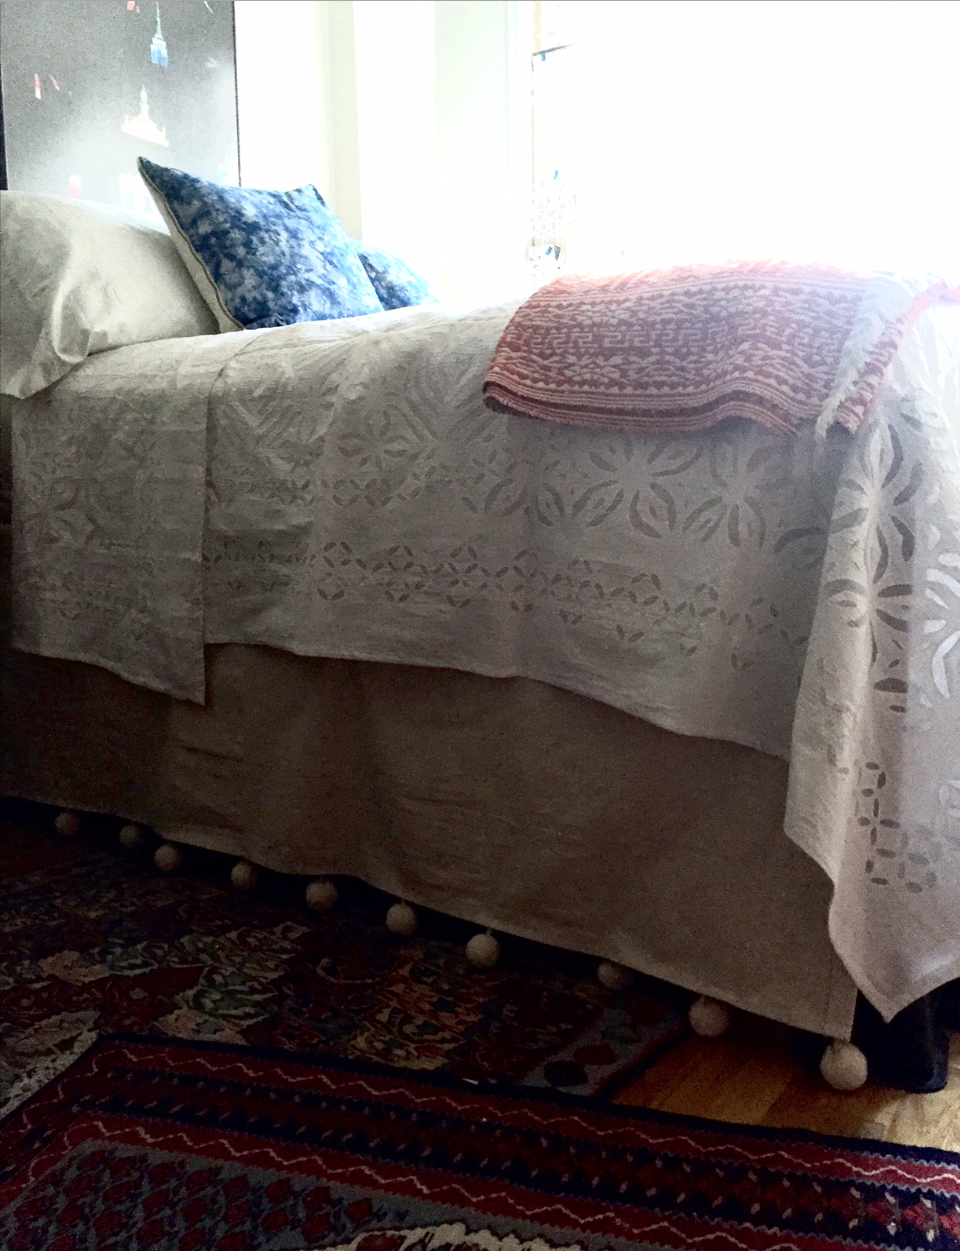
Hello! I'm back! I've kicked off the new year with a few little upgrades in my apartment; here's one of them. Let's back up a few months. When I was searching for ways to squeeze a little more storage space out of my little studio, one solution was to make the most of the under-the-bed storage. This meant simply using bed risers (yes, the same ones from freshman year dorms), which both gives me far more space and makes the bed so high that I all but need a running start to get in. :) Of course, I couldn’t leave that unsightly view uncovered, so I made up a quick and cheap bedskirt.

Screen Shot 2015-07-15 at 9.06.51 AM

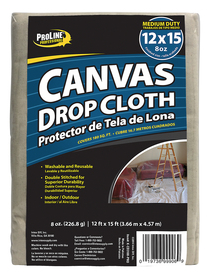
The beauty of making my own is that I could have a completely custom cover—it would be very difficult to find a bedskirt that I wanted in that length—for a fraction of the cost of having it made by an upholsterer. I used a painter’s drop cloth, one of my favorite sources for inexpensive, heavy-duty fabric.


Screen Shot 2016-01-13 at 2.30.00 PM

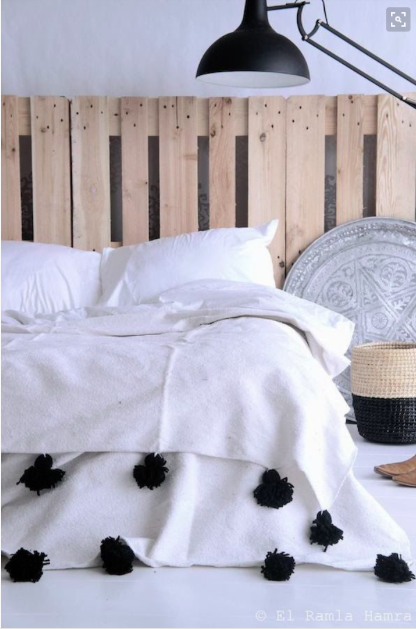
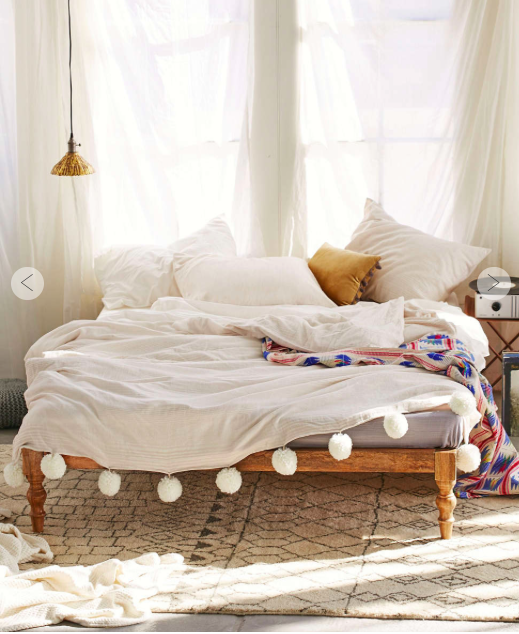
I cut it to size, leaving extra room at the top to tuck in between the mattress and box springs. Then I hemmed it all around to prevent any fraying down the road. I left it just like this for a while; I kind of liked the simplicity. Then I ran across these bedding images and instantly became obsessed with this version of what I like to call a "sophisticated pom-pom":

From Mui Ma:

Screen Shot 2015-12-01 at 10.58.56 PM

So simply lovely. Via L'Aviva Home:

Screen Shot 2015-12-01 at 11.02.11 PM

Other color options available too (here):

Screen Shot 2015-12-01 at 11.03.45 PM

And this from Urban just makes my heart sing:

Screen Shot 2015-12-01 at 11.06.28 PM

I happened to have several samples of this trim (from Samuel & Sons) left over from various projects, which I negotiated to a spacing that I liked; the poms here are about 7" apart. (This city has some terrific trim stores, though: I've had great luck at Mokuba and M&J Trimming, but if you just walk around the garment district--especially 36th to 40th Streets between 6th to 8th Avenues--you'll stumble upon many other gold mines.) The trick for this look is to find BIG pom-poms. I also especially like these because they're not too white; they're actually the same ecru color as the drop cloth. Match made in heaven.

Screen Shot 2016-01-13 at 2.21.34 PM

After spacing them, I simply sewed a few stitches on each to keep it in place and called it a day! From start to finish, this little project took all of 30 minutes, and I am so pleased with the result. The poms just make me smile!

Screen Shot 2016-01-13 at 2.22.04 PM

Screen Shot 2016-01-13 at 2.22.16 PM

Screen Shot 2016-01-13 at 2.21.53 PM

I loved seeing so many of you over the break--and I can't tell you how wonderful it was to hear that you've been reading The Spoonful! So nice and I so appreciate it.

And if you have a DIY you'd like to share on The Spoonful, send it on over!


Trunks for Coffee Tables

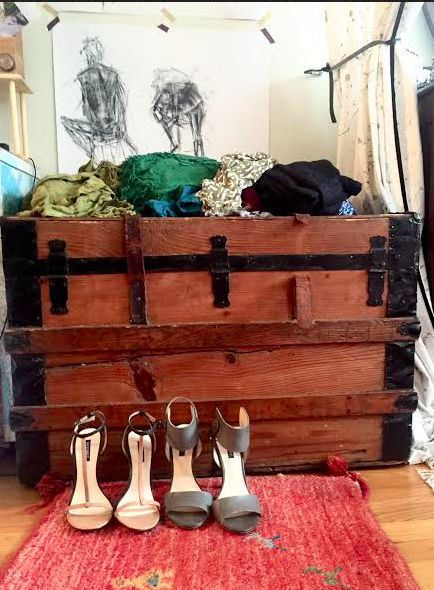
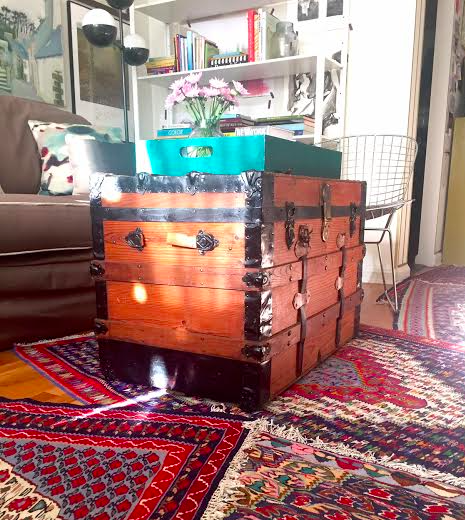
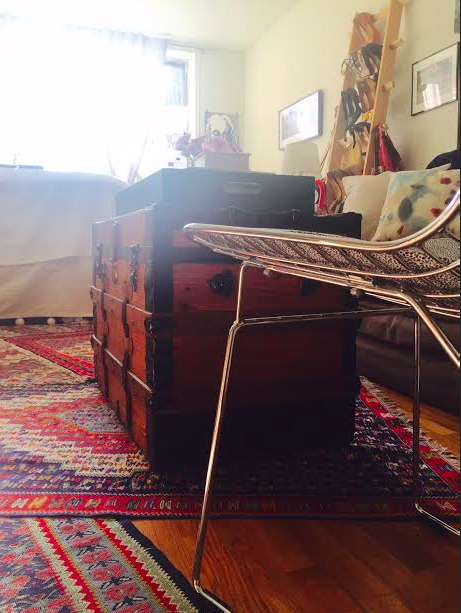
One of my favorite pieces in all of the apartments that I've lived in has been this glorious steamer trunk: Screen Shot 2015-11-21 at 1.53.28 PM

It's an old family piece, and I love all of the textures it brings into the room: wood body, metal hardware, leather straps. The best part, though, is that this thing holds A LOT: an air mattress, extra sheets, towels, out of season clothes... you name it. And in this cozy (tiny) apartment, multipurpose furniture is this girl's best friend!

Screen Shot 2015-11-21 at 1.53.38 PM

Screen Shot 2015-11-21 at 1.54.01 PM

Screen Shot 2015-11-21 at 1.54.09 PM

Screen Shot 2015-11-21 at 1.54.36 PM

I've seen the trunk-as-coffee-table idea executed well in many situations. Here's a bit of inspiration...

Love how this room (via CocoCozy) works the deep plum walls and dark floors. And the trunk rocks:

Screen Shot 2015-11-13 at 11.00.15 PM


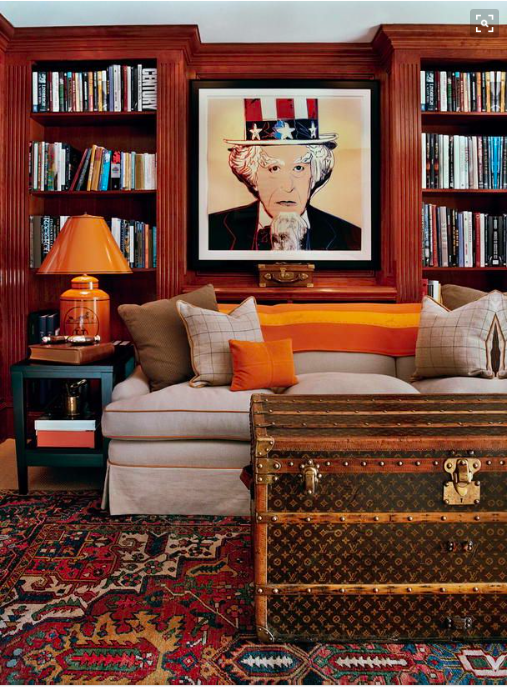
This vintage Louis Vuitton makes my mouth water (from Interiors Addict):

Screen Shot 2015-11-13 at 10.39.46 PM

And another LV inspiration. SO GOOD!

Screen Shot 2015-11-13 at 11.39.57 PM

It could be yours... to the tune of $24,000 (via 1st Dibs):

Screen Shot 2015-11-13 at 10.45.17 PM

While I'm dreaming, how about this amazing trunk headed to Buenos Aires?!

Screen Shot 2015-11-13 at 10.47.40 PM


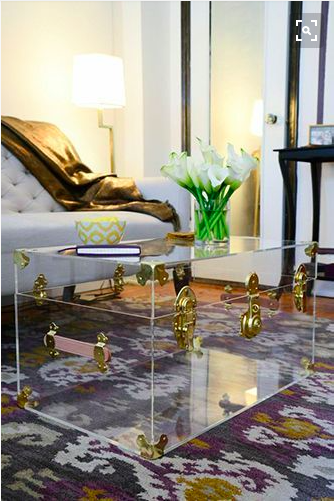
This acrylic trunk (as shown on Refinery 29) gives a new spin on the antique trunk idea:

Screen Shot 2015-11-13 at 12.09.09 PM

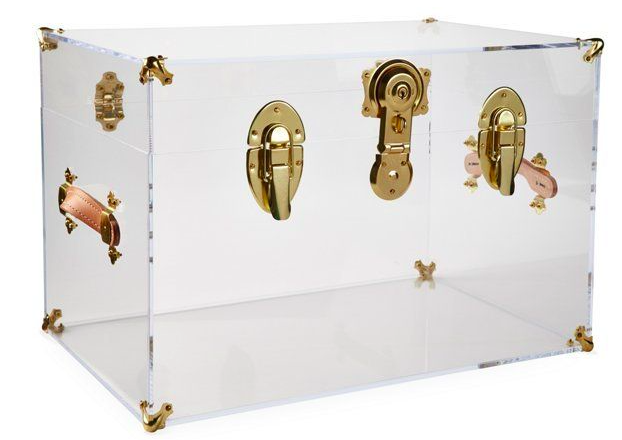
Here's a similar one on sale at One Kings Lane:

Screen Shot 2015-11-13 at 10.36.03 PM

Vintage trunks like mine run the gamut in pricing. Thrift stores often have them--I've even seen one on the street!--and a little elbow grease can go a long way. The key is to pick one with a flat top (to place a tray, books, drinks on top, of course!) that hasn't fallen too far into disrepair, and it should be a good coffee table height. Around 16-21" is standard, depending on the height of your sofa; a table more than 2" lower than your sofa will feel funky. That said, my trunk is higher than 21" and feels perfectly fine! (If you're looking for the right height for your space, I suggest holding up a measuring tape next to your sofa and visualizing it that way. The table should be high enough to comfortably place a drink or book but not so high that you feel like you're at a dining table.)

A quick eBay search turned up a few inexpensive diamonds in the rough, like this amazing green one:

Screen Shot 2015-11-21 at 2.06.19 PM

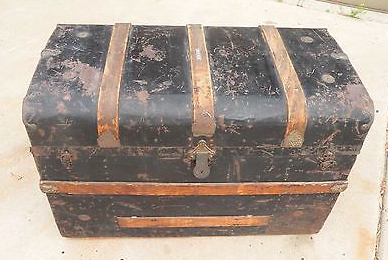
And this one. It's about 14" high--a few inches shorter than it should be--but it could have another, smaller trunk stacked on top, or some great coffee table books piled up on top to add height would look so chic too. It needs some good refinishing and some polish on those hinges, but what a great weekend project, amiright?!

Screen Shot 2015-11-21 at 2.05.19 PM

Something about this old trunk makes me want to leave it as-is and embrace its vintage feel:

Screen Shot 2015-11-13 at 11.23.24 PM

For those of you dear readers in the NYC area, here are a few Craigslist options:

Imagine this trunk cleaned up with polished hardware... gorgeous.

Screen Shot 2015-11-21 at 2.03.07 PM

This is a gem:

Screen Shot 2015-11-13 at 11.29.36 PM

Reminds me of this LV orange trunk:

Screen Shot 2015-11-13 at 11.42.55 PM

This definitely needs some love but the possibilities are endless...

Screen Shot 2015-11-21 at 2.01.42 PM

Have you ever used  a trunk as a coffee table? I'd love to see photos--send them over and I'll feature your space on The Spoonful!


Throw Blanket Round-up + Coziness Formula

It's fall (y'all) in New York City, and this forgotten chill in the air has me reaching for the best coziness formula I know: warm liquids and warmer blankets. I've recently come across some wonderfully warm blankets and thought I'd share my favorites. Nothing makes a sofa seem more beckoning than a comfy throw: Screen Shot 2015-10-04 at 2.01.44 PM

Wonderful buffalo check from Hudson and Vine, $110:

Screen Shot 2015-10-04 at 2.03.16 PM

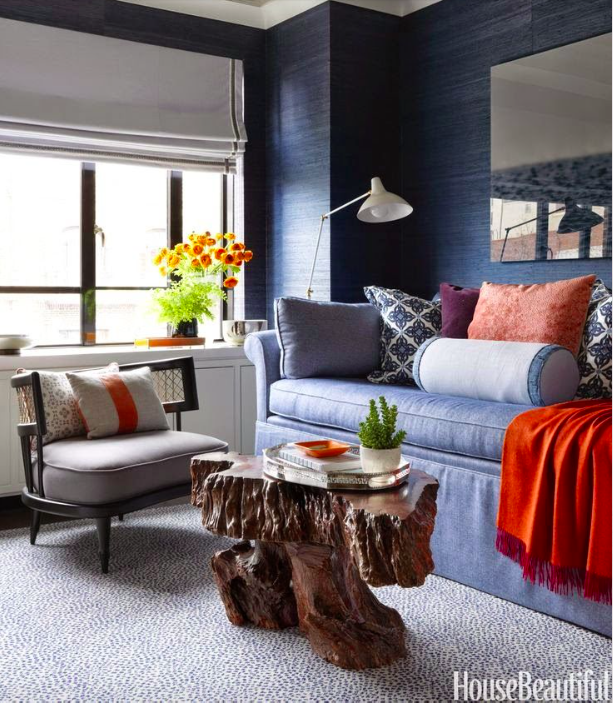
Gorgeous red-orange in this House Beautiful shot:

Screen Shot 2015-10-04 at 2.07.33 PM

Wool & cashmere throw from Garnet Hill, $138:

Screen Shot 2015-10-04 at 2.12.20 PM

One of my favorite sofas from Southern Living:

Screen Shot 2015-10-04 at 2.14.40 PM

Cream knitted throw (with festive metallic woven in!) from West Elm, on sale now for $55:

Screen Shot 2015-10-28 at 2.06.55 PM

A luxe-y (faux) fur throw on this leather sofa softens up the dark walls (via The Design Daredevil):

Screen Shot 2015-10-24 at 9.53.17 PM

Restoration Hardware ($139) for the win:Screen Shot 2015-10-24 at 9.57.32 PM

How about this cozy reading nook by the fabulous Emily Henderson (and how great is that wall color?!):

Screen Shot 2015-10-28 at 2.20.56 PM

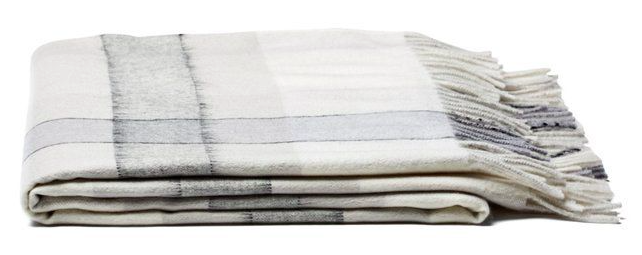
One King's Lane has this big windowpane check for $199:

Screen Shot 2015-10-28 at 2.19.15 PM

Stay cozy!

P.S. In the spirit of autumn, my mom sent me this darling note:

Screen Shot 2015-10-04 at 1.53.53 PM

Isn't she the dearest?? (And for those of you who don't know That Girl... Go! Watch! Now!)