DIY: Tapestry Turned Pillow

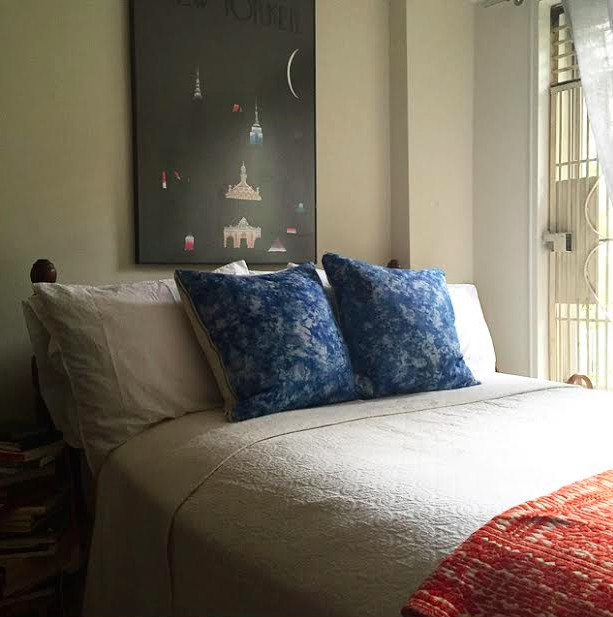
A few lovely readers asked after the big pillow on my Charlottesville bed (as seen in my posts on the tiny shelf makeover and the postcard wall).

Screen Shot 2015-08-15 at 6.26.32 PM

Isn’t it great?! In high school I picked up this old tapestry from a local flea market, then tucked it away in the depths of a closet where I found it a few years into college. I thought about putting it up on a wall, but what I really needed was a big pillow. Some inspiration...

I pinned this forever ago from Domino magazine:

Screen Shot 2015-08-23 at 3.26.41 PM

Great teal bedspread from a post on House of Turquoise:

Screen Shot 2015-08-23 at 3.27.29 PM

Love this as a cover for a sofa, too (via the blog Honey & Fitz):

Screen Shot 2015-08-23 at 3.28.21 PM

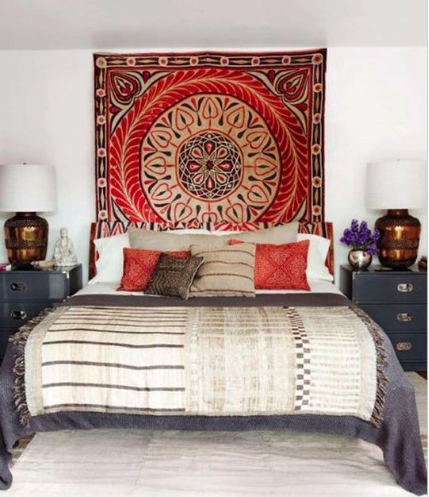
This headboard is from the bedroom of Grace Bonney (of the great blog Design*Sponge):

Screen Shot 2015-08-23 at 3.29.14 PM

After a bit of research, I learned that this type of textile is made by the Otomi people in the Mexican state of Hidalgo. There are so many options other than simply textiles: dresses, purses, you name it. And purchasing from certain sources also benefits the tribe--doing good deeds while beautifying a room!

Because I had a pretty neutral background (white bedspread and sheets, wood furniture, white walls), I thought this color-charged tapestry would give me just the right happy feel that I wanted in my room. I enlisted my dear mother to turn the tapestry into a pillow by sewing on a big piece of red duck cloth that we had on hand as the back and stuffing it with cotton.

Screen Shot 2015-08-23 at 3.25.10 PM
Screen Shot 2015-08-23 at 3.24.38 PM

I love projects like this that make such a big difference but are so simple to do—especially when we’re talking throw pillows! This can easily be replicated for small or big pillows, too.

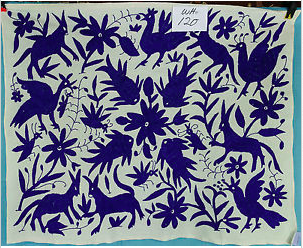
A friend of mine was thinking of doing something similar in her new apartment, so I did a quick eBay search for Otomi tapestries where I found some great options, like this wall hanging:

Screen Shot 2015-08-24 at 1.44.13 PM

Another wall hanging, very much like mine:

Screen Shot 2015-08-24 at 1.45.10 PM

Placemat--could be made into a small pillow:

Screen Shot 2015-08-24 at 1.46.15 PM
Screen Shot 2015-08-24 at 1.53.01 PM

Of course, having a sewing machine is largely helpful for this project. Sewing by hand, using small stitches, would also work—just want to make sure that the stitches are set in from the edge of the fabric by about 1" so that the stuffing can’t peek through. (Do I sound like Martha Stewart?? YIKES) In retrospect, I would make an envelope pillow (great instructions from Jenny at Little Green Notebook here) and use a standard pillow insert instead of stuffing.

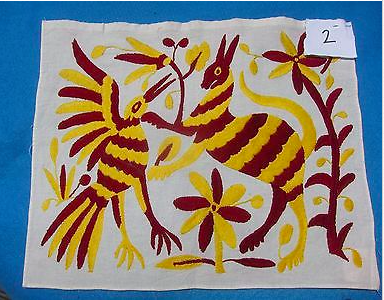
Or, of course, there are options to buy for yourself, like these from the same eBay search:

Screen Shot 2015-08-24 at 1.54.05 PM
Screen Shot 2015-08-24 at 1.55.18 PM

From the etsy shop mentioned above:

Screen Shot 2015-08-24 at 1.56.32 PM
Screen Shot 2015-08-24 at 1.58.28 PM

Just used this gorgeous pillow from Roberta Roller Rabbit in a project and LOVE the yellow tassels:

Screen Shot 2015-08-24 at 1.59.27 PM

Do you have any pillow DIYs you’d like to see featured on The Spoonful?? Contact me here or post in the comments below!
DIY: Postcard Wall

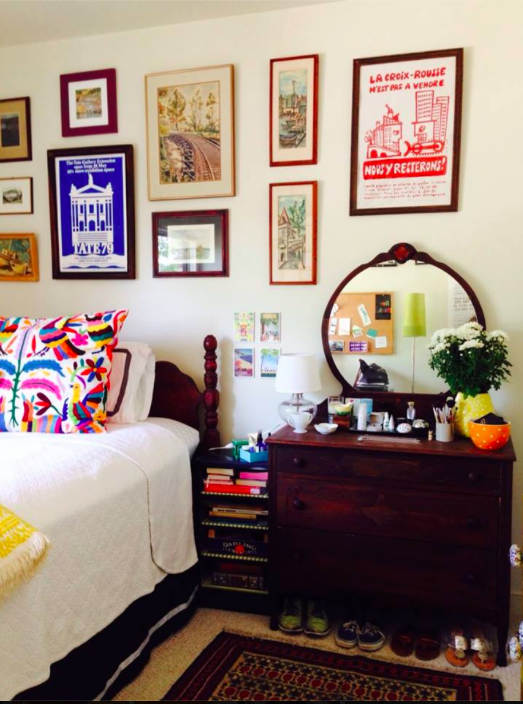
I have a habit of picking up postcards and other papers, especially while traveling. While studying abroad in Lyon, I amassed quite a pile of wonderful postcards which I loved too much to send away or keep hidden in a stack of papers. I also had, on impulse, bought a box of postcards based off of the wonderful Paris vs. New York book (and blog, here). With all of those postcards crying out to be used, I thought I would make a small-scale art installation in my college room (also shown here with the tiny shelf makeover), and the vast wall by my bed seemed to be asking for something wonderful to fill its emptiness. I could have just taped them up to the wall (like I did in my NYC entryway), but I wanted them to have more substance—I think my NYC entryway works because it feels like a massive bulletin board, but this space in my Charlottesville room by my bed wasn’t going to have the same feel.

Screen Shot 2015-08-23 at 12.18.39 AM

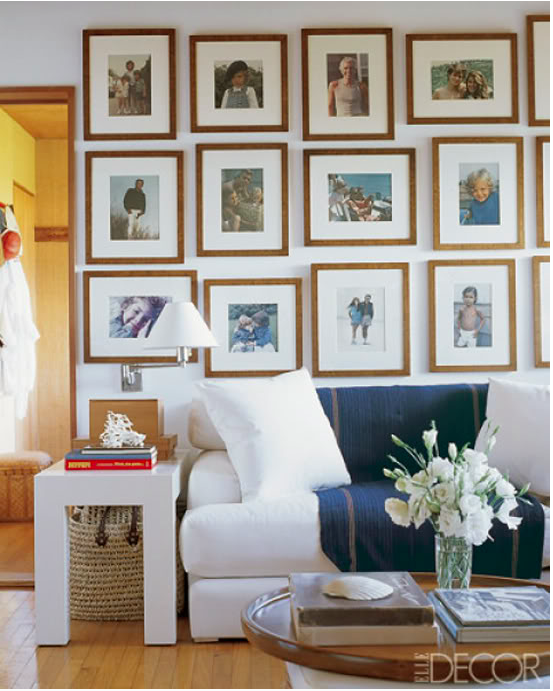
I love the look of a bunch of similar frames (who doesn't?!). Here's an image from the wonderful Nick Olsen in last month's Architectural Digest:

Screen Shot 2015-08-22 at 11.47.58 PM

All red frames from Elle Decor:

Screen Shot 2015-08-22 at 11.52.32 PM

Bigger scale here from Elle Decor:

Screen Shot 2015-08-22 at 11.58.44 PM

One of my all time favorite rooms by Tom Scheerer. Love the wood frames!

Screen Shot 2015-08-23 at 12.00.13 AM

Yes. (Elle Decor again)

Screen Shot 2015-08-23 at 12.01.45 AM

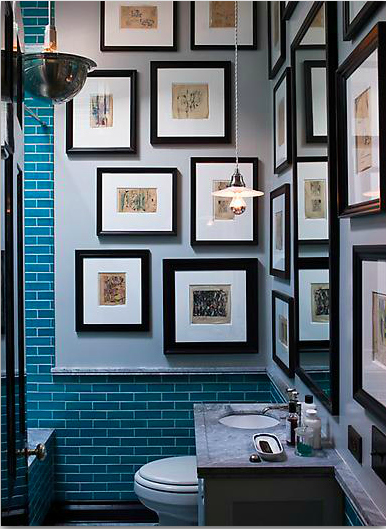
This collection of black frames by Steven Gambrel (a fellow UVA alum! Wahoowa) makes my mouth water:

Screen Shot 2015-08-23 at 12.04.13 AM

And how great is this grouping by the revered Ralph Lauren? (Seen on Little Green Notebook)

Screen Shot 2015-08-23 at 12.08.36 AM

But, alas, all of those frames would’ve been pricier than I was looking for in this project. What I really wanted out of the “installation” was a 3-dimensional quality with the postcards popping off the wall.

Screen Shot 2015-08-23 at 12.18.52 AM

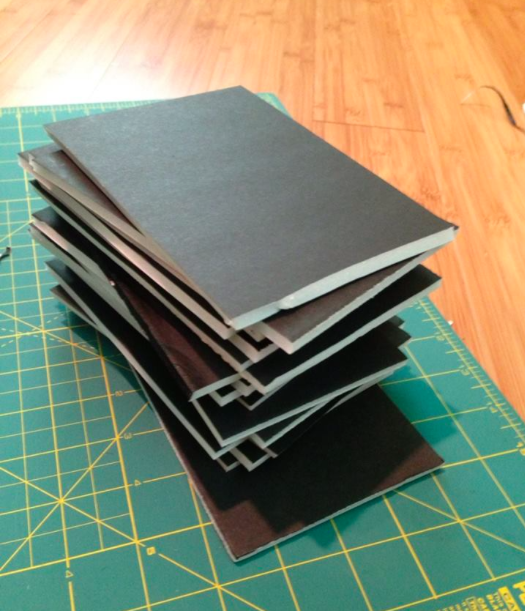
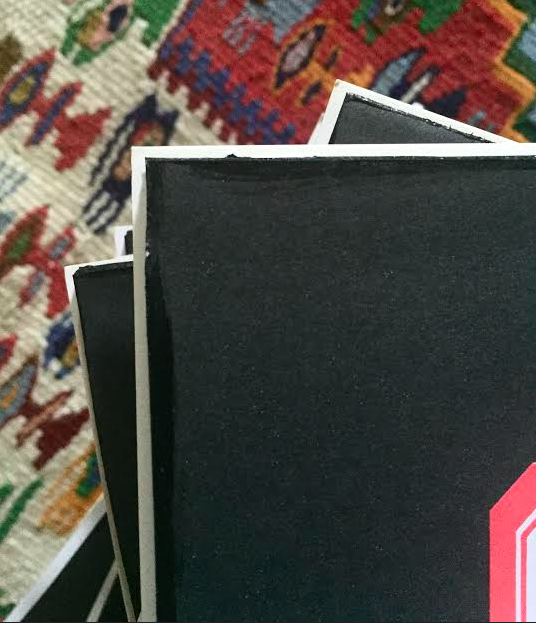
To achieve this 3-D look, I glued foam core to the back of the postcards and then hung them on the wall. Foam core board is super cheap—I got several boards from the dollar store and cut them down to be about ¼” smaller on all sides of the postcard. I recommend using an x-acto knife and straight edge when working with foam core; it's so much faster than scissors, which don't give a clean edge anyway.

Screen Shot 2015-08-23 at 12.17.06 AM

I realized when I cut down the foam core that the white foam showed on the sides of the cards and was rather unsightly, so I grabbed some black craft paint and quickly covered up the white foam with black paint.

Screen Shot 2015-08-23 at 12.16.49 AM
Screen Shot 2015-08-23 at 12.17.16 AM

After the paint dried, I used rubber cement (which I prefer to Elmer's glue when working with paper because it doesn't wrinkle) to attach postcard to foam core board.

Screen Shot 2015-09-04 at 9.20.26 AM
Screen Shot 2015-09-04 at 9.20.14 AM

Because the foam core backing covers up the writing on the back of the postcard, I wanted to make a note to remind myself later where the cards had come from. I had some labels lying around, so I recorded the necessary details on the backs that way:

Screen Shot 2015-09-04 at 9.20.00 AM

Then I hung them all up... ta-da!

Screen Shot 2015-08-23 at 12.18.39 AM

Do you have any great DIY ideas to share? Contact me here or in the comments below... I'd love to share them on The Spoonful! And happy Labor Day!

Shoes and Ladders

I have an infatuation with heels (and it's justified: I'm 5'2"!). Though we live in the same city, I do not have Carrie Bradshaw's closet space for them (my apartment = Carrie's closet size... sniff, sniff).

Carrie Bradshaw closet

... if only.

Welp, on to Plan B. This image has been in the back of my mind for years (literally... I think I pinned it right out of high school):

shoes ladder orig pin

... and I had seen other ways that ladders were used for storage:

ladder inspo 2
ladder inspo 2
ladder inspo 1
ladder inspo 1

It's obviously not a novel idea... just last week I was in this fabulous shop in Brooklyn Heights, Collyer's Mansion, and snapped this picture:

ladder inspo 3
ladder inspo 3

I had looked all around for a vintage wood ladder, but they were pricier than I expected/wanted to spend, so I enlisted my long-suffering father for the task. Poor guy is doomed to be my workhorse forever.

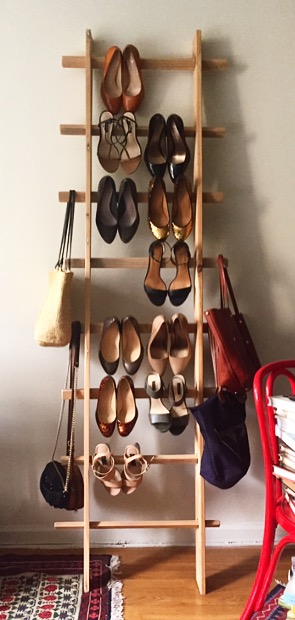
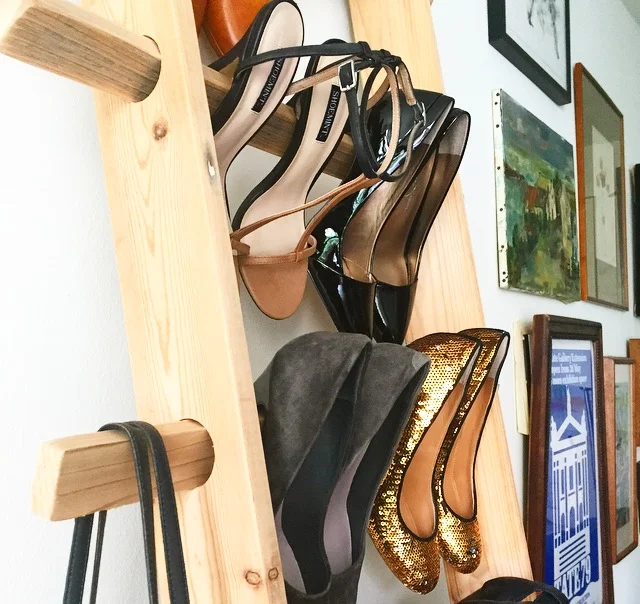
I showed him the inspiration image of the ladder with shoes, drew a diagram of what I imagined in a ladder of my own, and the next thing I knew, he whipped this out.

ladder 1
ladder 1

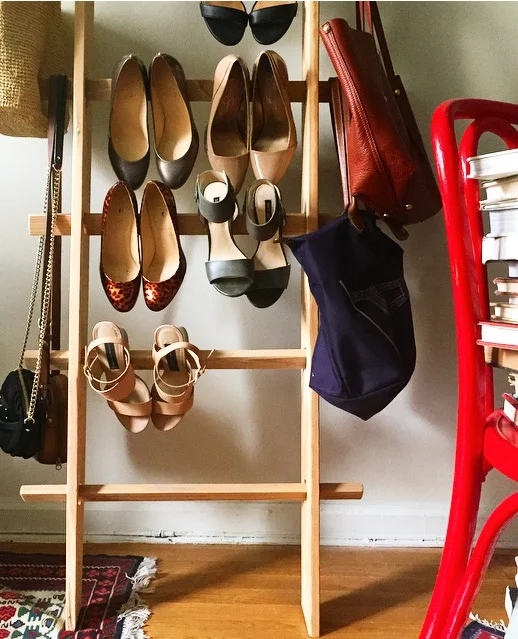
Pretty amazing, right? And so much more special than anything I could've bought.

ladder6
ladder6

We had all the wood in the garage, most of it making up the shipping crates from our return from Saudi Arabia 17 years ago... it pays to be a pack rat! Details like that turn pieces in a room into stories.

ladder2
ladder2

And it doubles as a hanger for satchels and totes!

ladder4
ladder4

Even if the heels are gathering dust (city life and high heels don't mix), I love the vertical aspect of the ladder leaning against the wall. And maybe having them visible will be a reminder to stop buying them... flats are the way to go in this walking city! 

The Plant That Lived

Despite varied attempts at being a gardenista, I have come to terms with my black thumb. Herbs die within the week; I even killed my succulents (how does that even happen?!). I go through the vicious cycle: buy the pretty, verdant greenery (it makes a house a home! Case and point illustrated below), marvel at their beauty and lushness on my window sill, under-water or over-water, watch in horror as they perish, vow that "that was the last time!"... and then, a few months later, go through it again. Vicious, like I said. 

That is, until I found The Indestructible Plant.

This little mama lives in my bathroom and I bring her out to bathe in natural light once a month or so. She needs hardly any water and... wait for it... she's living! Thriving, in fact, because, ladies and gents, THIS is a new, baby green shoot!

I picked her up a few months ago at Lowes after asking the kind man working there to point me in the direction of a plant that couldn't be killed (I'm totally jinxing this as I write it). She's called a ZZ plant (Gardenista talks about them here) and, $7.98 later, she was mine.

The pot (too big, I know, but she'll grow into it) I picked up at last year's Design on a Dime; her plastic pot has holes in the bottom so the water can drain without a worry. Shower curtain is old as the hills, from TJ Maxx, and the soap dispensers are Muji (my faves--streamlining!). 

There's something just so wonderful about having something green and alive in an apartment. Here are some of my favorite images where greenery reigns: 

Plants, plants everywhere (via Indulgy and pinned here):

This is an old favorite from domino (pinned here), with just a couple shoots cut in a vase, but what a statement!

Greenery on the mirror ledge? Yes please! (via Airows and pinned here)

This outdoor shower via The Jungalow (pinned here)... dreamy, steamy, marvelous. 

What a lovely little smattering! I'm also digging the shower's wall tile and black showerhead big time. (via Her New Tribe and pinned here)

Remember this post? Still love it (via One Kings Lane and pinned here)

Check out what this greenery does to an otherwise black-and-white kitchen (via Decoholic and pinned here):

Sooo pretty (via domino, pinned here):

ADORE (via Vogue Australia and pinned here):

I could go on, but I must go back to admiring my own little green goddess...

Do you have greenery in your own space? Tricks for keeping green things green? Share in the comments below!


A Red Bed

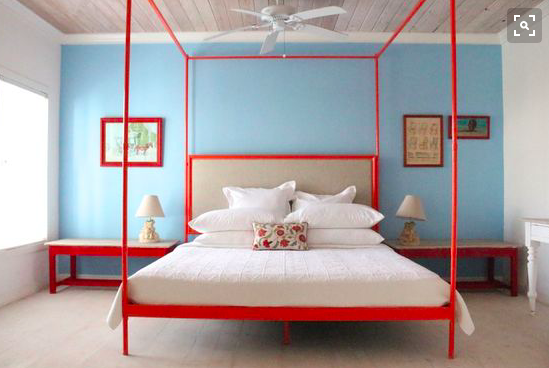
This photo is from a little spot in the Bahamas called Ocean View Club (on my travel list!). How heavenly is this bedroom??

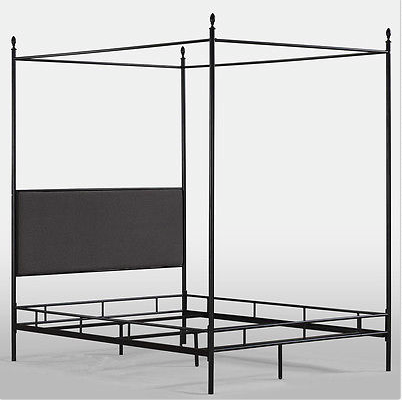
I'm loving the pale blue/tomato red color combination. To recreate, I'd take a four poster bed like this one...

... and paint it in a terrific red:

Other accents should be the same red, like the bedsides and a frame or two on the wall. I love how the wall is filled up with the two benches on either side of the bed. I would recreate that look by painting a couple of benches (like this one from World Market) the same red as the bed frame and painting the top of the bench white (as shown in the inspiration image):

Of course, that could also be done with smaller nightstands (and if the red is too much, leave them natural wood!).

The pale blue accent wall is lovely and looks to be similar to this shade:

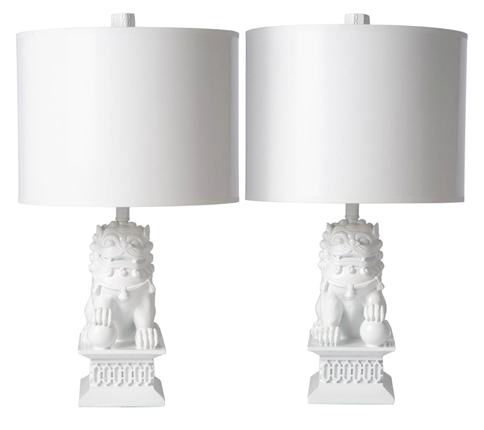
Add little foo dog bedside lamps (less pricey alternative here):

And an ethnic throw pillow on a crisp white bedspread:

Island decor, delivered!

Do you have a room you'd like to see recreated on The Spoonful? Let me know in the comments below!

Snuggle-y Bedroom

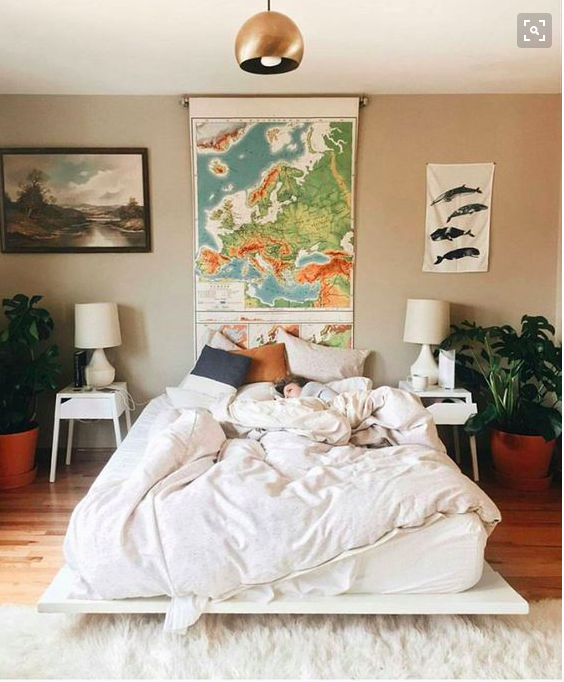
Schoolhouse Electric (amazing lighting--and more--shop in TriBeCa) posted this photo on instagram a while ago, and I came across it this weekend while going through old photos. How comfy?! Screen Shot 2016-03-21 at 12.03.40 AM

Want to recreate this cozy space for yourself? Read on...

Maps are one of my favorite things--probably because I was forever traveling as a child (I even covered my desk in maps! See that post here.) Etsy has a plethora of vintage pull-down maps like the one in the photo above:

Screen Shot 2016-03-21 at 12.08.14 AM

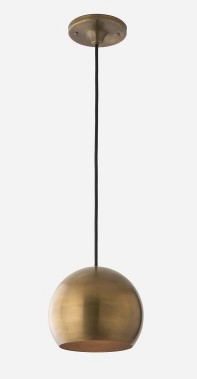
Love this amazing pendant from Schoolhouse Electric:

Screen Shot 2016-03-21 at 12.15.48 AM

Check out Schoolhouse Electric's bedding, too, because it's pretty great:

Screen Shot 2016-03-21 at 12.13.14 AM

Here are similar lamps from Crate & Barrel:

Screen Shot 2016-03-21 at 12.11.24 AM

And bedside tables from Ikea!!

Screen Shot 2016-03-21 at 12.13.44 AM

Finish off the space with this big ole sheepskin rug:

image


And then you'll be ready to crawl right back in bed!

Have you seen a room you'd like to see recreated and featured on The Spoonful? Let me know in the comments below!


Things I Love: Canopy Beds

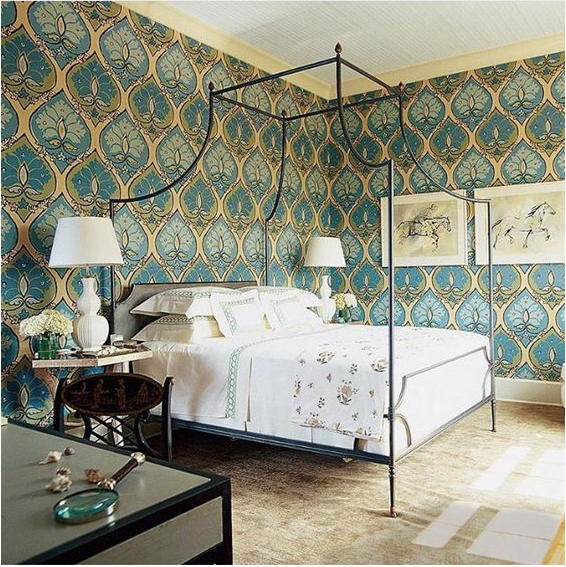
Wouldn't you feel like a modern day princess in this room, sleeping on this bed (via Elle Decor and pinned here)?

Screen Shot 2016-03-21 at 12.02.26 PM

This shot from Lonny Mag is also magnificent (pinned here):

Screen Shot 2016-03-21 at 12.06.08 PM

The great thing about a dark canopy like this is that it doesn't have to feel princess-y! Check out this gypsy-esque rendition (pinned here):

Screen Shot 2016-03-21 at 12.08.58 PM

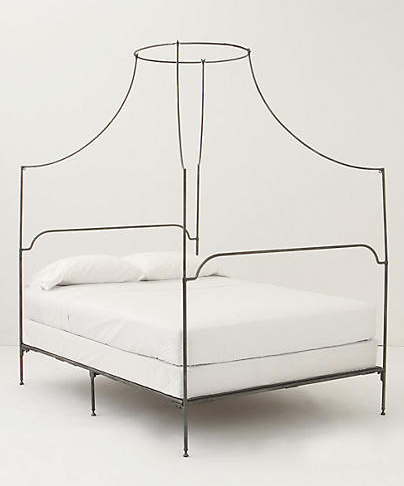
Dying for your own? Anthropologie has a gorgeous version here:

Screen Shot 2016-03-21 at 12.10.55 PM

Do you have a piece you'd like to see on The Spoonful? Let me know in the comments below!

In Honor of Spring...

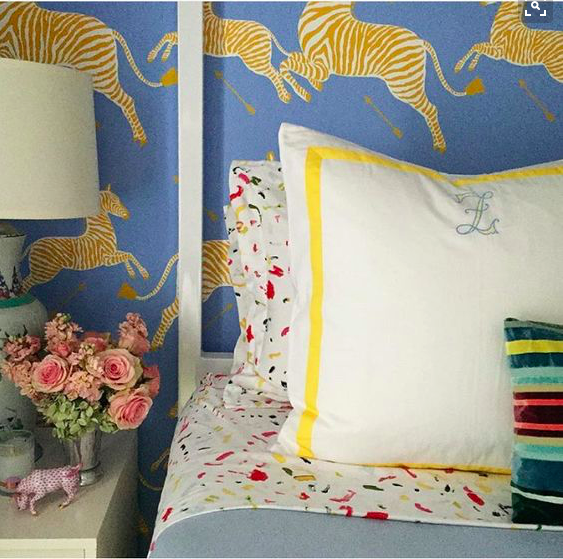
... I share with you this gloriously springy and feminine bedside moment (pinned here) by Bailey Quin of Biscuit Home (written up here by Southern Living): Screen Shot 2016-03-21 at 12.16.35 AM

I think I've just found my new favorite bedding store! Loving these awesome Boone sheets:

Screen Shot 2016-03-21 at 12.28.18 AM

Wallpaper brought to you by Scalamandre (other colorways available):

Screen Shot 2016-03-21 at 12.31.30 AM

Mildly obsessed with this Border sham (also by Bailey Quin and 50% discount now with code SHAMROCK):

Screen Shot 2016-03-21 at 12.32.10 AM


I'll be dreaming of that simple monogram all day...


The Sophisticated Pom-pom

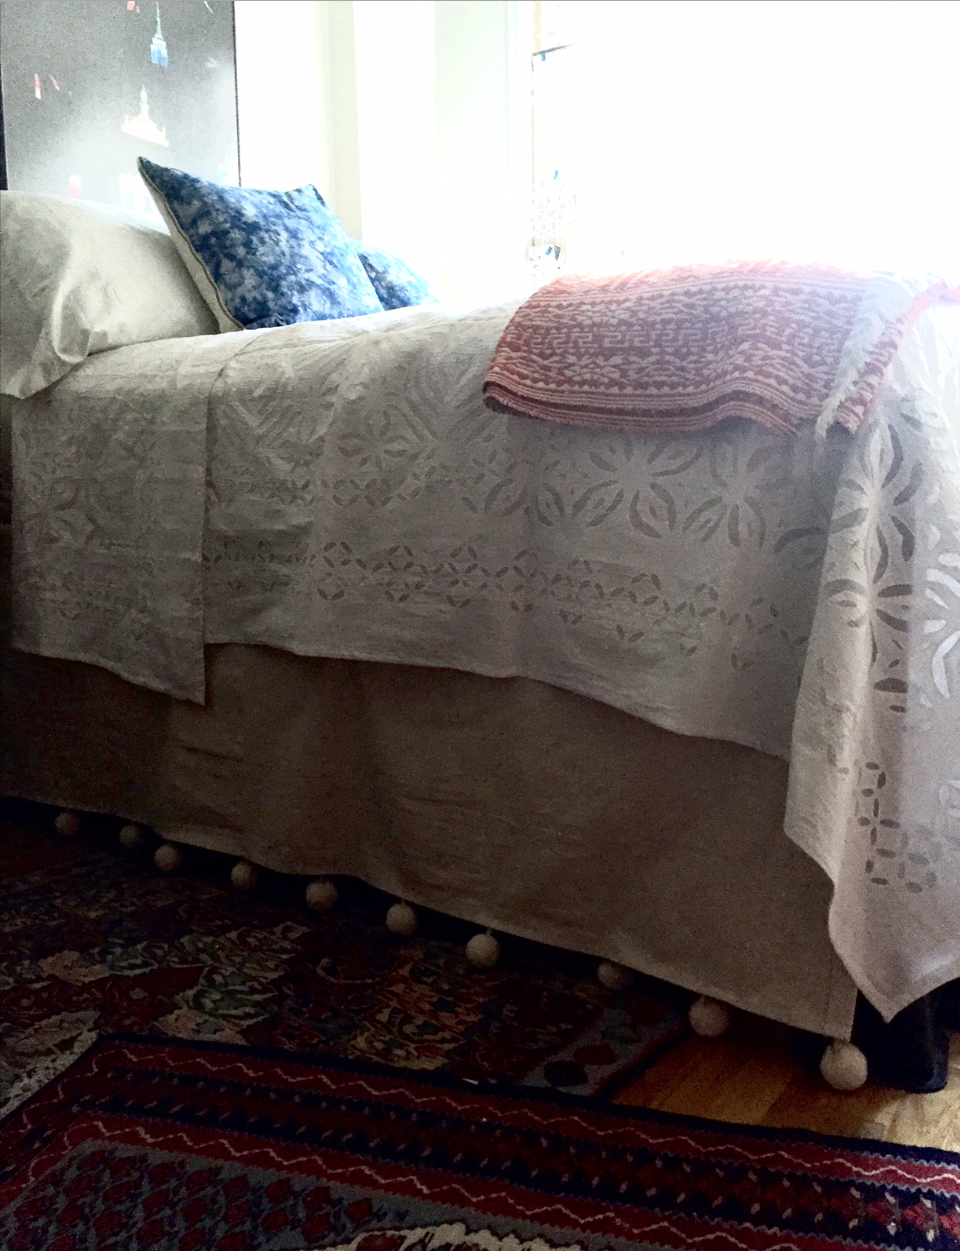
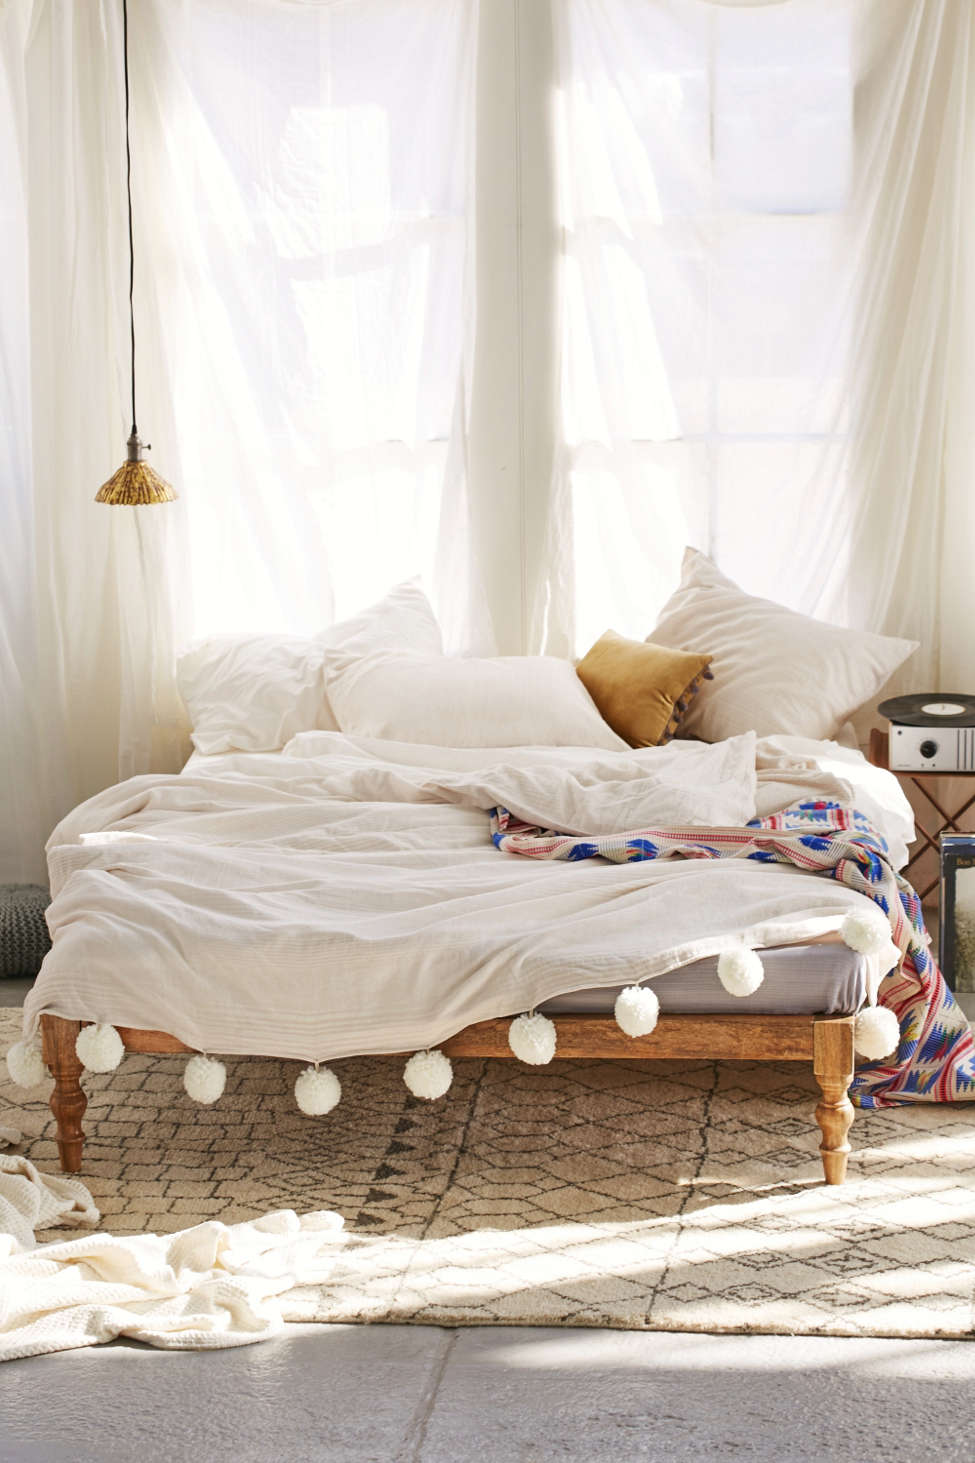
Hello! I'm back! I've kicked off the new year with a few little upgrades in my apartment; here's one of them. Let's back up a few months. When I was searching for ways to squeeze a little more storage space out of my little studio, one solution was to make the most of the under-the-bed storage. This meant simply using bed risers (yes, the same ones from freshman year dorms), which both gives me far more space and makes the bed so high that I all but need a running start to get in. :) Of course, I couldn’t leave that unsightly view uncovered, so I made up a quick and cheap bedskirt.

Screen Shot 2015-07-15 at 9.06.51 AM

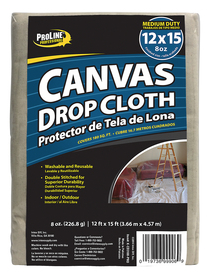
The beauty of making my own is that I could have a completely custom cover—it would be very difficult to find a bedskirt that I wanted in that length—for a fraction of the cost of having it made by an upholsterer. I used a painter’s drop cloth, one of my favorite sources for inexpensive, heavy-duty fabric.


Screen Shot 2016-01-13 at 2.30.00 PM

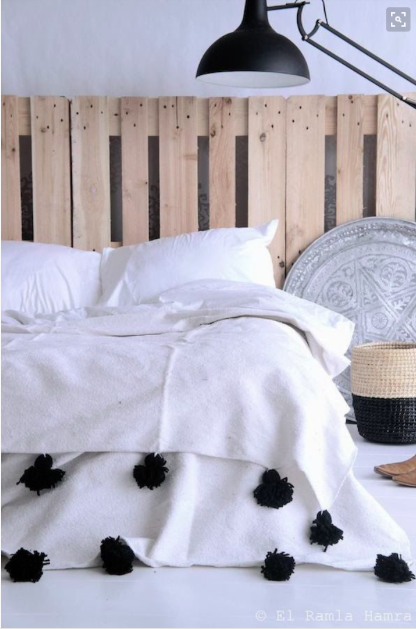
I cut it to size, leaving extra room at the top to tuck in between the mattress and box springs. Then I hemmed it all around to prevent any fraying down the road. I left it just like this for a while; I kind of liked the simplicity. Then I ran across these bedding images and instantly became obsessed with this version of what I like to call a "sophisticated pom-pom":

From Mui Ma:

Screen Shot 2015-12-01 at 10.58.56 PM

So simply lovely. Via L'Aviva Home:

Screen Shot 2015-12-01 at 11.02.11 PM

Other color options available too (here):

Screen Shot 2015-12-01 at 11.03.45 PM

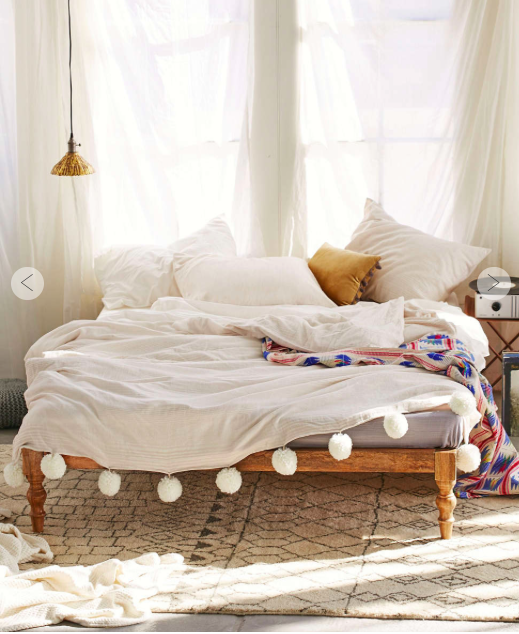
And this from Urban just makes my heart sing:

Screen Shot 2015-12-01 at 11.06.28 PM

I happened to have several samples of this trim (from Samuel & Sons) left over from various projects, which I negotiated to a spacing that I liked; the poms here are about 7" apart. (This city has some terrific trim stores, though: I've had great luck at Mokuba and M&J Trimming, but if you just walk around the garment district--especially 36th to 40th Streets between 6th to 8th Avenues--you'll stumble upon many other gold mines.) The trick for this look is to find BIG pom-poms. I also especially like these because they're not too white; they're actually the same ecru color as the drop cloth. Match made in heaven.

Screen Shot 2016-01-13 at 2.21.34 PM

After spacing them, I simply sewed a few stitches on each to keep it in place and called it a day! From start to finish, this little project took all of 30 minutes, and I am so pleased with the result. The poms just make me smile!

Screen Shot 2016-01-13 at 2.22.04 PM

Screen Shot 2016-01-13 at 2.22.16 PM

Screen Shot 2016-01-13 at 2.21.53 PM

I loved seeing so many of you over the break--and I can't tell you how wonderful it was to hear that you've been reading The Spoonful! So nice and I so appreciate it.

And if you have a DIY you'd like to share on The Spoonful, send it on over!


DIY: Tapestry Headboard

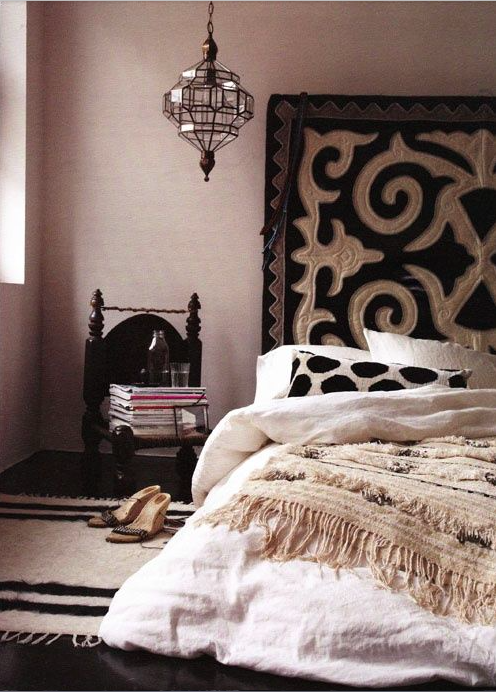
I came across this fantastic image from Anthology magazine while I was searching for headboard ideas for my dear friend's new apartment. So cool, right? Screen Shot 2015-08-24 at 9.20.38 AM

Here's another inspiration image from the August Black blog:

Screen Shot 2015-08-24 at 5.19.35 PM

She’s looking for a calming, serene retreat in her bedroom, but also loves the boho chic feel, which we’ll incorporate in other rooms of her apartment (more on that to come down the road!). Headboards are one of my favorite parts of the room to DIY because there are just so many options. This solution for a headboard is so very simple and can be quite inexpensive: all you need is the tapestry and a bedframe upon which to set the mattress.

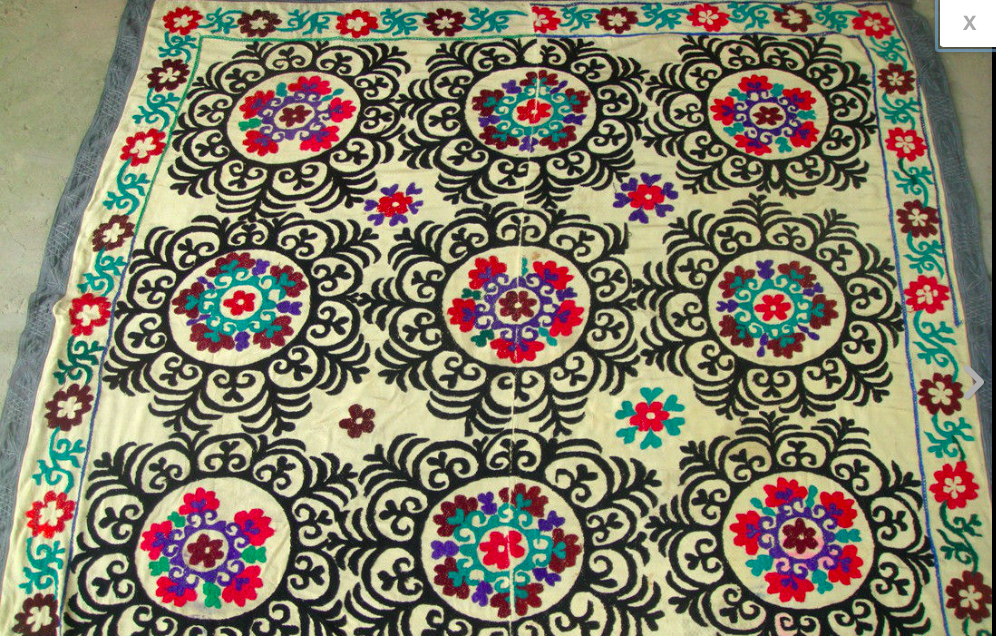
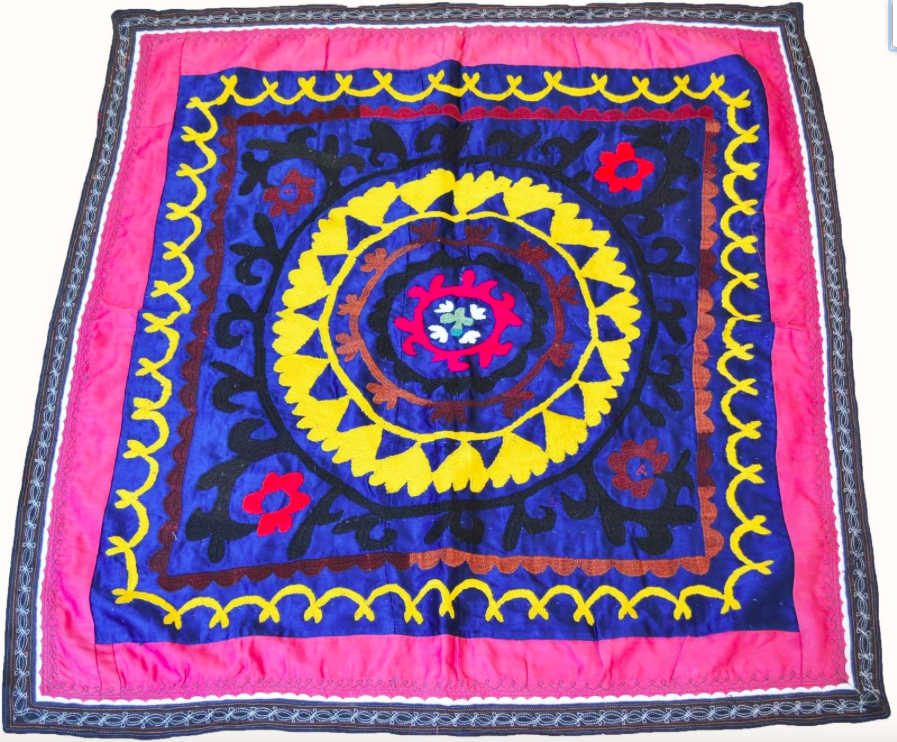
I did a quick eBay search which came up with some gorgeous options, like this big Suzani tapestry:

Screen Shot 2015-08-24 at 2.22.06 PM

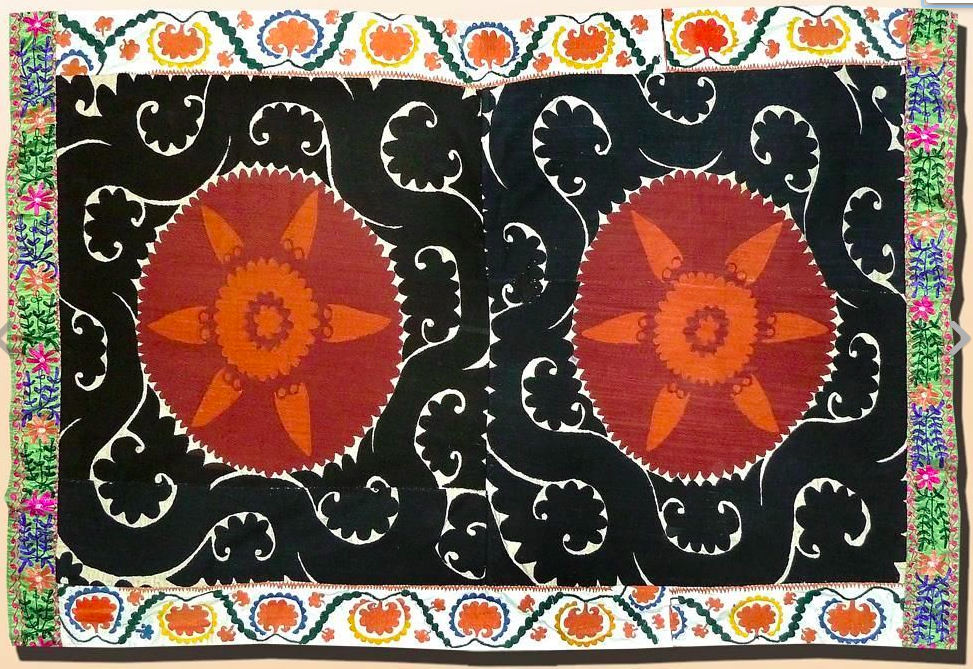
Or this one:

Screen Shot 2015-08-24 at 2.23.53 PM

Love the colors here:

Screen Shot 2015-08-24 at 2.25.38 PM

And here:

Screen Shot 2015-08-24 at 3.36.13 PM

Pretty pink:

Screen Shot 2015-08-24 at 3.40.25 PM

To fit in with her image of a calming space, I encouraged her to pick out a more neutral one, like this:

Screen Shot 2015-08-24 at 2.28.46 PM

Or this one:

Screen Shot 2015-08-24 at 3.43.26 PM

The tapestry could be attached directly to the wall or it could be mounted on a wood support to be a bit sturdier--it looks like the inspiration image did the latter. Erin Williamson did a great tutorial here, and Mr. Kate used a gorgeous different technique here.

Have you ever used a nonconventional headboard? How did it turn out? Let me know here or in the comments below!

DIY: Tiny Shelf Makeover

One of my favorite things to do when redecorating a room is to see what existing furniture I have that can be reworked for a fresh look (like I did with my atlas-covered desk). During my last year of college I needed a small bedside table to hold a few necessities--namely, my ever-growing pile of books and a lamp with which to read them. I already had this little dresser with drawers that my grandfather had made years and years ago, which had been painted and repainted umpteen times. I had changed out his original knobs for these funky ones another time, but the drawers just weren't going to work for my books. Screen Shot 2015-08-15 at 6.11.52 PM

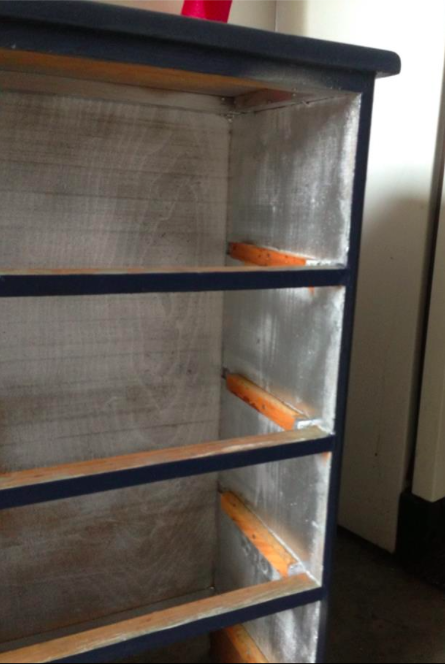
I liked the navy, so didn't bother painting it yet again. Instead, I took the drawers out and, taking care to keep the face of the piece navy (but apparently not careful enough--don't look too closely! A little painter's tape might have been helpful here...), spray painted the inside silver. I wanted something a little glitzy inside, but not too overboard. For the record, I don't always love to paint old furniture, especially pieces with sentimental value, but because this already had about five layers of paint on it, I didn't feel too badly.

Screen Shot 2015-08-15 at 6.12.24 PM

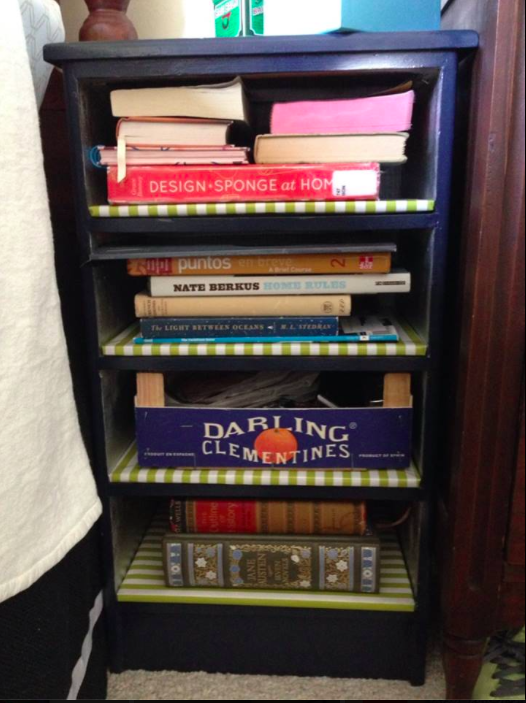
With a little (okay, a lot; okay, he did it all) help from my dad, boards were cut to easily slide into the dresser as shelves instead of the drawers. I covered them in some wrapping paper I had laying around and reinforced the edges with clear packing tape--a great little trick to keep the edges from getting banged up, which you can't see unless getting very up close and personal! You can see where I was running out of paper and turned the stripes the opposite direction on the last shelf. Gives a little personality :)

Screen Shot 2015-08-15 at 6.13.18 PM

Then I filled it with books! And a clementine crate, which fit perfectly, to hold odds and ends.

Screen Shot 2015-08-15 at 6.10.44 PM

And that was that! I loved this makeover because I only used things I already had (read: free!), and it was so quick to do--and so functional! Here it is in situ in my old Charlottesville room:

Screen Shot 2015-08-15 at 6.26.32 PM

What about you? Do you have any successful furniture makeovers? Contact me here or let me know in the comments below--I'd love to share them on the blog!

Personal Shopper: 15 Area Rugs for $300 or Less

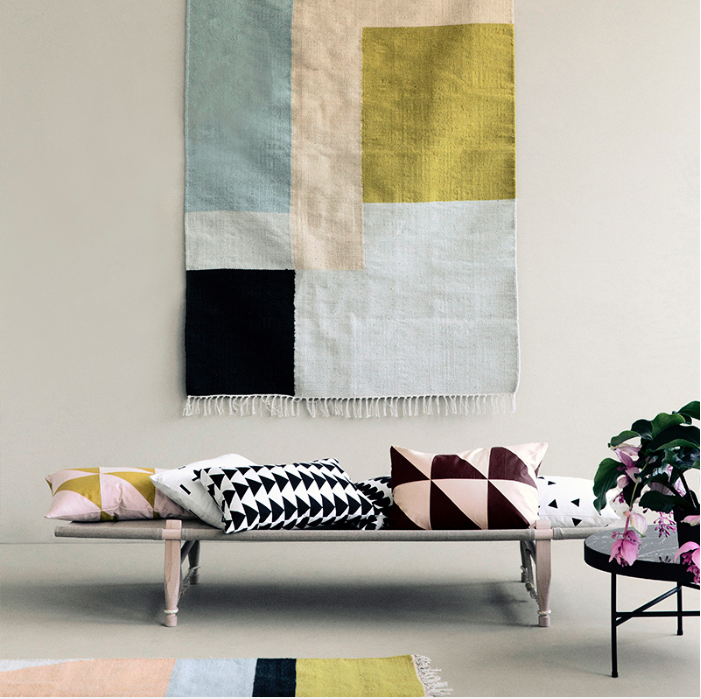
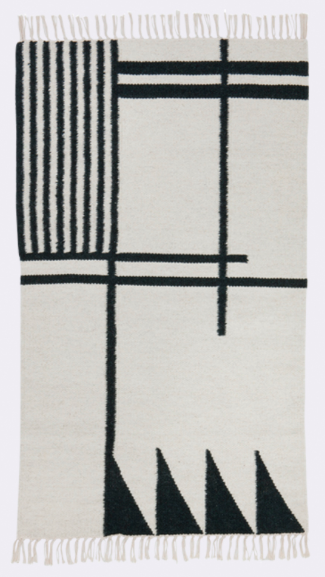
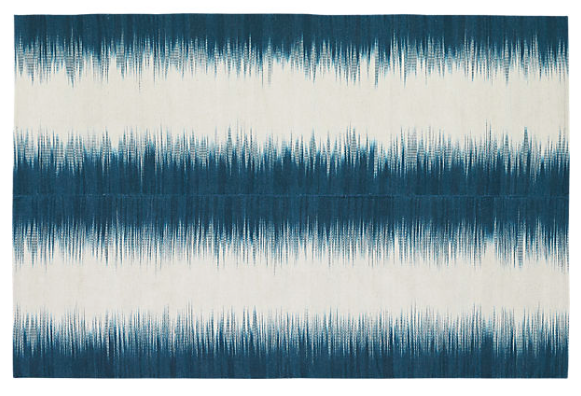
After the post on my studio's rugs, I received several very sweet notes wondering where to find rugs on a budget. This is a tough one because, on one hand, carpets can easily get destroyed, which makes investing in them a hard bite to swallow. On the other hand, a beautiful, well-made rug is a purchase that can travel from apartment to apartment for years--that's how I look at mine, anyway. Regardless, here's a round up of some of my favorites that don't break the bank! Color blocked rug (4'6 x 6'6 is about $268) by Ferm Living featured in this great post by Remodelista. Also comes in a smaller size.

Screen Shot 2015-08-04 at 12.15.11 AM

Black and white, comes in two sizes (2'6 x 4'6 is about $126). Check out more, similar options from Ferm Living here.

Screen Shot 2015-08-04 at 12.19.48 AM

Great graphics (and dark background hides dirt!)... also comes in inverse colors and other sizes. Urban Outfitters; 8' x 10' is $199.

Screen Shot 2015-08-04 at 12.24.18 AM

Urban is #winning. Also comes in other color ways and sizes; 4' x 6' for $59.

Screen Shot 2015-08-04 at 12.27.14 AM

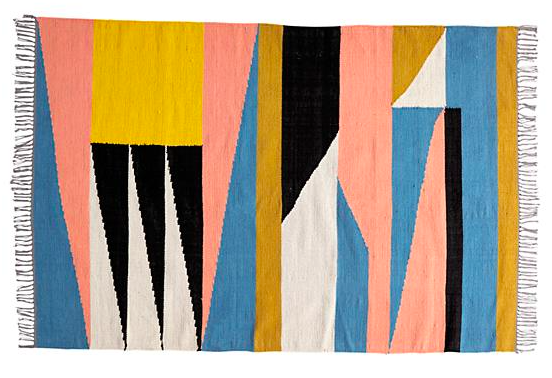
More color blocking from Urban Outfitters; 5' x 7' is $99.

Screen Shot 2015-08-04 at 12.30.30 AM

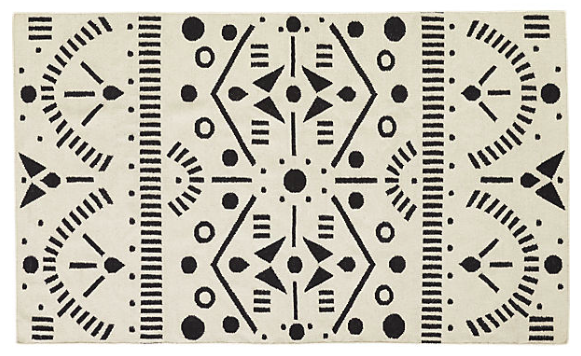
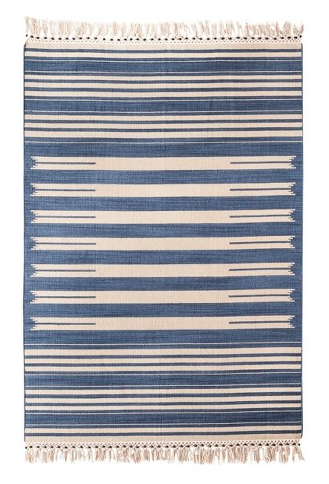
This colorful tribal flat weave from Urban is $189 for the 3' x 5', and a bigger size is also available.

Screen Shot 2015-08-04 at 11.17.24 AM

A classic from IKEA; 5'7 x 8'10 for $199. (When shopping for IKEA rugs, I've found the better quality ones are their flat weaves, not low pile.)

Screen Shot 2015-08-04 at 12.33.40 AM

From Hawkins New York; 4' x 6' is $300 and is available in more, equally fantastic colors and sizes:

Screen Shot 2015-08-04 at 12.38.06 AM

Love this black and white from Bed, Bath, & Beyond. A 5' x 7' is $160; it also comes in other sizes.

Screen Shot 2015-08-04 at 12.45.23 AM

Colors from Land of Nod (yes, that's a children's store!); 4' x 6' is $129.

Screen Shot 2015-08-04 at 12.49.58 AM

Another Land of Nod find; 4' x 6' for $99 and other sizes are available.

Screen Shot 2015-08-04 at 12.55.20 AM

On sale now at West Elm! 5' x 8' is $150; other sizes available.

Screen Shot 2015-08-04 at 12.53.57 AM

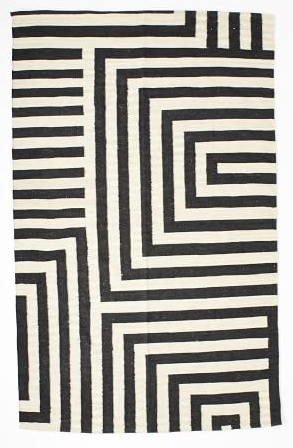
More B&W from CB2, 5' x 8' for $249.

Screen Shot 2015-08-04 at 12.58.59 AM

Vibin', also from CB2 (also comes in black). 6' x 9' for $249; a runner is also available.

Screen Shot 2015-08-04 at 1.00.22 AM

Target for the win with this 5' x 7' for $120.

Screen Shot 2015-08-04 at 1.05.23 AM

Have you found any great rug options? Tell me here or in the comments below!

Bedding Facelift

I love my white bedding (as I mentioned in this post), but it's a little dingy. Okay, it's more cream than white now. Understandably so--I've had it for maybe ten years, including all of college?! Yikes. My college room:

Screen Shot 2015-07-15 at 12.22.16 AM


New city, same cover:

Screen Shot 2015-07-15 at 9.10.13 AM

It's worn-in in that wonderful way that only constant use and many washes can produce, and for that reason I've been putting off replacing it... but I think the time has come for a fresh cover.

Screen Shot 2015-07-15 at 9.03.41 AM

Screen Shot 2015-07-15 at 9.06.51 AM

I'd like to keep the bed white for a multitude of reasons: calming, crisp & clean looking, blank canvas for patterns elsewhere. I love the pattern in the coverlet here:

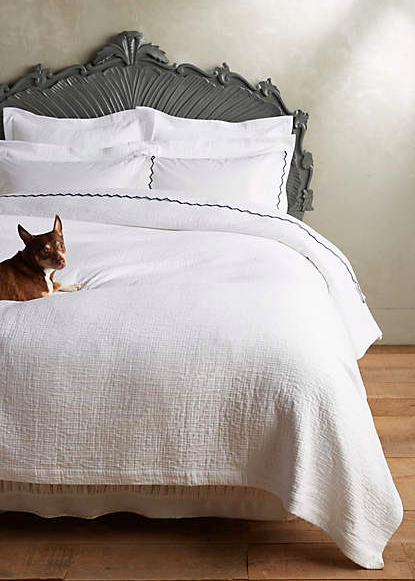
Isn't this setting just to die for?! I'm imagining  a duvet cover in the pattern of those front throw pillows. And the wavy white shams... adore.

Amazing pom-poms:

Quite similar to this cover from Urban Outfitters:

So calming.

I really love the pattern in my coverlet now and have had the hardest time finding something similar.

Screen Shot 2015-07-15 at 9.07.50 AM

It's neither too geometric nor too floral, but still feminine. This cover that I have now is a matelasse, meaning that it looks like it's quilted or padded but actually isn't, and it's nice and lightweight... but I could switch to a duvet, too.

I've been mulling over a few options, like this one on eBay (free shipping and 60-day returns?! I can handle that):

Screen Shot 2015-07-15 at 12.28.03 AM

Simplicity from Anthropologie:

Screen Shot 2015-07-15 at 12.31.18 AM

Another very simple spread (and close up) from Anthro:

Screen Shot 2015-07-15 at 12.33.19 AM

Screen Shot 2015-07-15 at 12.34.09 AM

Do you have any sources for bedding?? Let me hear them in the comments below!
DIY: Extension Cords

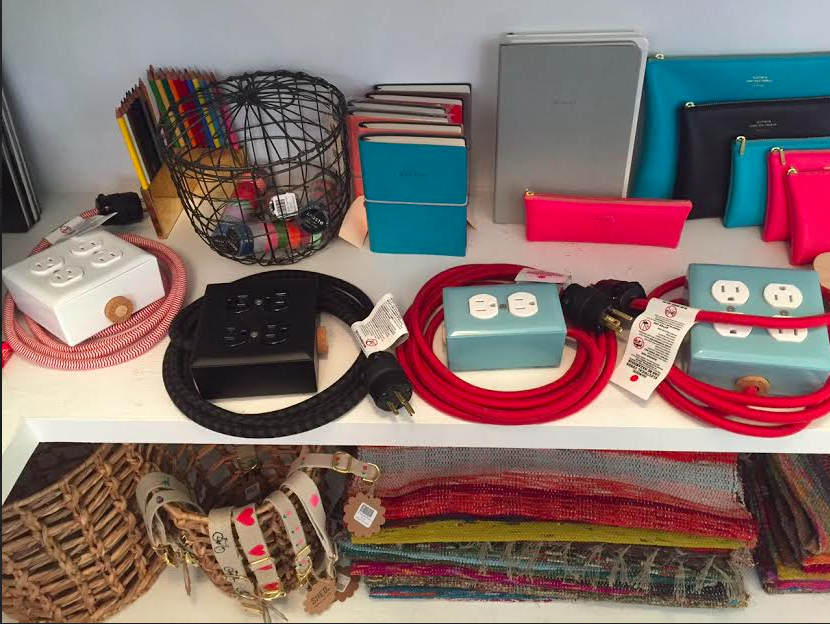
Hello and happy weekend! A few weeks ago I was in a new store in Brooklyn Heights called Collyer's Mansion (named after the compulsive hoarding Collyer brothers), where I saw these fantastic and oh-so-functional extension cords: Screen Shot 2015-07-10 at 6.04.51 PM
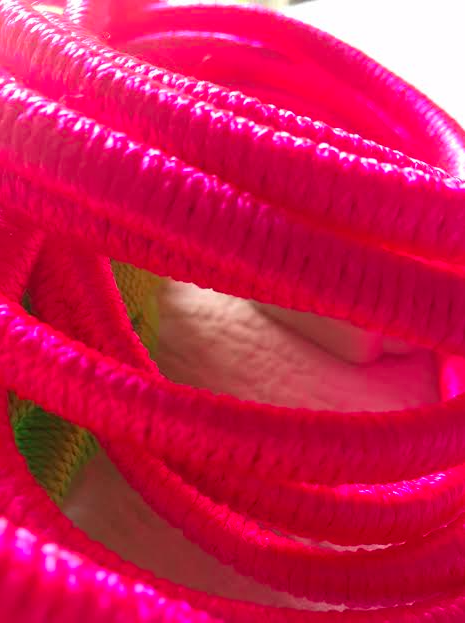
So much better looking than any other extension cord I've ever seen! The cord itself is wrapped with string/thread which makes it less prone to tangles. I just love when everyday, necessary pieces are made beautiful.
Screen Shot 2015-07-10 at 6.04.58 PM

I immediately thought of the unsightly cords running through my apartment and had one of those "I could make that" moments. So I did, and here's how.

You'll need:

  • extension cord
  • string
  • scissors
  • binder clip
  • tape (I used gray washi tape, but regular Scotch would do)
  • patience :)

I had this neon string leftover from Christmas decorations that I had picked up at my local hardware store, and what could be better than a jolt of neon green for a little pick-me-up on such a pedestrian object?! Below are options in neon-y colors, but most any string would work for this project, like crochet yarn or standard package string. Good to keep in mind that thicker string wraps more quickly than thin--but I would advise against going too thick because it gets bulky.

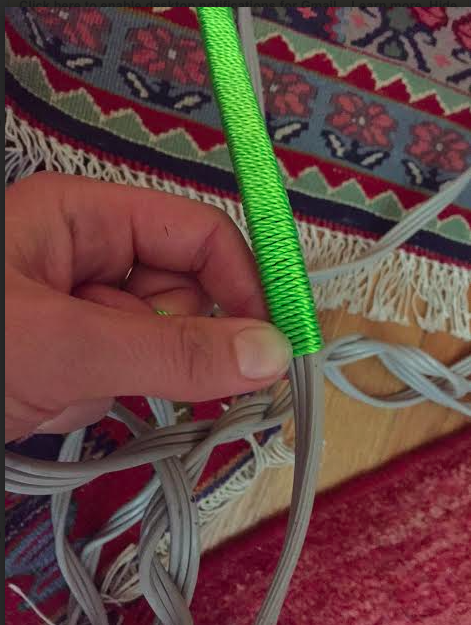
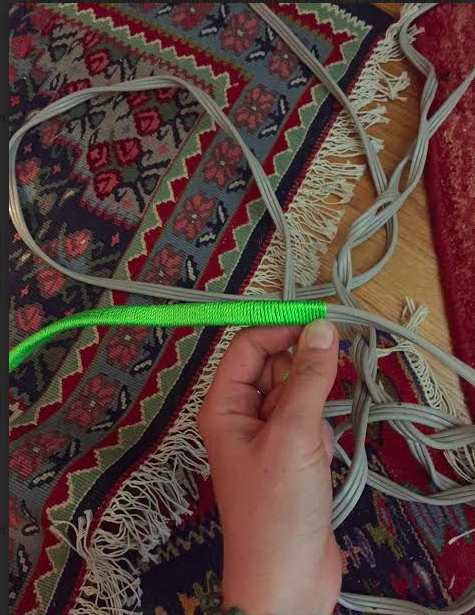
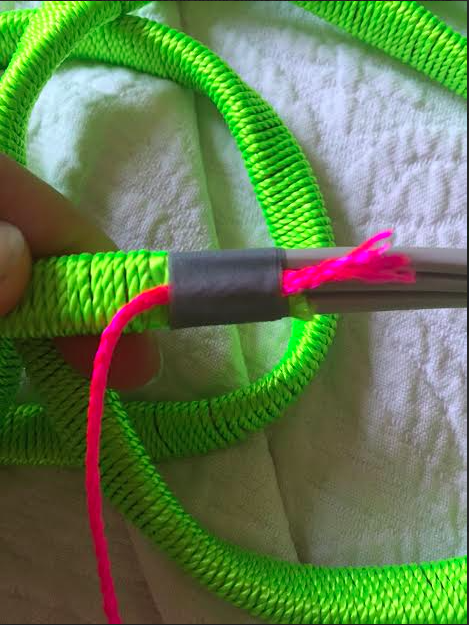
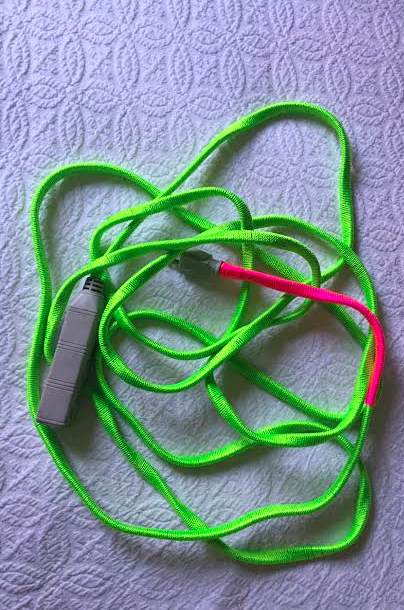
I began by laying about an inch of string flush on the cord, cut end towards the expanse of cord to be wrapped, and started wrapping from the end with the plugs (I don't have pictures of this step--oops--but see below where I overlap with pink string. It's the same process!). I made sure to keep the wrapping tight and close together.

Screen Shot 2015-07-10 at 6.05.12 PM

The hardest part was keeping the string from knotting on itself, but patience is key! I found that wrapping the cord once then pulling the ball of string through and around, and repeating over and over like that, worked the best to avoid tangles (and hair pulling frustration).

Screen Shot 2015-07-10 at 6.05.06 PM

It took a few hours, but it was strangely soothing--and addicting--to see how far along I could get. I found myself picking it up for a few minutes here and there, like how one might with knitting or other handiwork. When I wanted to take a break, I secured the string in place with a little binder clip to prevent unraveling until I picked it up again.

Screen Shot 2015-07-10 at 6.05.43 PM

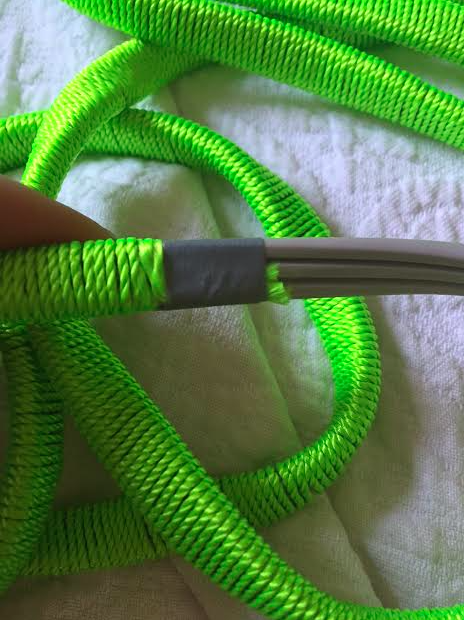
At the end, I ran out of green and decided to switch it up with hot pink to finish it off. First I cleanly cut the green string and taped it to the extension cord using matching gray washi tape that I happened to have on hand:

Screen Shot 2015-07-10 at 6.05.49 PM

Then I laid the new color on top and taped around it. I made sure that the tape was smooth to have a seamless transition and to keep it from being too bumpy.


Screen Shot 2015-07-10 at 6.05.57 PM

Then I kept on wrapping! (Like I mentioned, this is the same process as starting in the beginning.)

Screen Shot 2015-07-10 at 6.07.30 PM

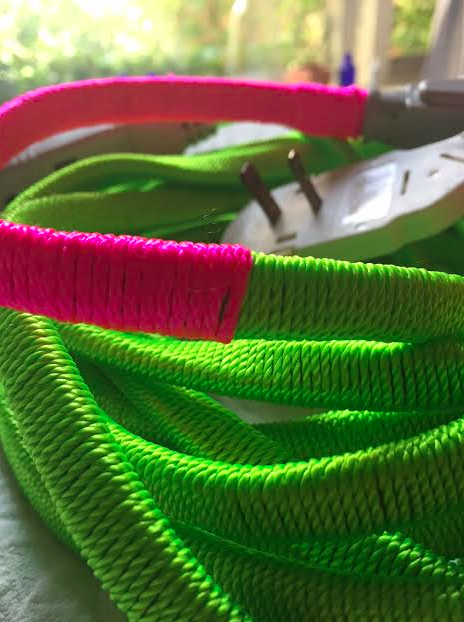
When I got to the end, I taped the pink off, like I had with the green earlier, and wrapped over it again. I didn't cut it until the end, when I knotted it multiple times to keep it from coming undone. You can see where the end is doubled over:

Screen Shot 2015-07-10 at 6.06.16 PM

Screen Shot 2015-07-10 at 6.06.03 PM

By ending at the plug-in part (my extension cord vocabulary is lacking...), the tie-off isn't as noticeable because it's hidden when it's plugged into the wall.

Ta-da!

Screen Shot 2015-07-10 at 6.05.28 PM

Screen Shot 2015-07-10 at 5.19.36 PM

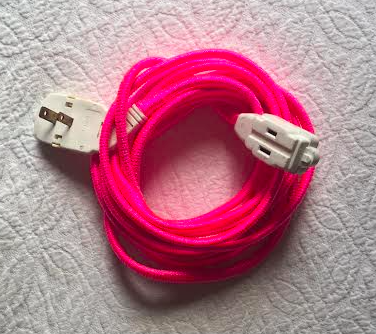
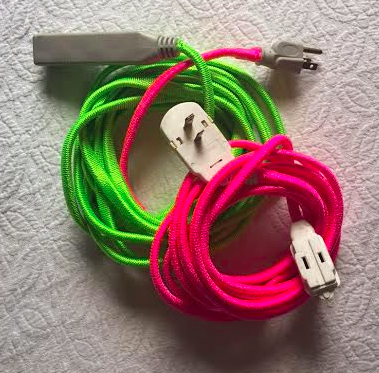
And since I had all that string left, I decided to do another cord!

Screen Shot 2015-07-10 at 5.19.26 PM


Screen Shot 2015-07-10 at 6.07.19 PM


Screen Shot 2015-07-10 at 5.19.51 PM

Nothing groundbreaking, but I love the little details. And I think a little neon here and there is fun in any space. I find that neon can be thrown in with most any color scheme just because it's so crazy. And much better than the utilitarian extension cords from before, don't you agree?

Screen Shot 2015-07-10 at 5.32.01 PM

Screen Shot 2015-07-10 at 6.07.24 PM

Screen Shot 2015-07-10 at 6.07.08 PM


Have you tried this DIY? Would you like to see another DIY on The Spoonful? Let me know in the comments below!