Painted Bookshelves

There are few things I love more than a great set of bookshelves... unless the interior of said bookshelves has been painted in some gorgeous color. Here's what I mean: 

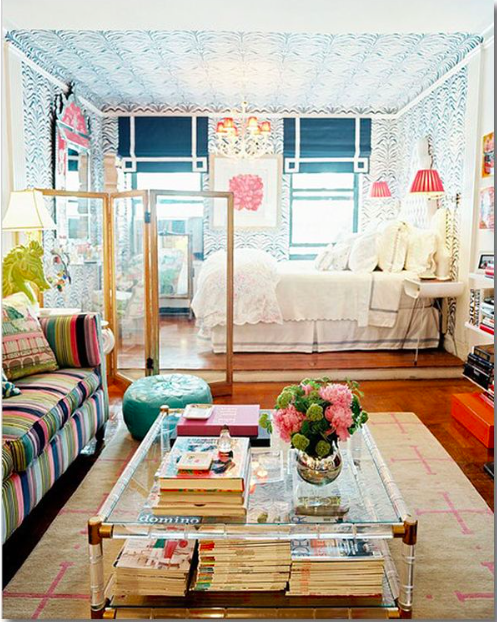
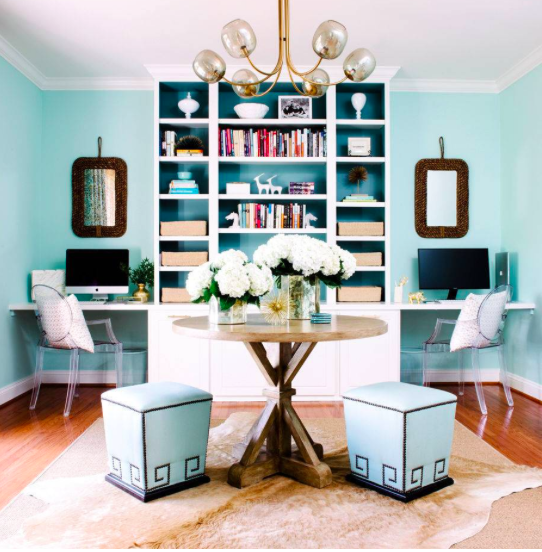
I love how the blue of these shelves' interior (via domino, pinned here) is a few shades darker than the wall color (also seriously loving that hide rug). 

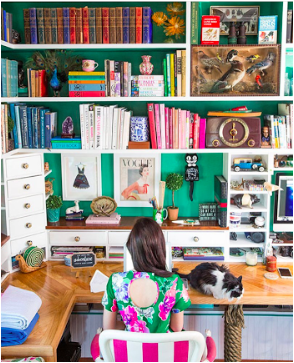
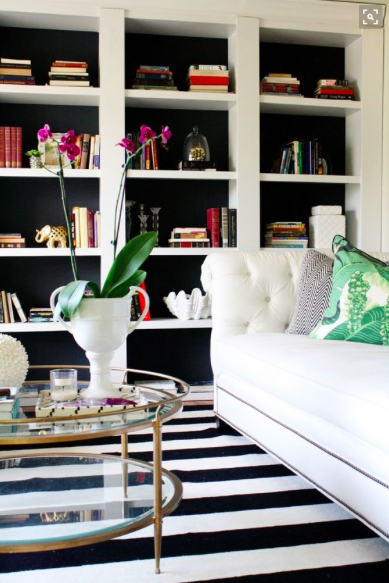
This red! I like how the rest of the room is pretty low key so the red insides can really make a statement (via Architectural Digest by Steven Volpe, pinned here), but other red accents throughout the room (pillows, dress in photograph) tie it all together. 

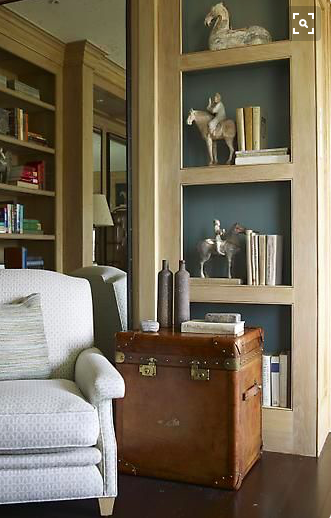
Here's a simple favorite (by Steven Gambrel and pinned here from this blog). Such a beautiful shade of blue for the shelves' backs, and the leather chest is a beautiful complement. And those antique horses! Amazing.

This post from Crane Concept (pinned here) walks through how to DIY these built-ins. The black paint here makes the shelves look like they go on to infinity (and beyond)--a great optical illusion. (The rug is killer, too... see this post for where to find an affordable option for yourself!)

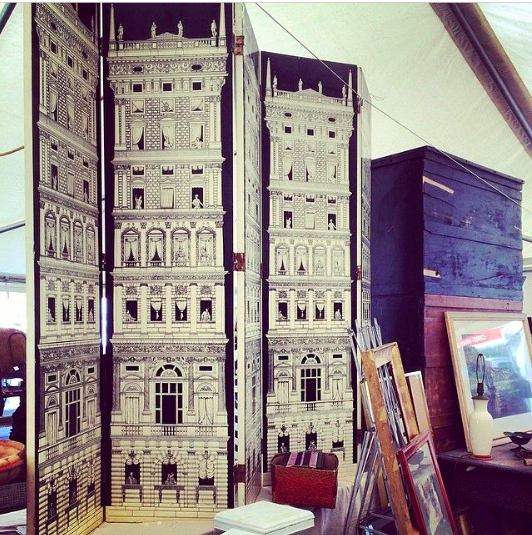
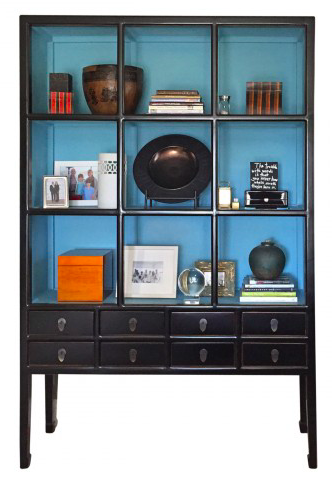
This idea is also really effective and gorgeous in stand-alone shelves. Antony Todd, a wonderful space on 11th and University, has these amazing shelves that I drool over every time: 

This beautiful display cabinet was for sale on Viyet-- it has since sold, sadly, but inspirational all the same! DIY, anyone??

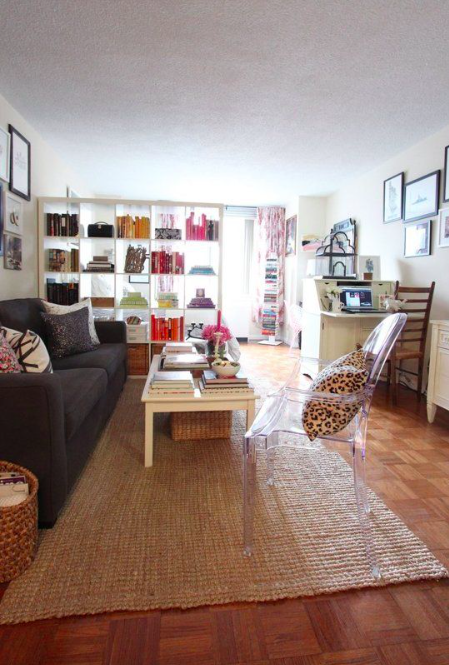
And then, of course, there's the wallpaper-backed route. I'm particularly obsessed with the island vibe in this image (via PS I Made This with a video outlining the process here):

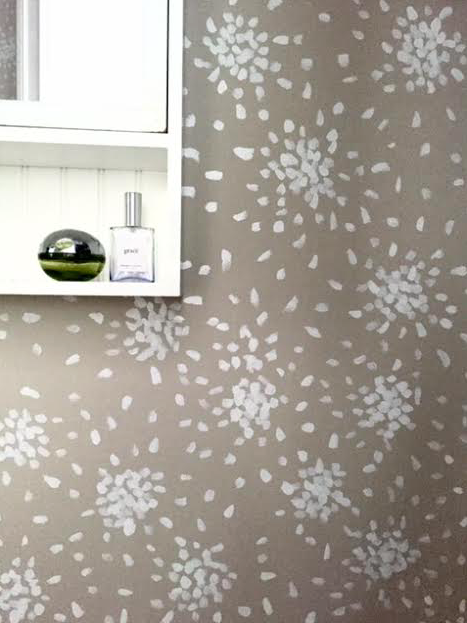
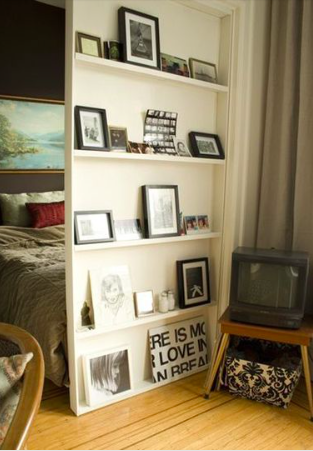
This wallpaper is always a favorite, especially when it's tucked in somewhere unexpectedly, like here (via Apartment Therapy and pinned here):

Here's that tropical vibe again... loving it (via Cup of Jo and pinned here):

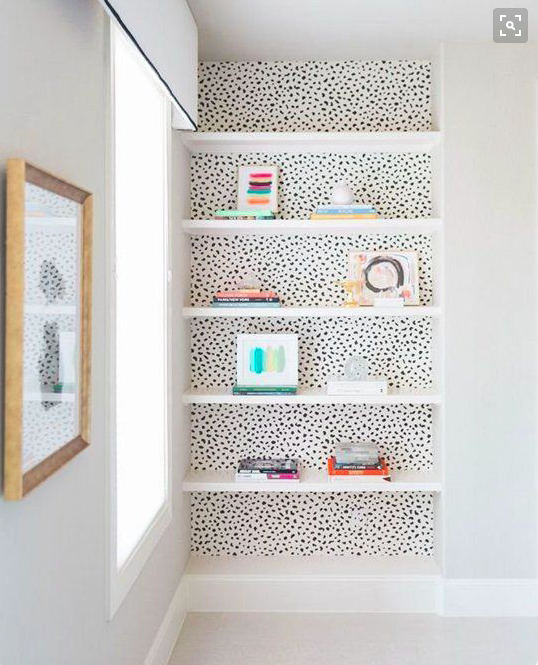
This can be a great DIY, too! In high school, my dear mother and I actually "wallpapered" the back of my built-in bookshelves with wrapping paper... but that's another story for another day :)

Have you ever  painted the backs of your shelves? Have you seen any especially beautiful examples of someone who has? Let me know in the comments below!

Throwback DIY: Albert Hadley Walls

Many, many years ago, before I even knew the name Albert Hadley, I pinned this image of a bathroom wallpapered in a print ("Fireworks") by the design great: Screen Shot 2015-10-25 at 3.39.02 PM

A quick design history lesson... Albert Hadley was one half of the design company Parish-Hadley--"the erudite yang to Sister Parish's freewheeling yin," as Architectural Digest describes him here--who brought about wonderful things in the world of interior design. His clients included the Rockefellers, the Astors, and the Kennedys, to name a few, and his signature lay in creating a comfortable room with some punchy kick to keep things interesting. Though Mr. Hadley passed away a few years ago, his legacy lives on in many ways--including this wallpaper!

One college summer, I decided my lime green bathroom needed a facelift (really wish I had a "before" photo!), and, remembering that great image, I decided to do a little Hadley-inspired DIY.

Screen Shot 2016-01-18 at 10.48.41 PM

First things first: paint the walls. I picked a sandy off-white neutral; this bathroom gets very little sunlight so I made sure to choose a light color, without feeling too sterile.

For the "fireworks," I picked a high-gloss white, the whitest white; the glossiness helps the white stand out against the sandy background color. Once the wall color was good and dry, I mapped out my pattern lightly with a pencil, taking care to space the fireworks correctly. This is one of those steps that takes a long time but makes such a difference and actually saves time--and headaches--in the end!

Then I got to work! I found it important to have enough paint on the brush each time so that the fireworks didn't look too painterly (a look I often love but not here).

Screen Shot 2016-01-18 at 10.48.27 PM

Screen Shot 2016-01-18 at 10.48.33 PM

I'm still so pleased with the result, even several years after completing the paint job. And it was absolutely more budget-friendly than installing genuine Albert Hadley wallpaper! Maybe one day...


Unleash the Pollock Within

When I decided to move into a studio, I knew I would need to finagle a divider to define the spaces. It's nice both for myself and for guests to know the living space from the private or sleeping space, even though there's no wall between the two. entry left wall

Remodelista blogged about a few ideas here, and Buzzfeed has an article here. Here's some inspiration that I played with, too:

This room is just fantastic, packing a double punch with the dividers by using both curtains (attached on only part of the ceiling and not meant to be fully closed) as well as the screen/plant combo. Those herringbone floors... I could move right in.

Screen Shot 2015-07-21 at 1.34.34 AM

Another screen. Wouldn't that be a fun DIY??  Screen Shot 2015-07-21 at 1.37.47 AM

I love this screen because it doesn't obstruct the view or, more importantly, the light, but cues the separate parts of the room. (The rest of the image is a little froo-froo for my taste but how crazy is that wallpapered ceiling?!)

Screen Shot 2015-07-21 at 1.39.18 AM

Bookshelves are a fantastically functional use of space... especially airy ones like these that let light come through:

Screen Shot 2015-07-21 at 1.38.33 AM

Here's an example of very thin, narrow shelves that act as a divider:

Screen Shot 2015-07-21 at 1.38.57 AM

Great curtains (can you spy the Jielde lamp, like I talked about in this post??):

Screen Shot 2015-07-21 at 1.38.19 AM

Another curtain divider here:

Screen Shot 2015-07-21 at 1.37.29 AM

I considered all of the above ideas before settling on the curtain, which I like because it's lightweight, lets sunlight through, and doesn't distract too much  from the rest of the space. I didn't have the perfect spare curtain lying around, so I decided to make one myself. Keeping in mind something simple, light, neutral, but with a bit of glam, I thought a Pollock-inspired divider would be simple, quick, and  have just the effect I was after.

Screen Shot 2015-07-21 at 2.02.55 AM

I grabbed a clean, white, flat bedsheet from my mother's linen closet, some gold paint, and a paint brush. After laying the sheet out, I commenced to splattering. To figure out how best to splatter the paint, I studied a few photos of Pollock while working:

Screen Shot 2015-07-21 at 1.59.34 AM

Screen Shot 2015-07-21 at 2.01.36 AM

I liked how his pieces have both the drip drops of paint, as well as the longer lines that have been flopped down with the flick of a wrist.

Screen Shot 2015-07-21 at 2.06.15 AM

Because I wanted plenty of light to shine through, I leaned toward more background, less paint, like this of Pollock's:

Screen Shot 2015-07-21 at 2.06.59 AM

I also studied how Pollock made his paintings into fields ("field" refers to a painting, surface, expanse, etc that has no distinction between figure and ground), like these:

Screen Shot 2015-07-21 at 2.07.24 AM

Screen Shot 2015-07-21 at 2.07.11 AM

... and tried to do the same in mine by avoiding having either clusters of paint or expanses of white, as in this "during" photo of my own:

Screen Shot 2015-07-21 at 2.14.14 AM

And finished:

Screen Shot 2015-07-22 at 12.46.54 PM

Then I hung it up by attaching a heavy duty wire into the wall with screw-in hooks from the hardware store:

Screen Shot 2015-07-22 at 12.47.16 PM

Later, I added a little black velvet trim to the edge to finish it. I would definitely recommend doing this before hanging up the curtain, but fabric glue got it to stick (would've been much easier if the sheet were lying horizontally instead of vertically!):

Screen Shot 2015-07-22 at 12.47.07 PM

Now I need a chic little tieback and I'll be set! Stay tuned for a DIY on that to come :)

Screen Shot 2015-07-15 at 9.06.51 AM


Screen Shot 2015-07-22 at 1.08.50 PM

Screen Shot 2015-07-22 at 12.47.25 PM