DIY: Tapestry Turned Pillow

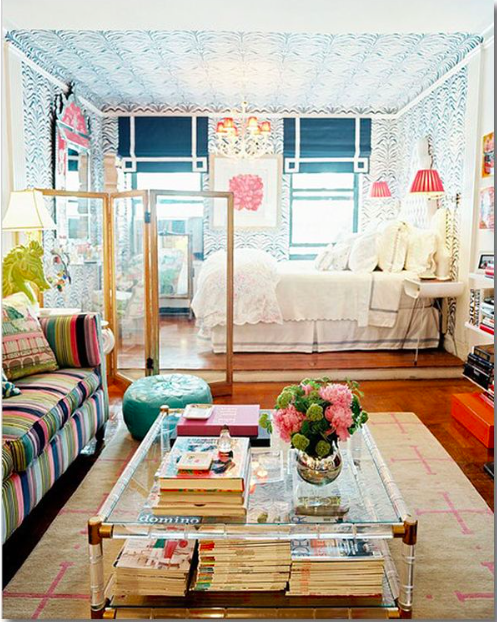
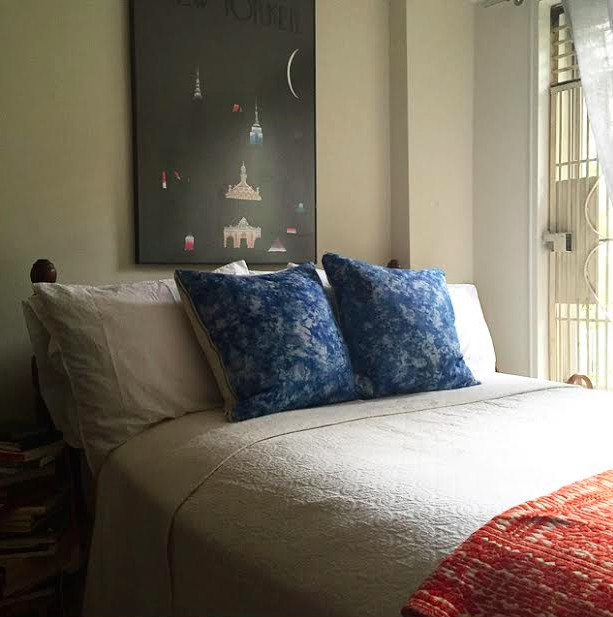
A few lovely readers asked after the big pillow on my Charlottesville bed (as seen in my posts on the tiny shelf makeover and the postcard wall).

Screen Shot 2015-08-15 at 6.26.32 PM

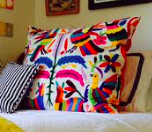
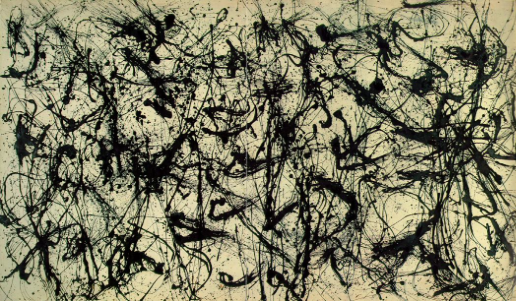
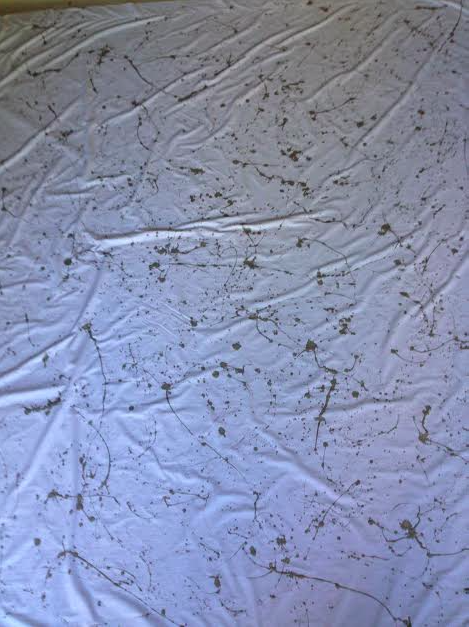
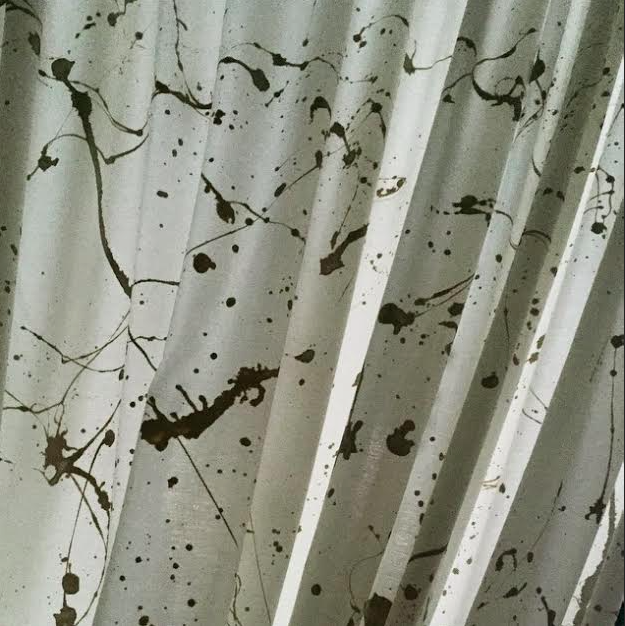
Isn’t it great?! In high school I picked up this old tapestry from a local flea market, then tucked it away in the depths of a closet where I found it a few years into college. I thought about putting it up on a wall, but what I really needed was a big pillow. Some inspiration...

I pinned this forever ago from Domino magazine:

Screen Shot 2015-08-23 at 3.26.41 PM

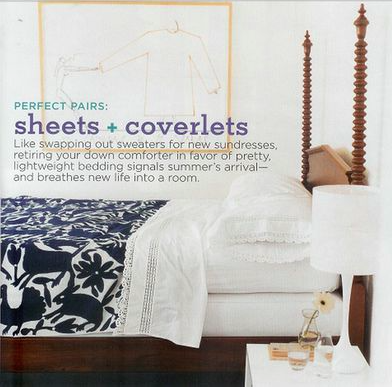
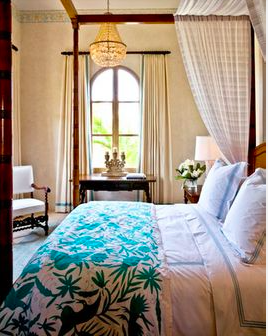
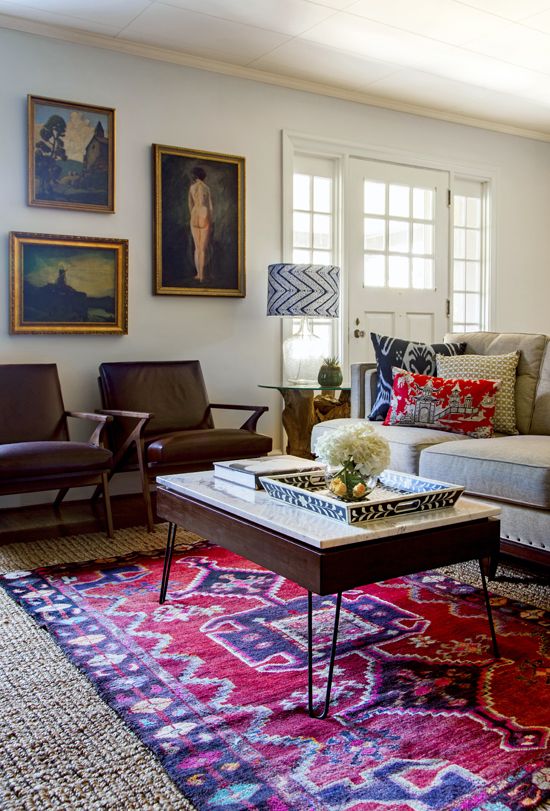
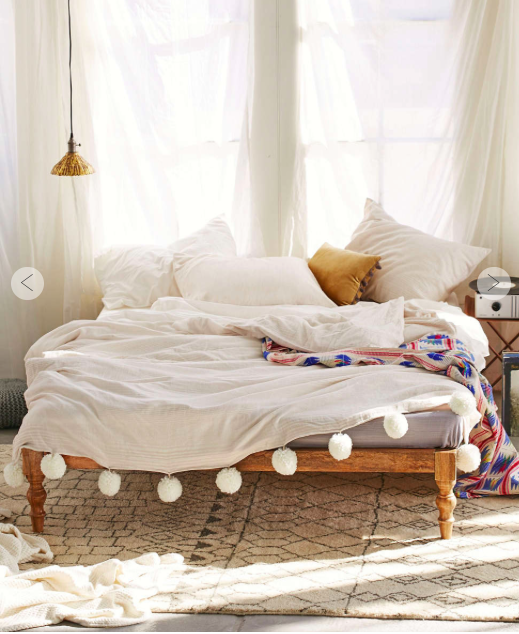
Great teal bedspread from a post on House of Turquoise:

Screen Shot 2015-08-23 at 3.27.29 PM

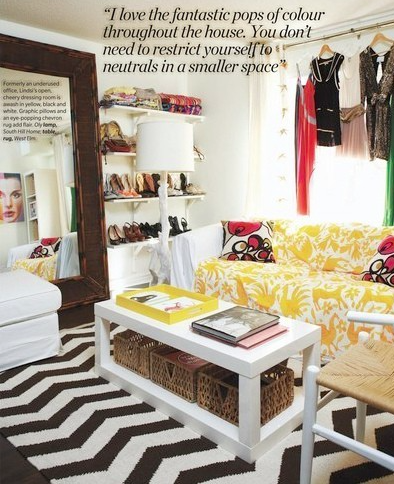
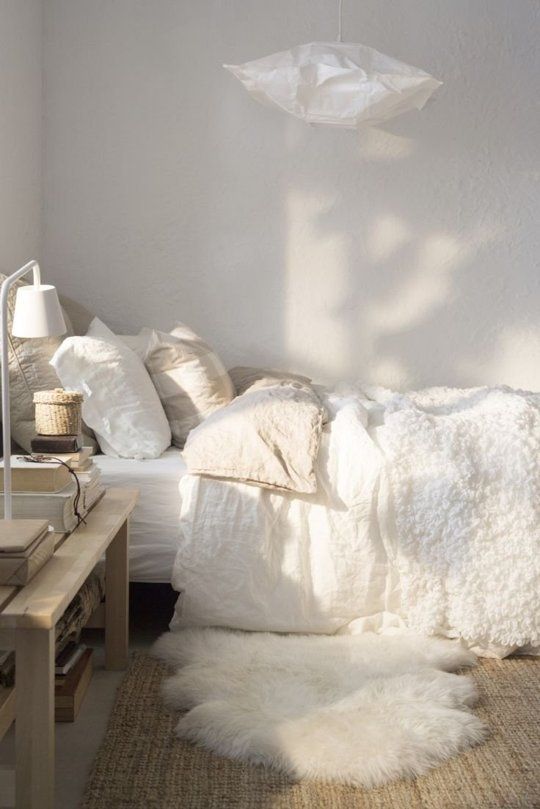
Love this as a cover for a sofa, too (via the blog Honey & Fitz):

Screen Shot 2015-08-23 at 3.28.21 PM

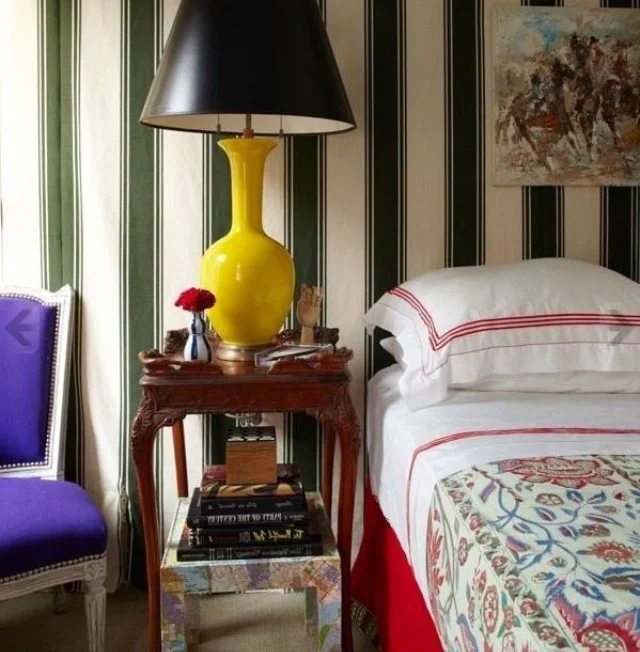
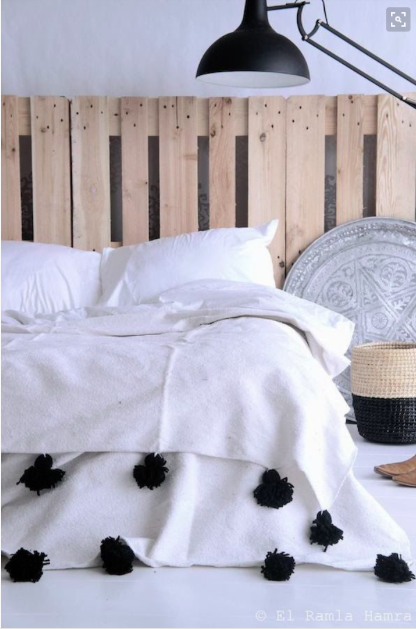
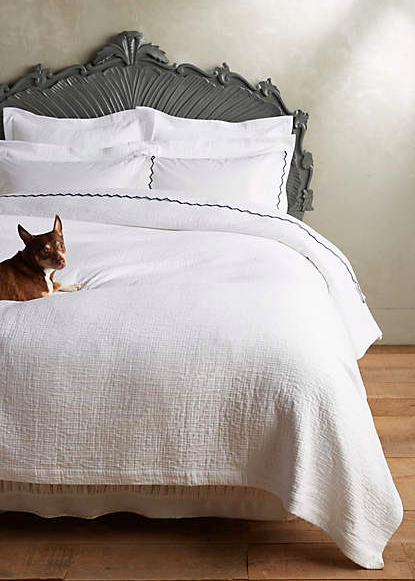
This headboard is from the bedroom of Grace Bonney (of the great blog Design*Sponge):

Screen Shot 2015-08-23 at 3.29.14 PM

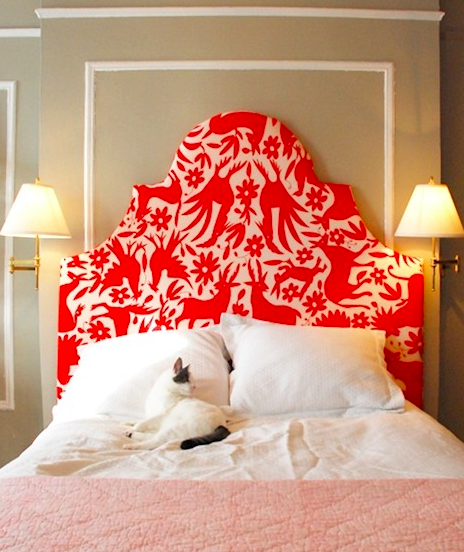
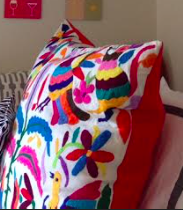
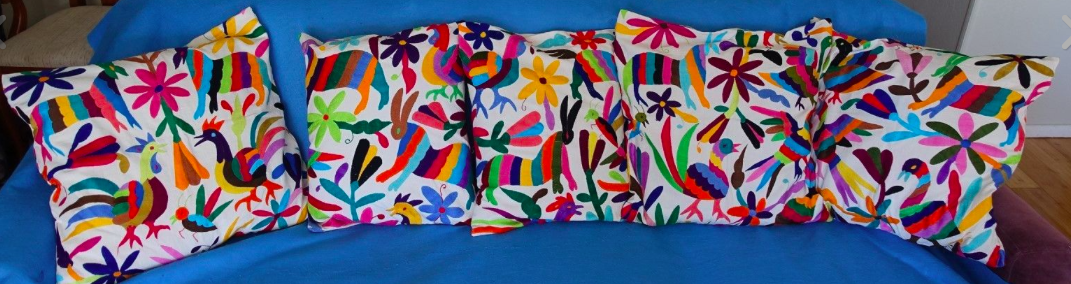
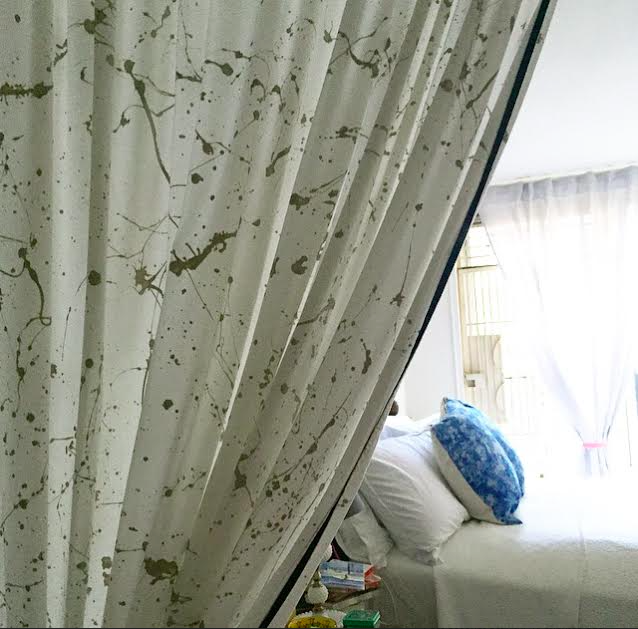
After a bit of research, I learned that this type of textile is made by the Otomi people in the Mexican state of Hidalgo. There are so many options other than simply textiles: dresses, purses, you name it. And purchasing from certain sources also benefits the tribe--doing good deeds while beautifying a room!

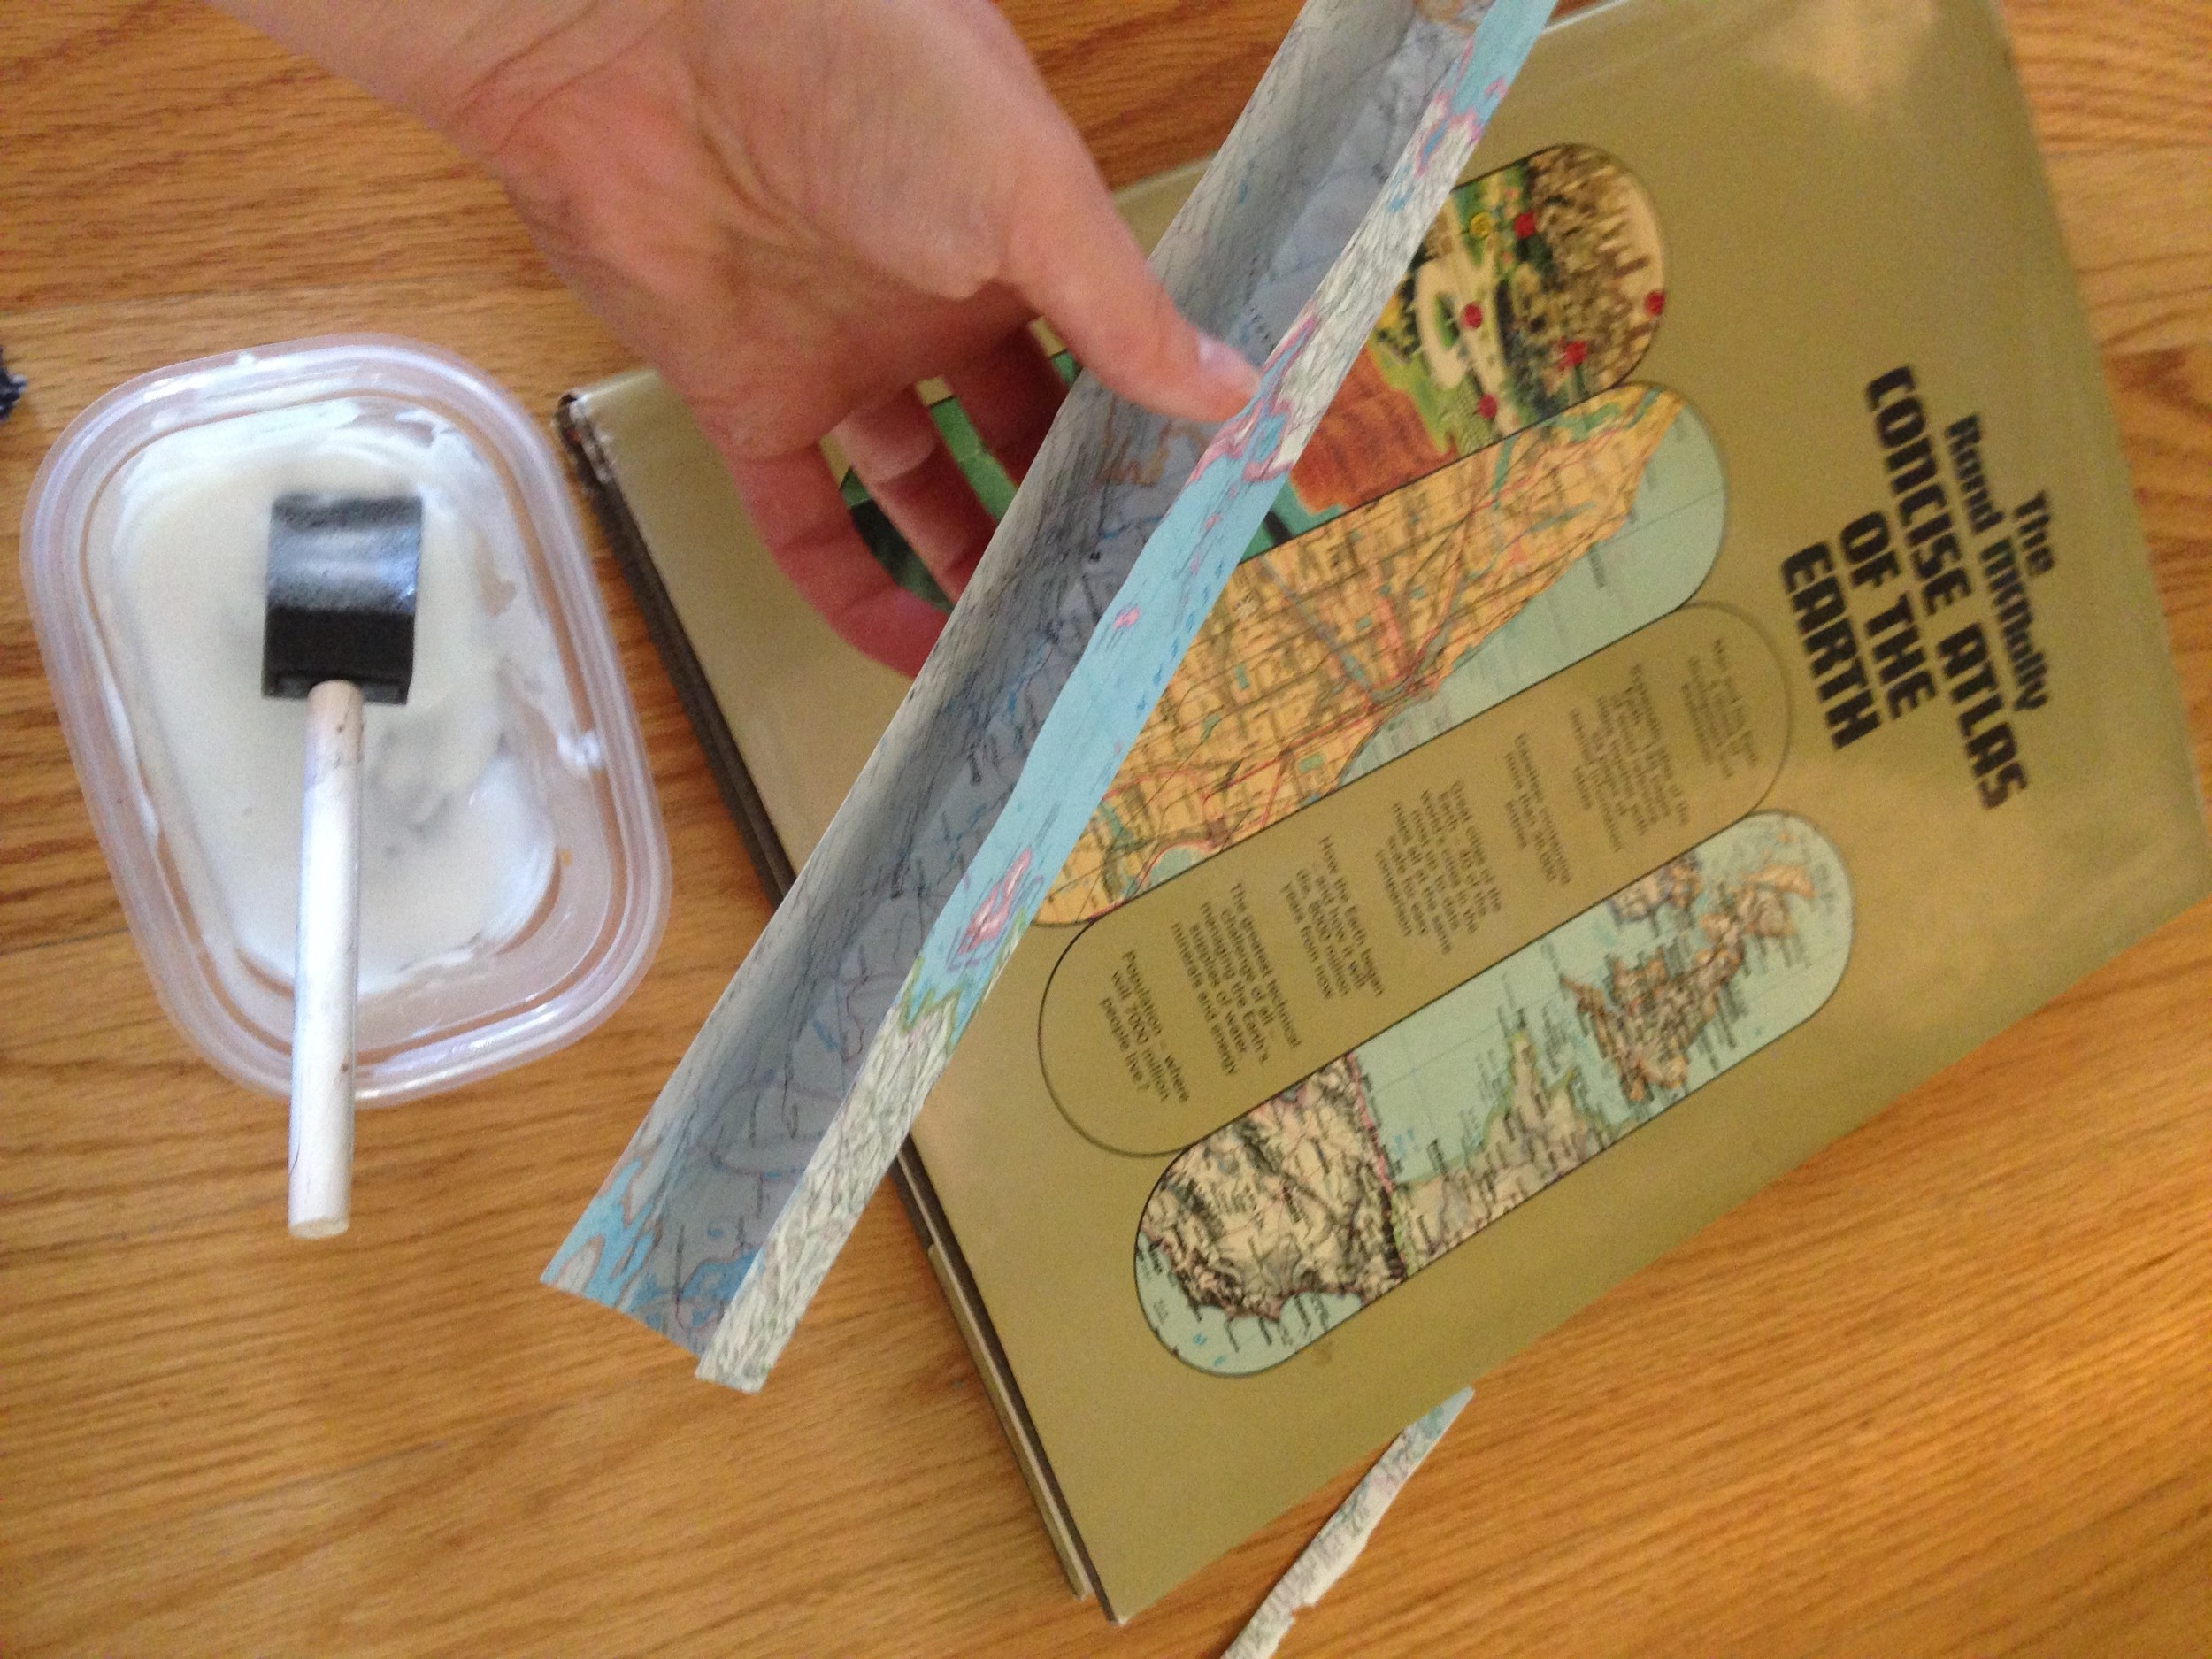
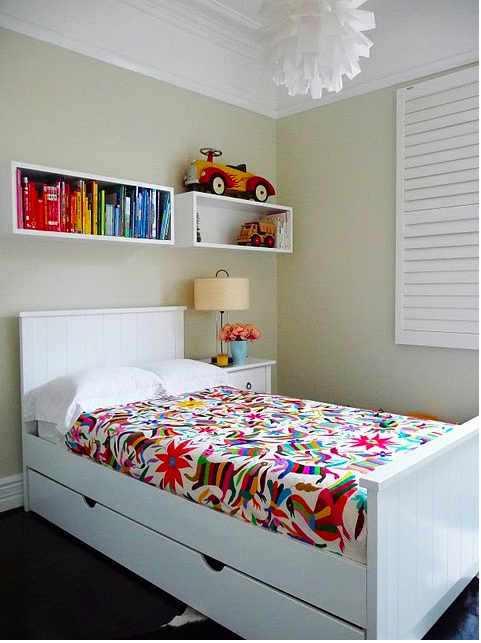
Because I had a pretty neutral background (white bedspread and sheets, wood furniture, white walls), I thought this color-charged tapestry would give me just the right happy feel that I wanted in my room. I enlisted my dear mother to turn the tapestry into a pillow by sewing on a big piece of red duck cloth that we had on hand as the back and stuffing it with cotton.

Screen Shot 2015-08-23 at 3.25.10 PM
Screen Shot 2015-08-23 at 3.24.38 PM

I love projects like this that make such a big difference but are so simple to do—especially when we’re talking throw pillows! This can easily be replicated for small or big pillows, too.

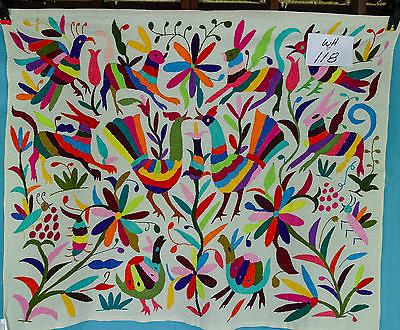
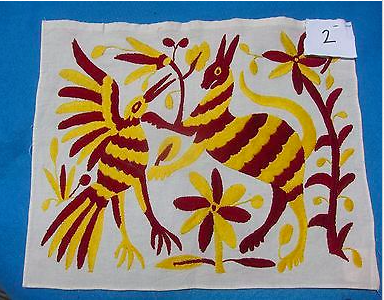
A friend of mine was thinking of doing something similar in her new apartment, so I did a quick eBay search for Otomi tapestries where I found some great options, like this wall hanging:

Screen Shot 2015-08-24 at 1.44.13 PM

Another wall hanging, very much like mine:

Screen Shot 2015-08-24 at 1.45.10 PM

Placemat--could be made into a small pillow:

Screen Shot 2015-08-24 at 1.46.15 PM
Screen Shot 2015-08-24 at 1.53.01 PM

Of course, having a sewing machine is largely helpful for this project. Sewing by hand, using small stitches, would also work—just want to make sure that the stitches are set in from the edge of the fabric by about 1" so that the stuffing can’t peek through. (Do I sound like Martha Stewart?? YIKES) In retrospect, I would make an envelope pillow (great instructions from Jenny at Little Green Notebook here) and use a standard pillow insert instead of stuffing.

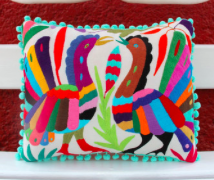
Or, of course, there are options to buy for yourself, like these from the same eBay search:

Screen Shot 2015-08-24 at 1.54.05 PM
Screen Shot 2015-08-24 at 1.55.18 PM

From the etsy shop mentioned above:

Screen Shot 2015-08-24 at 1.56.32 PM
Screen Shot 2015-08-24 at 1.58.28 PM

Just used this gorgeous pillow from Roberta Roller Rabbit in a project and LOVE the yellow tassels:

Screen Shot 2015-08-24 at 1.59.27 PM

Do you have any pillow DIYs you’d like to see featured on The Spoonful?? Contact me here or post in the comments below!

Shoes and Ladders

I have an infatuation with heels (and it's justified: I'm 5'2"!). Though we live in the same city, I do not have Carrie Bradshaw's closet space for them (my apartment = Carrie's closet size... sniff, sniff).

Carrie Bradshaw closet

... if only.

Welp, on to Plan B. This image has been in the back of my mind for years (literally... I think I pinned it right out of high school):

shoes ladder orig pin

... and I had seen other ways that ladders were used for storage:

ladder inspo 2
ladder inspo 2
ladder inspo 1
ladder inspo 1

It's obviously not a novel idea... just last week I was in this fabulous shop in Brooklyn Heights, Collyer's Mansion, and snapped this picture:

ladder inspo 3
ladder inspo 3

I had looked all around for a vintage wood ladder, but they were pricier than I expected/wanted to spend, so I enlisted my long-suffering father for the task. Poor guy is doomed to be my workhorse forever.

I showed him the inspiration image of the ladder with shoes, drew a diagram of what I imagined in a ladder of my own, and the next thing I knew, he whipped this out.

ladder 1
ladder 1

Pretty amazing, right? And so much more special than anything I could've bought.

ladder6
ladder6

We had all the wood in the garage, most of it making up the shipping crates from our return from Saudi Arabia 17 years ago... it pays to be a pack rat! Details like that turn pieces in a room into stories.

ladder2
ladder2

And it doubles as a hanger for satchels and totes!

ladder4
ladder4

Even if the heels are gathering dust (city life and high heels don't mix), I love the vertical aspect of the ladder leaning against the wall. And maybe having them visible will be a reminder to stop buying them... flats are the way to go in this walking city! 

DIY: Atlas Desk

The desk in my studio is one of my favorite DIYs that I've done. I needed something to fill in the vacant space opposite the sofa, and I always find that a surface upon which to stack assorted piles is supremely helpful and necessary.

desk1-1
desk1-1

My parents' storage room is chock-full of all kinds of furniture--lucky for me and not so lucky for dear old Dad who bears the brunt of reorganizing it! I dug around and resurfaced with a 20 year old Ikea-type white and sturdy table on rollers: a blank canvas. Perfect.

I remembered this great image I had seen on my very favorite blog, Little Green Notebook, a few years ago.

deskinspo
deskinspo

Check out that little Parsons side table covered in maps! It's from a room designed by Nick Olsen, who is just fantastic.  He was nice enough to talk to me about the design field when I was in the midst of job hunting and soul searching and gave really helpful insight and tips about getting a foot in the door of the design industry (Thanks Nick!!).

Maps have always been my thing, and I liked the way Nick's side table drew attention and interest without being over the top. Another hunt through storage led to an old atlas book from the 80s, which I commenced cutting up into big, mostly uniform sizes for decoupaging onto the desk. (Smaller pieces would've worked too, but I was a bit pressed for time.) I picked maps from the atlas where I had travelled or lived, or maps that I found to be exceptionally pretty, like the ocean maps that I put on the ends of the table.

diydesk1
diydesk1

Decoupage is terribly simple and there are loads of how-to pages with a quick Google search--or just use the directions on the tub of Mod Podge (I prefer the glossy finish). After making sure the desk was completely clean, I took the atlas pages I had neatly cut and laid out where I wanted them to be placed so that all of the white of the desk was covered, trimming them to fit if necessary. I also kept in mind color themes while doing this: I tried to keep edges all white maps, ends all ocean maps, etc. This made the maps seem a little less haphazard to me. Then, one by one, I brushed on a thorough--but not over-the-top--layer of Mod Podge with a foam brush (I like using these cheap foam brushes when I want to avoid brush strokes), and I coated the surface of the desk on which I planned on applying the page with a layer, too. I think it's helpful to let the Mod Podge dry for a few seconds to get a little tacky, and then I started in the middle of the top (although I probably should've started on the back... less pressure in case I messed up!) and worked out from there, smoothing the pages as I went. I find that less is more when it comes to Mod Podge... otherwise it wrinkles the pages. After each page had been placed, I covered it again with another layer of Mod Podge to seal it and keep any edges from peeling up.

diydesk2
diydesk2

The edges were a bit tricky, but I folded pages to fit around the turns of the piece, making sure I really creased the folds. This needed more Mod Podge to hold, and I found that making the piece a bit bigger made it stay because it had more surface area to hold on to.

diydesk3
diydesk3

I followed the drying instructions on the Mod Podge container and then took the desk outside to spray on a layer of polyurethane... I prefer glossy here, too. (This is optional, but I chose to do it because I knew it would be in a high-traffic spot.) This--horror of horrors!--made everything wrinkle dreadfully! So I covered the piece with a towel and stacked heavy books high to force the wrinkles out, with success. Crisis averted.

diydesk5
diydesk5

That's it! I had a piece of glass cut for the top and have been messing around with the containers, etc ever since. I'd like a proper desk lamp and definitely need to hide those cords. And need a filing cabinet! The list gets longer! To be continued... :)

desk1-4
desk1-4
desk1-3
desk1-3
desk1-5
desk1-5

The Sophisticated Pom-pom

Hello! I'm back! I've kicked off the new year with a few little upgrades in my apartment; here's one of them. Let's back up a few months. When I was searching for ways to squeeze a little more storage space out of my little studio, one solution was to make the most of the under-the-bed storage. This meant simply using bed risers (yes, the same ones from freshman year dorms), which both gives me far more space and makes the bed so high that I all but need a running start to get in. :) Of course, I couldn’t leave that unsightly view uncovered, so I made up a quick and cheap bedskirt.

Screen Shot 2015-07-15 at 9.06.51 AM

The beauty of making my own is that I could have a completely custom cover—it would be very difficult to find a bedskirt that I wanted in that length—for a fraction of the cost of having it made by an upholsterer. I used a painter’s drop cloth, one of my favorite sources for inexpensive, heavy-duty fabric.


Screen Shot 2016-01-13 at 2.30.00 PM

I cut it to size, leaving extra room at the top to tuck in between the mattress and box springs. Then I hemmed it all around to prevent any fraying down the road. I left it just like this for a while; I kind of liked the simplicity. Then I ran across these bedding images and instantly became obsessed with this version of what I like to call a "sophisticated pom-pom":

From Mui Ma:

Screen Shot 2015-12-01 at 10.58.56 PM

So simply lovely. Via L'Aviva Home:

Screen Shot 2015-12-01 at 11.02.11 PM

Other color options available too (here):

Screen Shot 2015-12-01 at 11.03.45 PM

And this from Urban just makes my heart sing:

Screen Shot 2015-12-01 at 11.06.28 PM

I happened to have several samples of this trim (from Samuel & Sons) left over from various projects, which I negotiated to a spacing that I liked; the poms here are about 7" apart. (This city has some terrific trim stores, though: I've had great luck at Mokuba and M&J Trimming, but if you just walk around the garment district--especially 36th to 40th Streets between 6th to 8th Avenues--you'll stumble upon many other gold mines.) The trick for this look is to find BIG pom-poms. I also especially like these because they're not too white; they're actually the same ecru color as the drop cloth. Match made in heaven.

Screen Shot 2016-01-13 at 2.21.34 PM

After spacing them, I simply sewed a few stitches on each to keep it in place and called it a day! From start to finish, this little project took all of 30 minutes, and I am so pleased with the result. The poms just make me smile!

Screen Shot 2016-01-13 at 2.22.04 PM

Screen Shot 2016-01-13 at 2.22.16 PM

Screen Shot 2016-01-13 at 2.21.53 PM

I loved seeing so many of you over the break--and I can't tell you how wonderful it was to hear that you've been reading The Spoonful! So nice and I so appreciate it.

And if you have a DIY you'd like to share on The Spoonful, send it on over!


Trunks for Coffee Tables

One of my favorite pieces in all of the apartments that I've lived in has been this glorious steamer trunk: Screen Shot 2015-11-21 at 1.53.28 PM

It's an old family piece, and I love all of the textures it brings into the room: wood body, metal hardware, leather straps. The best part, though, is that this thing holds A LOT: an air mattress, extra sheets, towels, out of season clothes... you name it. And in this cozy (tiny) apartment, multipurpose furniture is this girl's best friend!

Screen Shot 2015-11-21 at 1.53.38 PM

Screen Shot 2015-11-21 at 1.54.01 PM

Screen Shot 2015-11-21 at 1.54.09 PM

Screen Shot 2015-11-21 at 1.54.36 PM

I've seen the trunk-as-coffee-table idea executed well in many situations. Here's a bit of inspiration...

Love how this room (via CocoCozy) works the deep plum walls and dark floors. And the trunk rocks:

Screen Shot 2015-11-13 at 11.00.15 PM


This vintage Louis Vuitton makes my mouth water (from Interiors Addict):

Screen Shot 2015-11-13 at 10.39.46 PM

And another LV inspiration. SO GOOD!

Screen Shot 2015-11-13 at 11.39.57 PM

It could be yours... to the tune of $24,000 (via 1st Dibs):

Screen Shot 2015-11-13 at 10.45.17 PM

While I'm dreaming, how about this amazing trunk headed to Buenos Aires?!

Screen Shot 2015-11-13 at 10.47.40 PM


This acrylic trunk (as shown on Refinery 29) gives a new spin on the antique trunk idea:

Screen Shot 2015-11-13 at 12.09.09 PM

Here's a similar one on sale at One Kings Lane:

Screen Shot 2015-11-13 at 10.36.03 PM

Vintage trunks like mine run the gamut in pricing. Thrift stores often have them--I've even seen one on the street!--and a little elbow grease can go a long way. The key is to pick one with a flat top (to place a tray, books, drinks on top, of course!) that hasn't fallen too far into disrepair, and it should be a good coffee table height. Around 16-21" is standard, depending on the height of your sofa; a table more than 2" lower than your sofa will feel funky. That said, my trunk is higher than 21" and feels perfectly fine! (If you're looking for the right height for your space, I suggest holding up a measuring tape next to your sofa and visualizing it that way. The table should be high enough to comfortably place a drink or book but not so high that you feel like you're at a dining table.)

A quick eBay search turned up a few inexpensive diamonds in the rough, like this amazing green one:

Screen Shot 2015-11-21 at 2.06.19 PM

And this one. It's about 14" high--a few inches shorter than it should be--but it could have another, smaller trunk stacked on top, or some great coffee table books piled up on top to add height would look so chic too. It needs some good refinishing and some polish on those hinges, but what a great weekend project, amiright?!

Screen Shot 2015-11-21 at 2.05.19 PM

Something about this old trunk makes me want to leave it as-is and embrace its vintage feel:

Screen Shot 2015-11-13 at 11.23.24 PM

For those of you dear readers in the NYC area, here are a few Craigslist options:

Imagine this trunk cleaned up with polished hardware... gorgeous.

Screen Shot 2015-11-21 at 2.03.07 PM

This is a gem:

Screen Shot 2015-11-13 at 11.29.36 PM

Reminds me of this LV orange trunk:

Screen Shot 2015-11-13 at 11.42.55 PM

This definitely needs some love but the possibilities are endless...

Screen Shot 2015-11-21 at 2.01.42 PM

Have you ever used  a trunk as a coffee table? I'd love to see photos--send them over and I'll feature your space on The Spoonful!


Unleash the Pollock Within

When I decided to move into a studio, I knew I would need to finagle a divider to define the spaces. It's nice both for myself and for guests to know the living space from the private or sleeping space, even though there's no wall between the two. entry left wall

Remodelista blogged about a few ideas here, and Buzzfeed has an article here. Here's some inspiration that I played with, too:

This room is just fantastic, packing a double punch with the dividers by using both curtains (attached on only part of the ceiling and not meant to be fully closed) as well as the screen/plant combo. Those herringbone floors... I could move right in.

Screen Shot 2015-07-21 at 1.34.34 AM

Another screen. Wouldn't that be a fun DIY??  Screen Shot 2015-07-21 at 1.37.47 AM

I love this screen because it doesn't obstruct the view or, more importantly, the light, but cues the separate parts of the room. (The rest of the image is a little froo-froo for my taste but how crazy is that wallpapered ceiling?!)

Screen Shot 2015-07-21 at 1.39.18 AM

Bookshelves are a fantastically functional use of space... especially airy ones like these that let light come through:

Screen Shot 2015-07-21 at 1.38.33 AM

Here's an example of very thin, narrow shelves that act as a divider:

Screen Shot 2015-07-21 at 1.38.57 AM

Great curtains (can you spy the Jielde lamp, like I talked about in this post??):

Screen Shot 2015-07-21 at 1.38.19 AM

Another curtain divider here:

Screen Shot 2015-07-21 at 1.37.29 AM

I considered all of the above ideas before settling on the curtain, which I like because it's lightweight, lets sunlight through, and doesn't distract too much  from the rest of the space. I didn't have the perfect spare curtain lying around, so I decided to make one myself. Keeping in mind something simple, light, neutral, but with a bit of glam, I thought a Pollock-inspired divider would be simple, quick, and  have just the effect I was after.

Screen Shot 2015-07-21 at 2.02.55 AM

I grabbed a clean, white, flat bedsheet from my mother's linen closet, some gold paint, and a paint brush. After laying the sheet out, I commenced to splattering. To figure out how best to splatter the paint, I studied a few photos of Pollock while working:

Screen Shot 2015-07-21 at 1.59.34 AM

Screen Shot 2015-07-21 at 2.01.36 AM

I liked how his pieces have both the drip drops of paint, as well as the longer lines that have been flopped down with the flick of a wrist.

Screen Shot 2015-07-21 at 2.06.15 AM

Because I wanted plenty of light to shine through, I leaned toward more background, less paint, like this of Pollock's:

Screen Shot 2015-07-21 at 2.06.59 AM

I also studied how Pollock made his paintings into fields ("field" refers to a painting, surface, expanse, etc that has no distinction between figure and ground), like these:

Screen Shot 2015-07-21 at 2.07.24 AM

Screen Shot 2015-07-21 at 2.07.11 AM

... and tried to do the same in mine by avoiding having either clusters of paint or expanses of white, as in this "during" photo of my own:

Screen Shot 2015-07-21 at 2.14.14 AM

And finished:

Screen Shot 2015-07-22 at 12.46.54 PM

Then I hung it up by attaching a heavy duty wire into the wall with screw-in hooks from the hardware store:

Screen Shot 2015-07-22 at 12.47.16 PM

Later, I added a little black velvet trim to the edge to finish it. I would definitely recommend doing this before hanging up the curtain, but fabric glue got it to stick (would've been much easier if the sheet were lying horizontally instead of vertically!):

Screen Shot 2015-07-22 at 12.47.07 PM

Now I need a chic little tieback and I'll be set! Stay tuned for a DIY on that to come :)

Screen Shot 2015-07-15 at 9.06.51 AM


Screen Shot 2015-07-22 at 1.08.50 PM

Screen Shot 2015-07-22 at 12.47.25 PM


Bedding Facelift

I love my white bedding (as I mentioned in this post), but it's a little dingy. Okay, it's more cream than white now. Understandably so--I've had it for maybe ten years, including all of college?! Yikes. My college room:

Screen Shot 2015-07-15 at 12.22.16 AM


New city, same cover:

Screen Shot 2015-07-15 at 9.10.13 AM

It's worn-in in that wonderful way that only constant use and many washes can produce, and for that reason I've been putting off replacing it... but I think the time has come for a fresh cover.

Screen Shot 2015-07-15 at 9.03.41 AM

Screen Shot 2015-07-15 at 9.06.51 AM

I'd like to keep the bed white for a multitude of reasons: calming, crisp & clean looking, blank canvas for patterns elsewhere. I love the pattern in the coverlet here:

Isn't this setting just to die for?! I'm imagining  a duvet cover in the pattern of those front throw pillows. And the wavy white shams... adore.

Amazing pom-poms:

Quite similar to this cover from Urban Outfitters:

So calming.

I really love the pattern in my coverlet now and have had the hardest time finding something similar.

Screen Shot 2015-07-15 at 9.07.50 AM

It's neither too geometric nor too floral, but still feminine. This cover that I have now is a matelasse, meaning that it looks like it's quilted or padded but actually isn't, and it's nice and lightweight... but I could switch to a duvet, too.

I've been mulling over a few options, like this one on eBay (free shipping and 60-day returns?! I can handle that):

Screen Shot 2015-07-15 at 12.28.03 AM

Simplicity from Anthropologie:

Screen Shot 2015-07-15 at 12.31.18 AM

Another very simple spread (and close up) from Anthro:

Screen Shot 2015-07-15 at 12.33.19 AM

Screen Shot 2015-07-15 at 12.34.09 AM

Do you have any sources for bedding?? Let me hear them in the comments below!

Lantern Upgrade

I must have lighting on my mind, this time in my entry. While I love the action on the walls, all that busy-ness can't distract me from the rather dreadful light fixture situation going on up on the ceiling. FullSizeRender-19


FullSizeRender-18


I have this *lovely* habit of buying things--for a steal of a price, bien sûr--that I don't need now but will *surely* need in the future. Such was the case when I bought this gem at the local thrift for $10.

FullSizeRender-17


It sat in my parents' garage for a solid four years, but I didn't forget... and I think it might just be the perfect improvement for my little entry. I know it's seen better days, but some paint and Windex (and new glass and new chain...) will do wonders, I'm convinced. (Let it be recorded that the embarrassingly vast majority of items bought as "I don't need this now but I'm sure I might maybe possibly need it sometime in the indefinite and unruly future" have yet to be transformed. Maybe I'm turning a new leaf?!)

But what color to paint? Of course, there's ample inspiration to be found on Pinterest. Here's an example in a metallic:

Hello, red:

I'm a fan of how this lantern is a bit invisible, blending into the ceiling:

Can't go wrong with black (and a two-toned Dutch door never hurts, either):

Loving this updated take on a black lantern shape:

And another great shape in black (with another fantastic Dutch door):

Stay tuned for the upgrade process! Until then, I'll be reading up on how to become an electrician...