DIY: Extension Cords
Hello and happy weekend! A few weeks ago I was in a new store in Brooklyn Heights called Collyer's Mansion (named after the compulsive hoarding Collyer brothers), where I saw these fantastic and oh-so-functional extension cords:
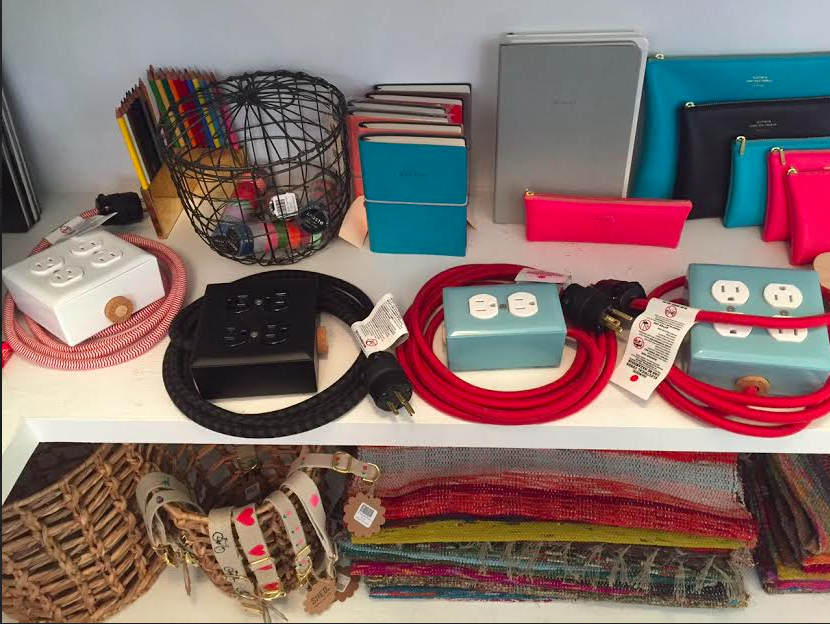
So much better looking than any other extension cord I've ever seen! The cord itself is wrapped with string/thread which makes it less prone to tangles. I just love when everyday, necessary pieces are made beautiful.

I immediately thought of the unsightly cords running through my apartment and had one of those "I could make that" moments. So I did, and here's how.
You'll need:
- extension cord
- string
- scissors
- binder clip
- tape (I used gray washi tape, but regular Scotch would do)
- patience :)
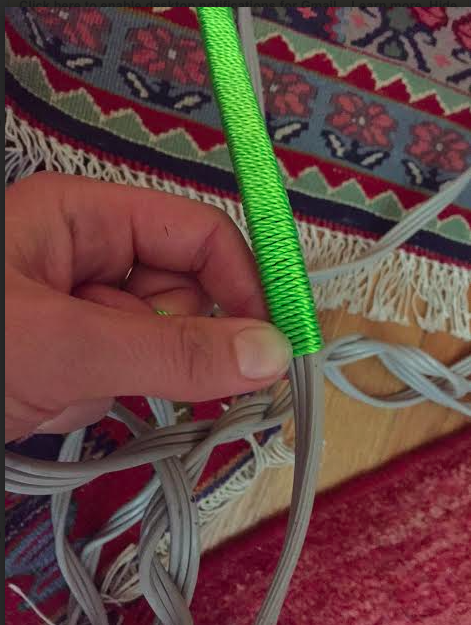
I had this neon string leftover from Christmas decorations that I had picked up at my local hardware store, and what could be better than a jolt of neon green for a little pick-me-up on such a pedestrian object?! Below are options in neon-y colors, but most any string would work for this project, like crochet yarn or standard package string. Good to keep in mind that thicker string wraps more quickly than thin--but I would advise against going too thick because it gets bulky.

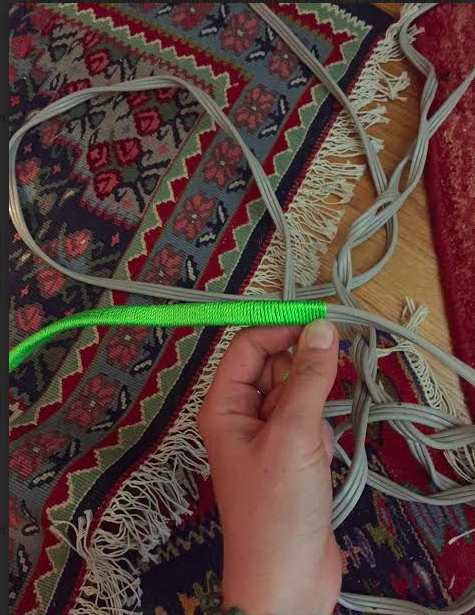
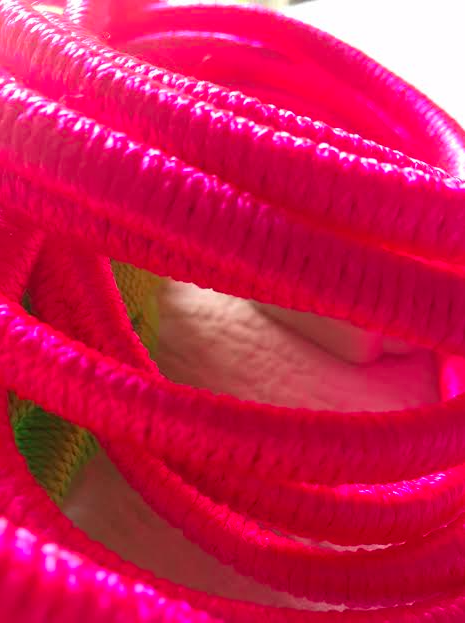
I began by laying about an inch of string flush on the cord, cut end towards the expanse of cord to be wrapped, and started wrapping from the end with the plugs (I don't have pictures of this step--oops--but see below where I overlap with pink string. It's the same process!). I made sure to keep the wrapping tight and close together.
The hardest part was keeping the string from knotting on itself, but patience is key! I found that wrapping the cord once then pulling the ball of string through and around, and repeating over and over like that, worked the best to avoid tangles (and hair pulling frustration).
It took a few hours, but it was strangely soothing--and addicting--to see how far along I could get. I found myself picking it up for a few minutes here and there, like how one might with knitting or other handiwork. When I wanted to take a break, I secured the string in place with a little binder clip to prevent unraveling until I picked it up again.

At the end, I ran out of green and decided to switch it up with hot pink to finish it off. First I cleanly cut the green string and taped it to the extension cord using matching gray washi tape that I happened to have on hand:
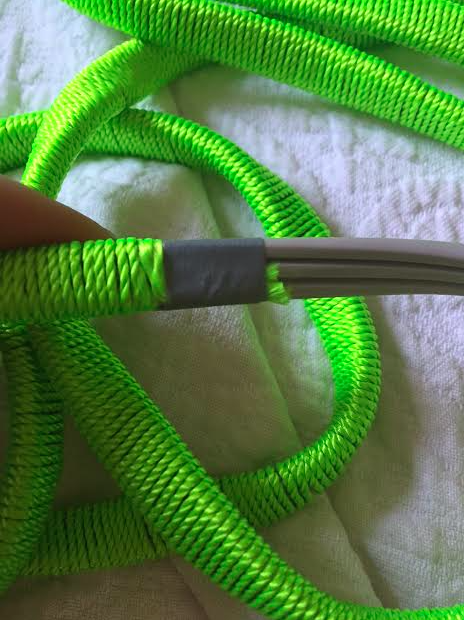
Then I laid the new color on top and taped around it. I made sure that the tape was smooth to have a seamless transition and to keep it from being too bumpy.
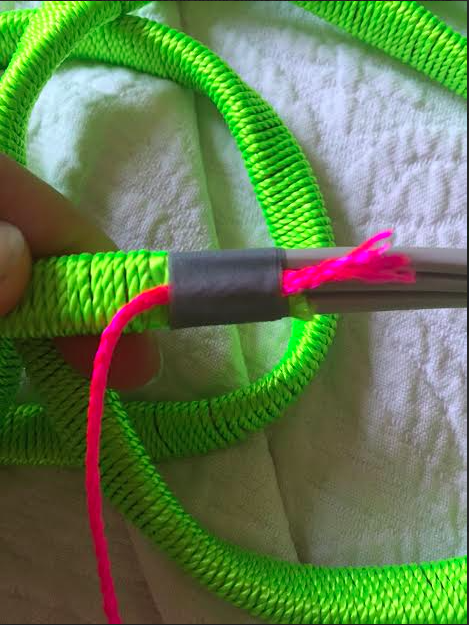
Then I kept on wrapping! (Like I mentioned, this is the same process as starting in the beginning.)
When I got to the end, I taped the pink off, like I had with the green earlier, and wrapped over it again. I didn't cut it until the end, when I knotted it multiple times to keep it from coming undone. You can see where the end is doubled over:


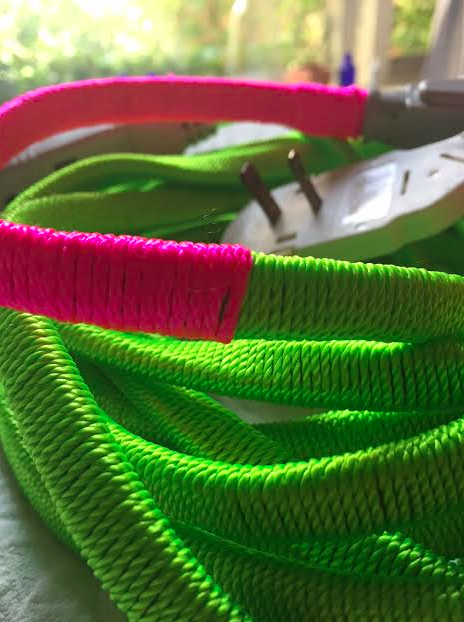
By ending at the plug-in part (my extension cord vocabulary is lacking...), the tie-off isn't as noticeable because it's hidden when it's plugged into the wall.
Ta-da!
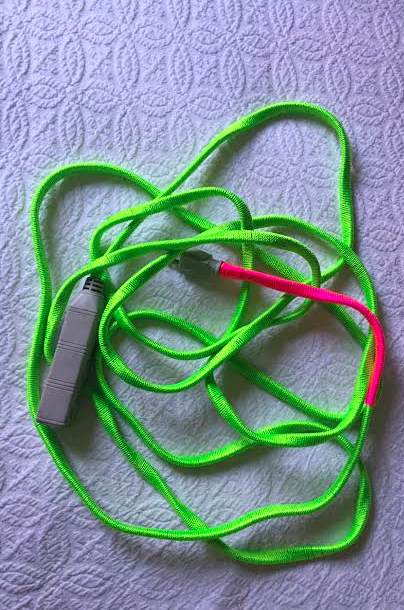

And since I had all that string left, I decided to do another cord!
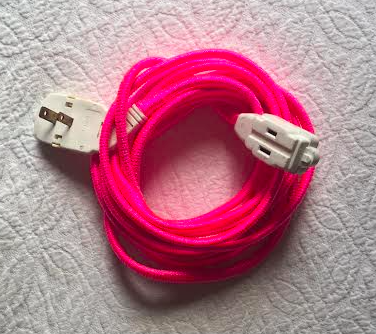
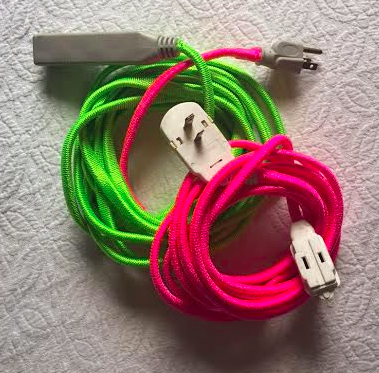
Nothing groundbreaking, but I love the little details. And I think a little neon here and there is fun in any space. I find that neon can be thrown in with most any color scheme just because it's so crazy. And much better than the utilitarian extension cords from before, don't you agree?


Have you tried this DIY? Would you like to see another DIY on The Spoonful? Let me know in the comments below!