DIY: Tiny Shelf Makeover

One of my favorite things to do when redecorating a room is to see what existing furniture I have that can be reworked for a fresh look (like I did with my atlas-covered desk). During my last year of college I needed a small bedside table to hold a few necessities--namely, my ever-growing pile of books and a lamp with which to read them. I already had this little dresser with drawers that my grandfather had made years and years ago, which had been painted and repainted umpteen times. I had changed out his original knobs for these funky ones another time, but the drawers just weren't going to work for my books. Screen Shot 2015-08-15 at 6.11.52 PM

I liked the navy, so didn't bother painting it yet again. Instead, I took the drawers out and, taking care to keep the face of the piece navy (but apparently not careful enough--don't look too closely! A little painter's tape might have been helpful here...), spray painted the inside silver. I wanted something a little glitzy inside, but not too overboard. For the record, I don't always love to paint old furniture, especially pieces with sentimental value, but because this already had about five layers of paint on it, I didn't feel too badly.

Screen Shot 2015-08-15 at 6.12.24 PM

With a little (okay, a lot; okay, he did it all) help from my dad, boards were cut to easily slide into the dresser as shelves instead of the drawers. I covered them in some wrapping paper I had laying around and reinforced the edges with clear packing tape--a great little trick to keep the edges from getting banged up, which you can't see unless getting very up close and personal! You can see where I was running out of paper and turned the stripes the opposite direction on the last shelf. Gives a little personality :)

Screen Shot 2015-08-15 at 6.13.18 PM

Then I filled it with books! And a clementine crate, which fit perfectly, to hold odds and ends.

Screen Shot 2015-08-15 at 6.10.44 PM

And that was that! I loved this makeover because I only used things I already had (read: free!), and it was so quick to do--and so functional! Here it is in situ in my old Charlottesville room:

Screen Shot 2015-08-15 at 6.26.32 PM

What about you? Do you have any successful furniture makeovers? Contact me here or let me know in the comments below--I'd love to share them on the blog!

Personal Shopper: 15 Area Rugs for $300 or Less

After the post on my studio's rugs, I received several very sweet notes wondering where to find rugs on a budget. This is a tough one because, on one hand, carpets can easily get destroyed, which makes investing in them a hard bite to swallow. On the other hand, a beautiful, well-made rug is a purchase that can travel from apartment to apartment for years--that's how I look at mine, anyway. Regardless, here's a round up of some of my favorites that don't break the bank! Color blocked rug (4'6 x 6'6 is about $268) by Ferm Living featured in this great post by Remodelista. Also comes in a smaller size.

Screen Shot 2015-08-04 at 12.15.11 AM

Black and white, comes in two sizes (2'6 x 4'6 is about $126). Check out more, similar options from Ferm Living here.

Screen Shot 2015-08-04 at 12.19.48 AM

Great graphics (and dark background hides dirt!)... also comes in inverse colors and other sizes. Urban Outfitters; 8' x 10' is $199.

Screen Shot 2015-08-04 at 12.24.18 AM

Urban is #winning. Also comes in other color ways and sizes; 4' x 6' for $59.

Screen Shot 2015-08-04 at 12.27.14 AM

More color blocking from Urban Outfitters; 5' x 7' is $99.

Screen Shot 2015-08-04 at 12.30.30 AM

This colorful tribal flat weave from Urban is $189 for the 3' x 5', and a bigger size is also available.

Screen Shot 2015-08-04 at 11.17.24 AM

A classic from IKEA; 5'7 x 8'10 for $199. (When shopping for IKEA rugs, I've found the better quality ones are their flat weaves, not low pile.)

Screen Shot 2015-08-04 at 12.33.40 AM

From Hawkins New York; 4' x 6' is $300 and is available in more, equally fantastic colors and sizes:

Screen Shot 2015-08-04 at 12.38.06 AM

Love this black and white from Bed, Bath, & Beyond. A 5' x 7' is $160; it also comes in other sizes.

Screen Shot 2015-08-04 at 12.45.23 AM

Colors from Land of Nod (yes, that's a children's store!); 4' x 6' is $129.

Screen Shot 2015-08-04 at 12.49.58 AM

Another Land of Nod find; 4' x 6' for $99 and other sizes are available.

Screen Shot 2015-08-04 at 12.55.20 AM

On sale now at West Elm! 5' x 8' is $150; other sizes available.

Screen Shot 2015-08-04 at 12.53.57 AM

More B&W from CB2, 5' x 8' for $249.

Screen Shot 2015-08-04 at 12.58.59 AM

Vibin', also from CB2 (also comes in black). 6' x 9' for $249; a runner is also available.

Screen Shot 2015-08-04 at 1.00.22 AM

Target for the win with this 5' x 7' for $120.

Screen Shot 2015-08-04 at 1.05.23 AM

Have you found any great rug options? Tell me here or in the comments below!

Artist Spotlight: Myla Seabrook

Regardless of the city or circle or stage of life, I've met so many fantastic artists, and I'm taking this chance to show them off through my Artist Spotlight series. Meet Myla Seabrook!

Screen Shot 2015-07-27 at 4.09.13 PM

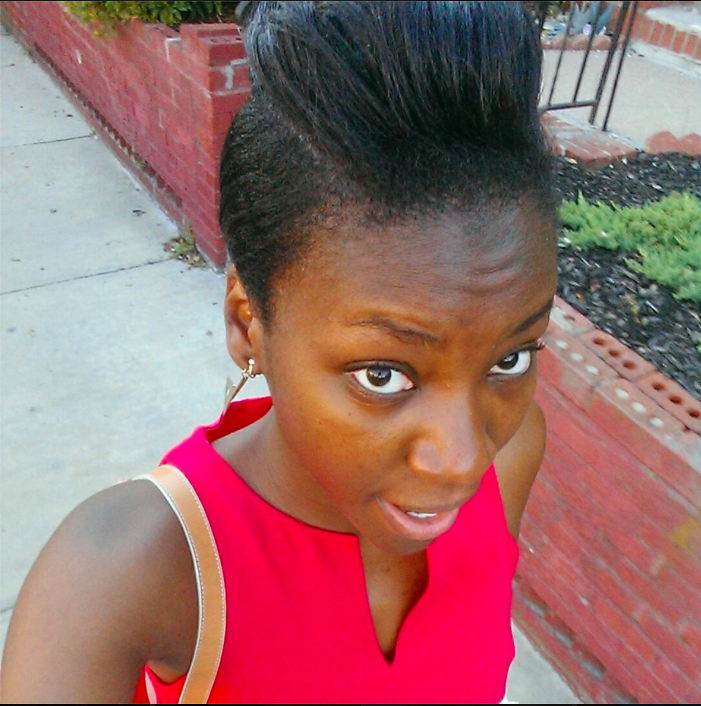
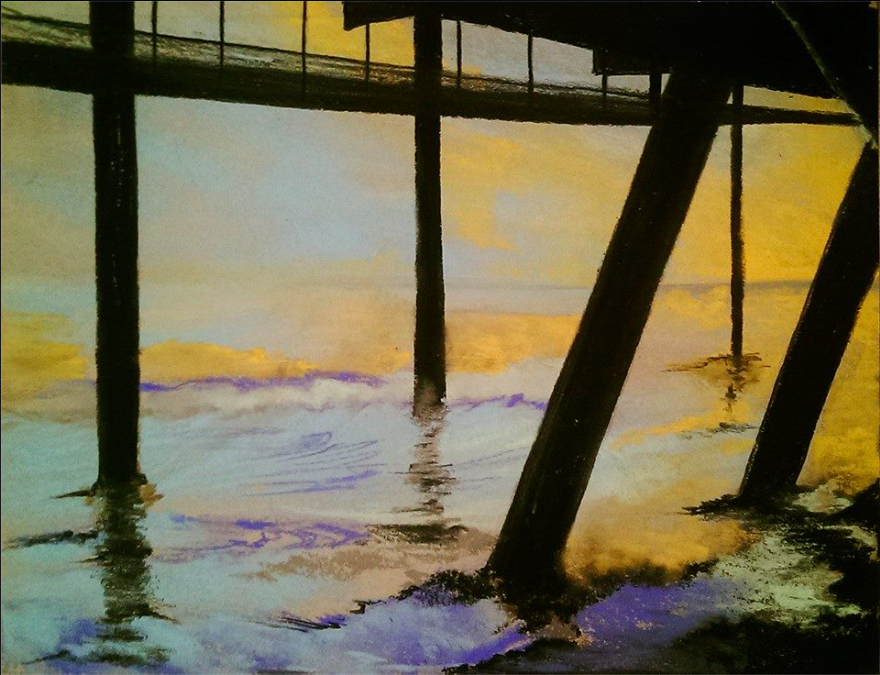
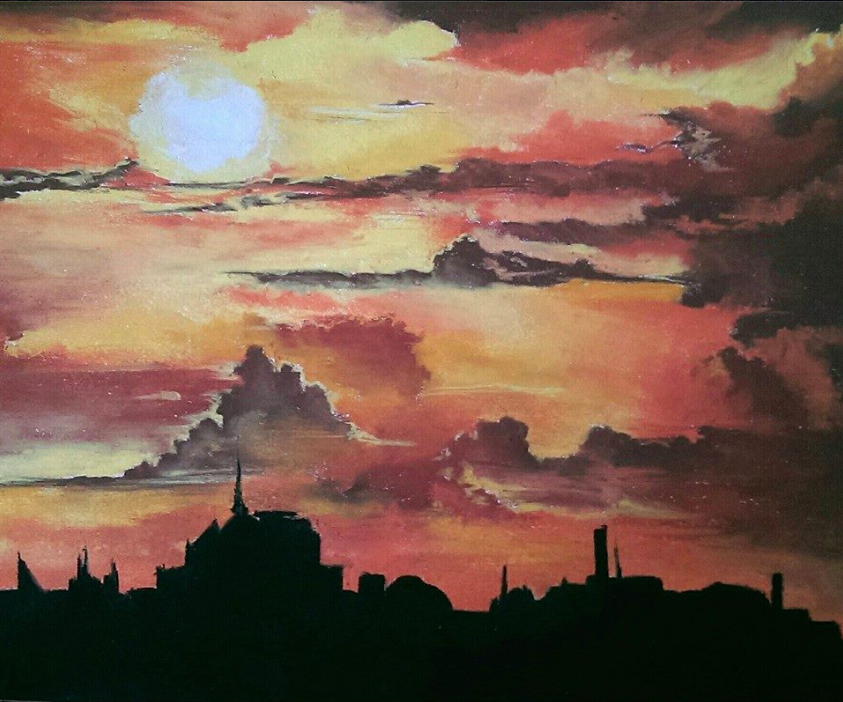
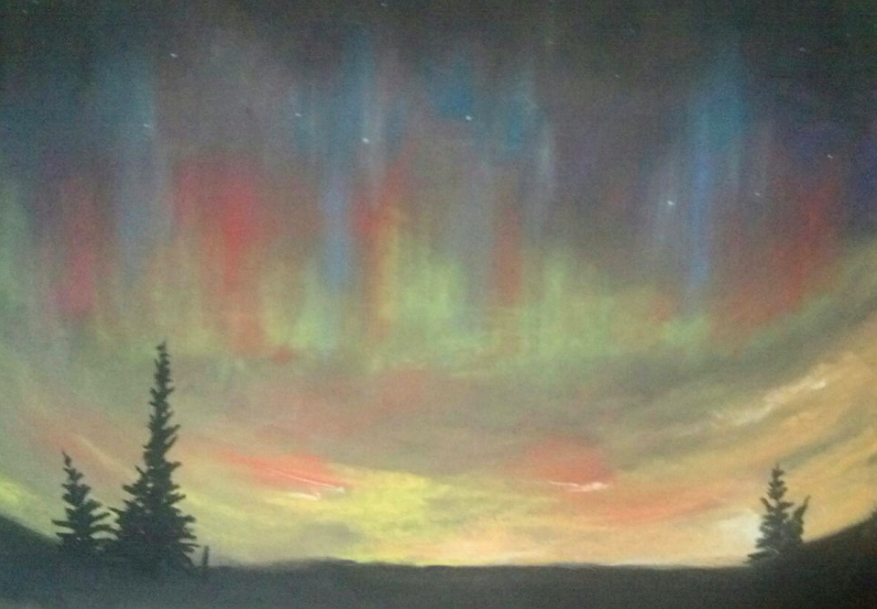
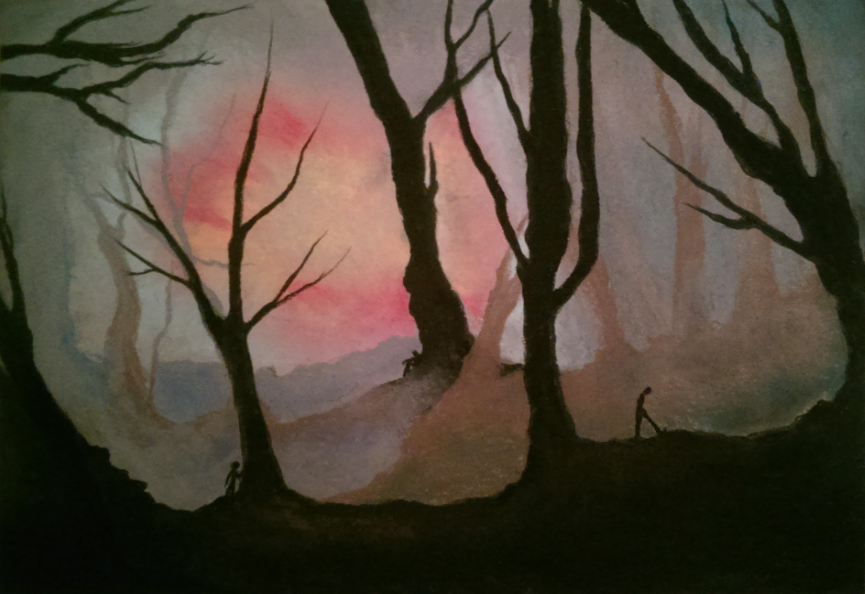
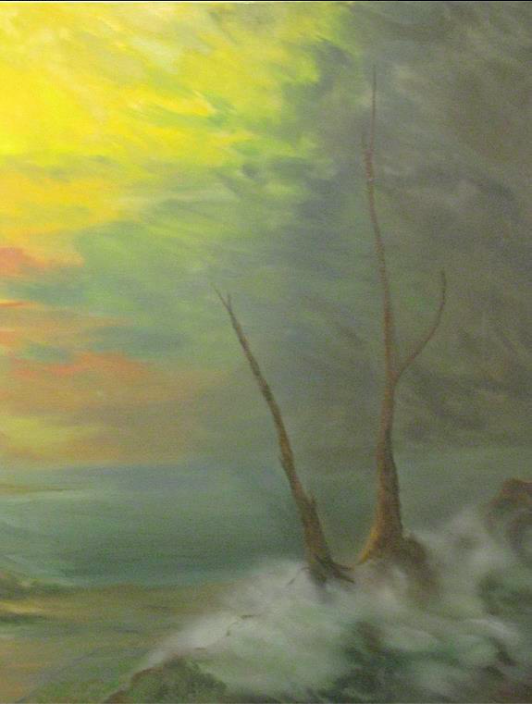
Myla and I worked together last summer, and I was immediately enthralled with her fearless use of color in the terrific landscapes she creates. She was recently featured by Cultation, and her work is really fantastic. She's better at telling her story for herself, so I'll let her!

Screen Shot 2015-07-27 at 4.10.22 PM

The Spoonful: Describe your style in five words. Myla: Colorful, loose, whimsical, nostalgic sometimes, happy

Screen Shot 2015-07-27 at 4.11.24 PM The Spoonful: What is your art background? Myla: I attended the High School of Art and Design and majored in Fashion Illustration there (random, I know, but I loved it), then went to Hofstra University and majored in Fine Art with a concentration in painting. Over the course of my studies I have created drawings, collages, paintings, sculptures, and various clothing designs. I also interned with the West Harlem Art Fund and completed a residency at Brooklyn Art Space.

Screen Shot 2015-07-27 at 4.12.07 PM

Screen Shot 2015-07-27 at 5.27.00 PM

Screen Shot 2015-07-27 at 4.09.56 PM

The Spoonful: Whose work do you most admire? Myla: Albert Bierstadt. He has a huge painting in the Brooklyn Museum (my favorite) that inspired me even when I was too small to be able to create something so large. He was a landscape painter that managed to capture the drama of skies and sweeping vistas perfectly with every painting, and he also worked in the super large sizes that I someday hope to have the space to produce.

Screen Shot 2015-07-27 at 4.43.44 PM

The Spoonful: Where do you find your inspiration? Myla: In nature. I spend a ridiculous amount of time staring at the sky or at trees, shadows on grass, the land around me when I'm up on a mountain or a bridge or in a plane, the colors of flowers. I love being awed by natural beauty, as I feel reminded of the majesty of the earth in moments like those. I am also inspired by books. I read a lot of science fiction and supernatural stuff, and I don't think anyone can create a fantasy world quite like science fiction writers can.

Screen Shot 2015-07-27 at 4.13.08 PM

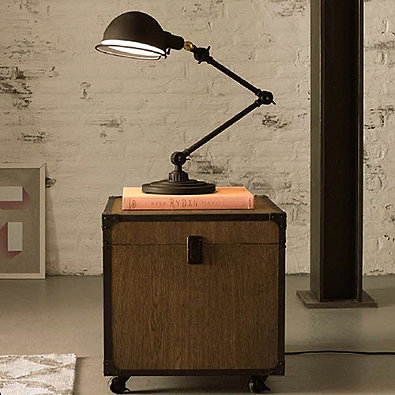
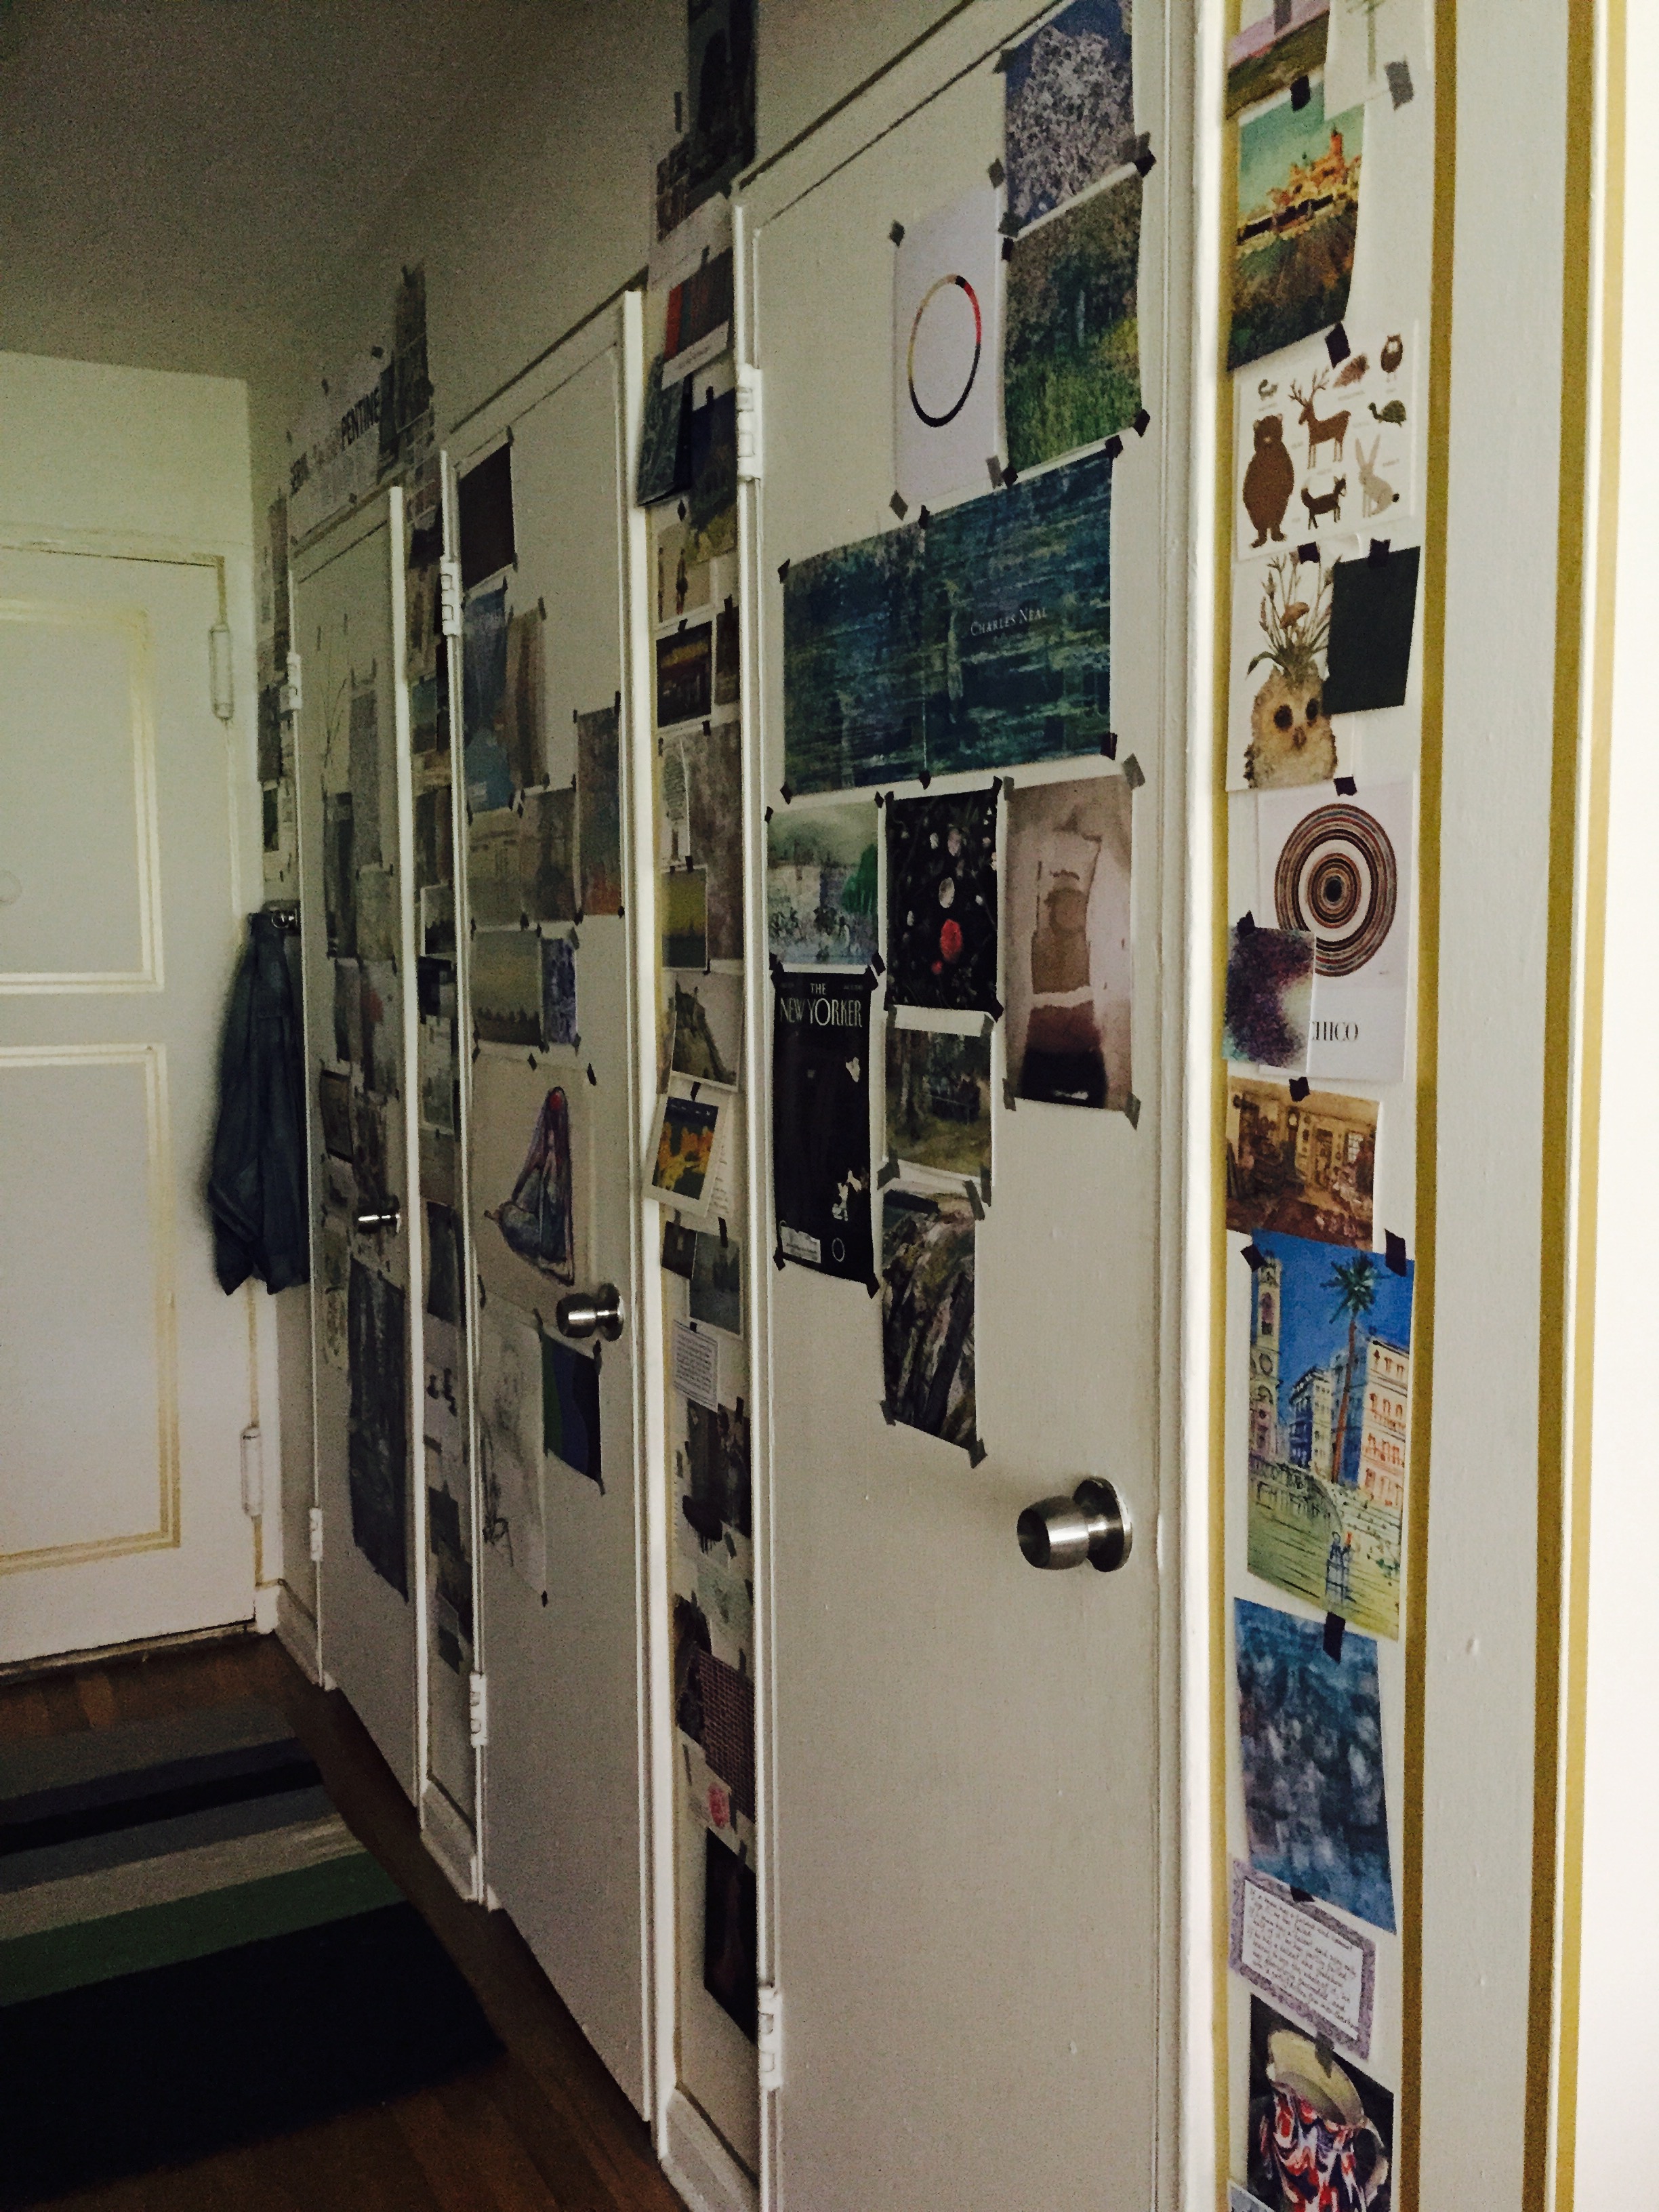
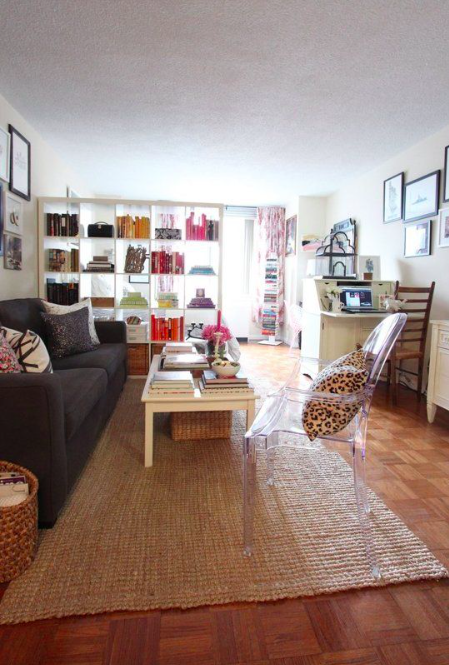
The Spoonful: Your ideal workspace consists of... Myla: A large table so I can space things out (I'm a messy person but I get kind of surgical about the layout of my workspace; brushes over here, paper towels over there, paints in the bin along the back...), an easel or two depending on whether or not I'm working on two paintings at a time, and a large wall to tack up some canvas and make a huge piece. Since we're talking ideal here, a ladder would be great too, because I have alllll that wonderful dream space. I also like a good wifi connection and a comfy chair. Sometimes I can spend twenty minutes scrolling through googled reference photos before I feel ready to put paint on the canvas.

Screen Shot 2015-07-27 at 5.26.18 PM

The Spoonful: Greatest piece of advice on being an artist (creating, surviving, anything) that you've received? That you can give? Myla: The road to success is winding. And you get there when the time is right. My mom is always coaching me on patience and trusting myself, and I think that, when you're self-employed, those things are incredibly important. Sometimes my path leads me places I didn't plan on being; lately, life has been about adapting to new situations and making the best out of them, assuming that staying focused on my goals/ willing to work and learn will get me to the things I want. So far, so good!

Screen Shot 2015-07-27 at 5.28.25 PM The Spoonful: Five things you can't live without? Myla: My cellphone (I hate admitting that but there it is), mostly for the Kindle reading, the texting, and the web browsing. I have all the social media accounts in the world but I'm too lazy to be super active on them. A sketchbook or journal Nail polish (if I can't paint a canvas, may as well paint my nails, am I right?) Books. Actual physical books. Sunlight. Not just for the vitamin D... I really, really love natural light.

Screen Shot 2015-07-27 at 5.31.55 PM

The Spoonful: Where can we find your work? Myla: No shows at the moment, but I'm always open to setting up a studio visit at Brooklyn Art Space for people who'd like to see what I'm currently working on. (Editor's note: Myla's art can be seen on her website and Facebook, too.)

Screen Shot 2015-07-27 at 5.32.08 PM

The Spoonful: What's coming up next for you? Myla: Currently, I'm working on achieving my goal of making larger paintings, mainly through mural commissions. I've also been working on some concept design for books and book covers, so that's hopefully something the public will see from me soon!

Screen Shot 2015-07-27 at 5.32.28 PM Screen Shot 2015-07-27 at 5.32.39 PM

Screen Shot 2015-07-27 at 5.34.49 PM

Thanks for sharing your story, Myla! Can't wait to see what's next :)

Do you know of an artist to be featured on The Spoonful's Artist Spotlight series? Let me hear it! Email me at lucyclarespooner@gmail.com. 

Unleash the Pollock Within

When I decided to move into a studio, I knew I would need to finagle a divider to define the spaces. It's nice both for myself and for guests to know the living space from the private or sleeping space, even though there's no wall between the two. entry left wall

Remodelista blogged about a few ideas here, and Buzzfeed has an article here. Here's some inspiration that I played with, too:

This room is just fantastic, packing a double punch with the dividers by using both curtains (attached on only part of the ceiling and not meant to be fully closed) as well as the screen/plant combo. Those herringbone floors... I could move right in.

Screen Shot 2015-07-21 at 1.34.34 AM

Another screen. Wouldn't that be a fun DIY??  Screen Shot 2015-07-21 at 1.37.47 AM

I love this screen because it doesn't obstruct the view or, more importantly, the light, but cues the separate parts of the room. (The rest of the image is a little froo-froo for my taste but how crazy is that wallpapered ceiling?!)

Screen Shot 2015-07-21 at 1.39.18 AM

Bookshelves are a fantastically functional use of space... especially airy ones like these that let light come through:

Screen Shot 2015-07-21 at 1.38.33 AM

Here's an example of very thin, narrow shelves that act as a divider:

Screen Shot 2015-07-21 at 1.38.57 AM

Great curtains (can you spy the Jielde lamp, like I talked about in this post??):

Screen Shot 2015-07-21 at 1.38.19 AM

Another curtain divider here:

Screen Shot 2015-07-21 at 1.37.29 AM

I considered all of the above ideas before settling on the curtain, which I like because it's lightweight, lets sunlight through, and doesn't distract too much  from the rest of the space. I didn't have the perfect spare curtain lying around, so I decided to make one myself. Keeping in mind something simple, light, neutral, but with a bit of glam, I thought a Pollock-inspired divider would be simple, quick, and  have just the effect I was after.

Screen Shot 2015-07-21 at 2.02.55 AM

I grabbed a clean, white, flat bedsheet from my mother's linen closet, some gold paint, and a paint brush. After laying the sheet out, I commenced to splattering. To figure out how best to splatter the paint, I studied a few photos of Pollock while working:

Screen Shot 2015-07-21 at 1.59.34 AM

Screen Shot 2015-07-21 at 2.01.36 AM

I liked how his pieces have both the drip drops of paint, as well as the longer lines that have been flopped down with the flick of a wrist.

Screen Shot 2015-07-21 at 2.06.15 AM

Because I wanted plenty of light to shine through, I leaned toward more background, less paint, like this of Pollock's:

Screen Shot 2015-07-21 at 2.06.59 AM

I also studied how Pollock made his paintings into fields ("field" refers to a painting, surface, expanse, etc that has no distinction between figure and ground), like these:

Screen Shot 2015-07-21 at 2.07.24 AM

Screen Shot 2015-07-21 at 2.07.11 AM

... and tried to do the same in mine by avoiding having either clusters of paint or expanses of white, as in this "during" photo of my own:

Screen Shot 2015-07-21 at 2.14.14 AM

And finished:

Screen Shot 2015-07-22 at 12.46.54 PM

Then I hung it up by attaching a heavy duty wire into the wall with screw-in hooks from the hardware store:

Screen Shot 2015-07-22 at 12.47.16 PM

Later, I added a little black velvet trim to the edge to finish it. I would definitely recommend doing this before hanging up the curtain, but fabric glue got it to stick (would've been much easier if the sheet were lying horizontally instead of vertically!):

Screen Shot 2015-07-22 at 12.47.07 PM

Now I need a chic little tieback and I'll be set! Stay tuned for a DIY on that to come :)

Screen Shot 2015-07-15 at 9.06.51 AM


Screen Shot 2015-07-22 at 1.08.50 PM

Screen Shot 2015-07-22 at 12.47.25 PM


Bedding Facelift

I love my white bedding (as I mentioned in this post), but it's a little dingy. Okay, it's more cream than white now. Understandably so--I've had it for maybe ten years, including all of college?! Yikes. My college room:

Screen Shot 2015-07-15 at 12.22.16 AM


New city, same cover:

Screen Shot 2015-07-15 at 9.10.13 AM

It's worn-in in that wonderful way that only constant use and many washes can produce, and for that reason I've been putting off replacing it... but I think the time has come for a fresh cover.

Screen Shot 2015-07-15 at 9.03.41 AM

Screen Shot 2015-07-15 at 9.06.51 AM

I'd like to keep the bed white for a multitude of reasons: calming, crisp & clean looking, blank canvas for patterns elsewhere. I love the pattern in the coverlet here:

Isn't this setting just to die for?! I'm imagining  a duvet cover in the pattern of those front throw pillows. And the wavy white shams... adore.

Amazing pom-poms:

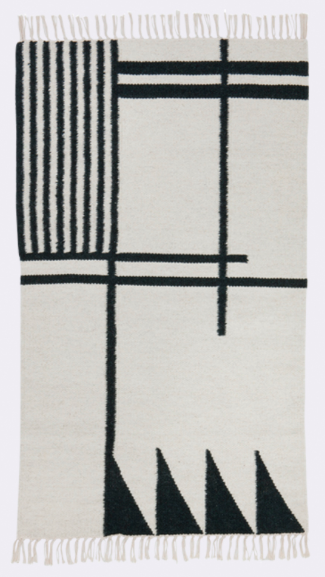
Quite similar to this cover from Urban Outfitters:

So calming.

I really love the pattern in my coverlet now and have had the hardest time finding something similar.

Screen Shot 2015-07-15 at 9.07.50 AM

It's neither too geometric nor too floral, but still feminine. This cover that I have now is a matelasse, meaning that it looks like it's quilted or padded but actually isn't, and it's nice and lightweight... but I could switch to a duvet, too.

I've been mulling over a few options, like this one on eBay (free shipping and 60-day returns?! I can handle that):

Screen Shot 2015-07-15 at 12.28.03 AM

Simplicity from Anthropologie:

Screen Shot 2015-07-15 at 12.31.18 AM

Another very simple spread (and close up) from Anthro:

Screen Shot 2015-07-15 at 12.33.19 AM

Screen Shot 2015-07-15 at 12.34.09 AM

Do you have any sources for bedding?? Let me hear them in the comments below!

DIY: Extension Cords

Hello and happy weekend! A few weeks ago I was in a new store in Brooklyn Heights called Collyer's Mansion (named after the compulsive hoarding Collyer brothers), where I saw these fantastic and oh-so-functional extension cords: Screen Shot 2015-07-10 at 6.04.51 PM

So much better looking than any other extension cord I've ever seen! The cord itself is wrapped with string/thread which makes it less prone to tangles. I just love when everyday, necessary pieces are made beautiful.

Screen Shot 2015-07-10 at 6.04.58 PM

I immediately thought of the unsightly cords running through my apartment and had one of those "I could make that" moments. So I did, and here's how.

You'll need:

  • extension cord
  • string
  • scissors
  • binder clip
  • tape (I used gray washi tape, but regular Scotch would do)
  • patience :)

I had this neon string leftover from Christmas decorations that I had picked up at my local hardware store, and what could be better than a jolt of neon green for a little pick-me-up on such a pedestrian object?! Below are options in neon-y colors, but most any string would work for this project, like crochet yarn or standard package string. Good to keep in mind that thicker string wraps more quickly than thin--but I would advise against going too thick because it gets bulky.

I began by laying about an inch of string flush on the cord, cut end towards the expanse of cord to be wrapped, and started wrapping from the end with the plugs (I don't have pictures of this step--oops--but see below where I overlap with pink string. It's the same process!). I made sure to keep the wrapping tight and close together.

Screen Shot 2015-07-10 at 6.05.12 PM

The hardest part was keeping the string from knotting on itself, but patience is key! I found that wrapping the cord once then pulling the ball of string through and around, and repeating over and over like that, worked the best to avoid tangles (and hair pulling frustration).

Screen Shot 2015-07-10 at 6.05.06 PM

It took a few hours, but it was strangely soothing--and addicting--to see how far along I could get. I found myself picking it up for a few minutes here and there, like how one might with knitting or other handiwork. When I wanted to take a break, I secured the string in place with a little binder clip to prevent unraveling until I picked it up again.

Screen Shot 2015-07-10 at 6.05.43 PM

At the end, I ran out of green and decided to switch it up with hot pink to finish it off. First I cleanly cut the green string and taped it to the extension cord using matching gray washi tape that I happened to have on hand:

Screen Shot 2015-07-10 at 6.05.49 PM

Then I laid the new color on top and taped around it. I made sure that the tape was smooth to have a seamless transition and to keep it from being too bumpy.


Screen Shot 2015-07-10 at 6.05.57 PM

Then I kept on wrapping! (Like I mentioned, this is the same process as starting in the beginning.)

Screen Shot 2015-07-10 at 6.07.30 PM

When I got to the end, I taped the pink off, like I had with the green earlier, and wrapped over it again. I didn't cut it until the end, when I knotted it multiple times to keep it from coming undone. You can see where the end is doubled over:

Screen Shot 2015-07-10 at 6.06.16 PM

Screen Shot 2015-07-10 at 6.06.03 PM

By ending at the plug-in part (my extension cord vocabulary is lacking...), the tie-off isn't as noticeable because it's hidden when it's plugged into the wall.

Ta-da!

Screen Shot 2015-07-10 at 6.05.28 PM

Screen Shot 2015-07-10 at 5.19.36 PM

And since I had all that string left, I decided to do another cord!

Screen Shot 2015-07-10 at 5.19.26 PM


Screen Shot 2015-07-10 at 6.07.19 PM


Screen Shot 2015-07-10 at 5.19.51 PM

Nothing groundbreaking, but I love the little details. And I think a little neon here and there is fun in any space. I find that neon can be thrown in with most any color scheme just because it's so crazy. And much better than the utilitarian extension cords from before, don't you agree?

Screen Shot 2015-07-10 at 5.32.01 PM

Screen Shot 2015-07-10 at 6.07.24 PM

Screen Shot 2015-07-10 at 6.07.08 PM


Have you tried this DIY? Would you like to see another DIY on The Spoonful? Let me know in the comments below!

Lantern Upgrade

I must have lighting on my mind, this time in my entry. While I love the action on the walls, all that busy-ness can't distract me from the rather dreadful light fixture situation going on up on the ceiling. FullSizeRender-19


FullSizeRender-18


I have this *lovely* habit of buying things--for a steal of a price, bien sûr--that I don't need now but will *surely* need in the future. Such was the case when I bought this gem at the local thrift for $10.

FullSizeRender-17


It sat in my parents' garage for a solid four years, but I didn't forget... and I think it might just be the perfect improvement for my little entry. I know it's seen better days, but some paint and Windex (and new glass and new chain...) will do wonders, I'm convinced. (Let it be recorded that the embarrassingly vast majority of items bought as "I don't need this now but I'm sure I might maybe possibly need it sometime in the indefinite and unruly future" have yet to be transformed. Maybe I'm turning a new leaf?!)

But what color to paint? Of course, there's ample inspiration to be found on Pinterest. Here's an example in a metallic:

Hello, red:

I'm a fan of how this lantern is a bit invisible, blending into the ceiling:

Can't go wrong with black (and a two-toned Dutch door never hurts, either):

Loving this updated take on a black lantern shape:

And another great shape in black (with another fantastic Dutch door):

Stay tuned for the upgrade process! Until then, I'll be reading up on how to become an electrician...

Light at work

A few weeks ago I wrote about my atlas desk  and mentioned how I'd like to find a proper desk lamp for it. I love the vintage glass one on there now, but I have my sights set on a bona fide architect's light. It's a workspace, and I want it to look like one! The French-made Jielde lamp (sold locally in NYC at McNally Jackson in selected colors/styles) is a classic, and one of my all-time favorites. It was produced in the 1950s by Jean-Louis Domecq when he wanted a sturdier working light that could twist and turn without also twisting and turning its wires. Later, domestic styles and more colors (so many colors!) were added to its repertoire. The rest is history--and it has certainly withheld the test of time!

I mean, really, how gorgeous is this olive green??

After Jielde and I met, I realized the lamps were featured in many of my favorite inspiration images (and not just in workspaces):

The Hunted Interior. Books on the wall, leather arm chairs

Desk, Eames yellow armchair, jielde signal desk lamp

green plant in black and white interior / via decor dots

desk lamp post 2

desk lamp 3

They're everywhere! Love the floor lamps too... but focusing on desk for now. Unless of course I did a floor lamp as a desk lamp like this:


There are also several economically happy alternatives, like the Atelier line from Restoration Hardware, which comes in other finishes as well:

Atelier Scissor Task Table Lamp - Polished Nickel

... and these from PB Teen:

... and this one by Kenneth Cole for Bed, Bath, & Beyond (also comes in a brass finish):

desk lamps post

There are also some listed on Craigslist (for those of you in the NYC area) in gold:

And these vintage ones:

And of course a quick eBay search might prove fruitful, too.

The alternatives are great options... I will say, though, I saw a genuine Jielde with my own two eyes (in McNally Jackson), and the imitations don't do it justice! The colors and finish are exquisite, and it's just so sturdy--a true classic. I think I'll continue to save my pennies and watch eBay like a hawk :)


Page One

Hello! I've finally bitten the blogging bullet after many years of procrastination. "Spoon" is my nickname, and a "spoonful" is what I'll provide: of design inspiration, of DIYs, and of my journey through life in New York City as an interior designer. I thought I'd make my entry into the blogosphere with another type of entry: to my apartment. They say a painting is never finished but merely abandoned--I'd say the same for my little studio. I moved to NYC one month shy of a year ago (!) and have really loved every second. One part I especially cherish about living alone is that the space is entirely my own and therefore mine to decorate as I please. My entry (which doubles as a hall and triples as a mudroom) was looking a little bare, so I turned it into an inspiration gallery of sorts and also outlined the door frames with subtle gold washi tape.

entry left wall

I had pinned (search "washi") bunches of washi tape inspiration images and felt like my own space could use a little glitzy uplift, so I headed to Paper Presentation (aka a small heaven of paper goods in Flatiron) and grabbed all of their gold washi tape (washi tape, if you're unfamiliar, is basically pretty masking tape, originally from Japan, that comes in every color and pattern imaginable). Then I stuck it up around the door frames! Simple. I wanted a bit of wall space between the frame and the tape to give more dimension, and I was careful to keep the spacing uniform throughout.

close up washi tape

For the inspiration gallery, I started by rifling through stacks of pamphlets and assorted papers that I had found too interesting to toss. The clippings are of images that called me to look twice: gallery pamphlets, postcards, drawings of my own, cards from my dear mother, and even an exceptionally beautiful aquarelle bird from my favorite 8-year-old, the very talented India.

entry right side from entrance

I started in the middle of the walls, at eye level, and worked up and down and all around from there, attaching the images with washi tape again. Using the washi tape lets me see how the pictures are stuck to the wall and gives a boho chic feel, I think--makes moving them around easier, too! Win-win. As I add on, I can even layer over top of the base layer of pictures. And now I have a reason to pick up all the fantastic postcards and flyers that vendors set out!

right side entry from inside room

What I love about this is the way the pictures come together as a sort of wallpaper and how the bits of washi tape attachments give the images the freedom to flutter in the wind... which has been happening a lot lately because spring has finally sprung in this city.

entry from inside room

Thanks for sharing my first post with me... and stay tuned for more Spoonfuls coming up!